
General Preferences
Updated on: March 09, 2026
PDF (download & print)

- Do You Work in an Office With Multiple Land F/X Users? Read This First!
- Accessing the Preferences Screen
- General Preferences: Overview
- Land F/X Version Information
- Install Info
- Editing Text Styles
- Editing Individual Layers
- Line Colors and Layers
- Schedules Upper Case
- Numeric Display
- Language Strings
- Update Options
- Print Preferences
- Saving Your Preferences in a Preference Set
- Other Preferences Categories
- Related Webinars
- Troubleshooting
Our Preferences settings allow you to configure our software quickly to work closer to the way you work. Although we recommend reviewing the Preferences early in the process of using our software, you can make changes to the Preferences at any time.
The General Preferences include settings for Text Styles used (such as for schedules, callouts, titles), as well as license information and several other options.
Changing a setting in the Preferences does not affect any existing projects. We engineered this preventive measure to keep users from altering the contents of current projects unintentionally. If you make a change in your Preferences and want to apply it to an existing drawing, you'll need to delete and purge any items that would be affected by the new Preferences settings. When you place these items back in the drawing, the new Preferences will be applied.
Do You Work in an Office With Multiple Land F/X Users? Read This First!
Preferences are saved in what's known as a Preference Set. If you work in an office where multiple people access your installation of our software using an office server or shared online folder, it's extremely important to realize that your office's Preference Sets are shared by everyone. That means if you make changes to an active Preference Set, you're making those changes for everyone who uses that Preference Set. Before delving into changing your Preferences, make sure you have a good understanding of what Preference Sets are and how they work.
If you're not sure whether you should be making changes to a Preference Set, ask your CAD manager.
Accessing the Preferences Screen

F/X Admin ribbon

Preferences flyout buttons on any of the other F/X ribbons
or type *FXPreferences in the Command line
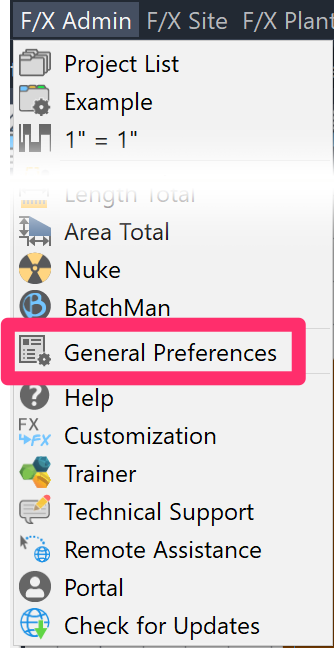
Any of the F/X pull-down menus
(F/X Admin, F/X Site, F/X Planting, F/X Irrigation, or F/X Details)
The Preferences screen will open. (See below.)
General Preferences: Overview

1. License Information: This area displays your Land F/X Support ID and your version of Land F/X. To update to the latest version, follow our update steps.
2. Work with your Land F/X licenses and look up your installation information.
- Use the Release License button to check in or release a Land F/X license.
- Click License to open the License Management screen to manage your Land F/X licenses.
- Click Install Info to view information about your Land F/X installation, including your server name, Local or Cloud Data status, and the location of your LandFX folder. More information
3. Layers: This list displays the Land F/X hard-coded layers, which you can choose to customize using the Edit button.
4. Select a layer and click Edit to change a layer's name, color, linetype, and lineweight. You can also set a layer as plot or non-plot.
5. Click Block Colors to change the Land F/X line colors to meet your office standards.
6. Text Styles: This area lists the Text Styles used by our software that can be edited for font type and size. Select a Text Style, and click Edit to open the Text Manager.
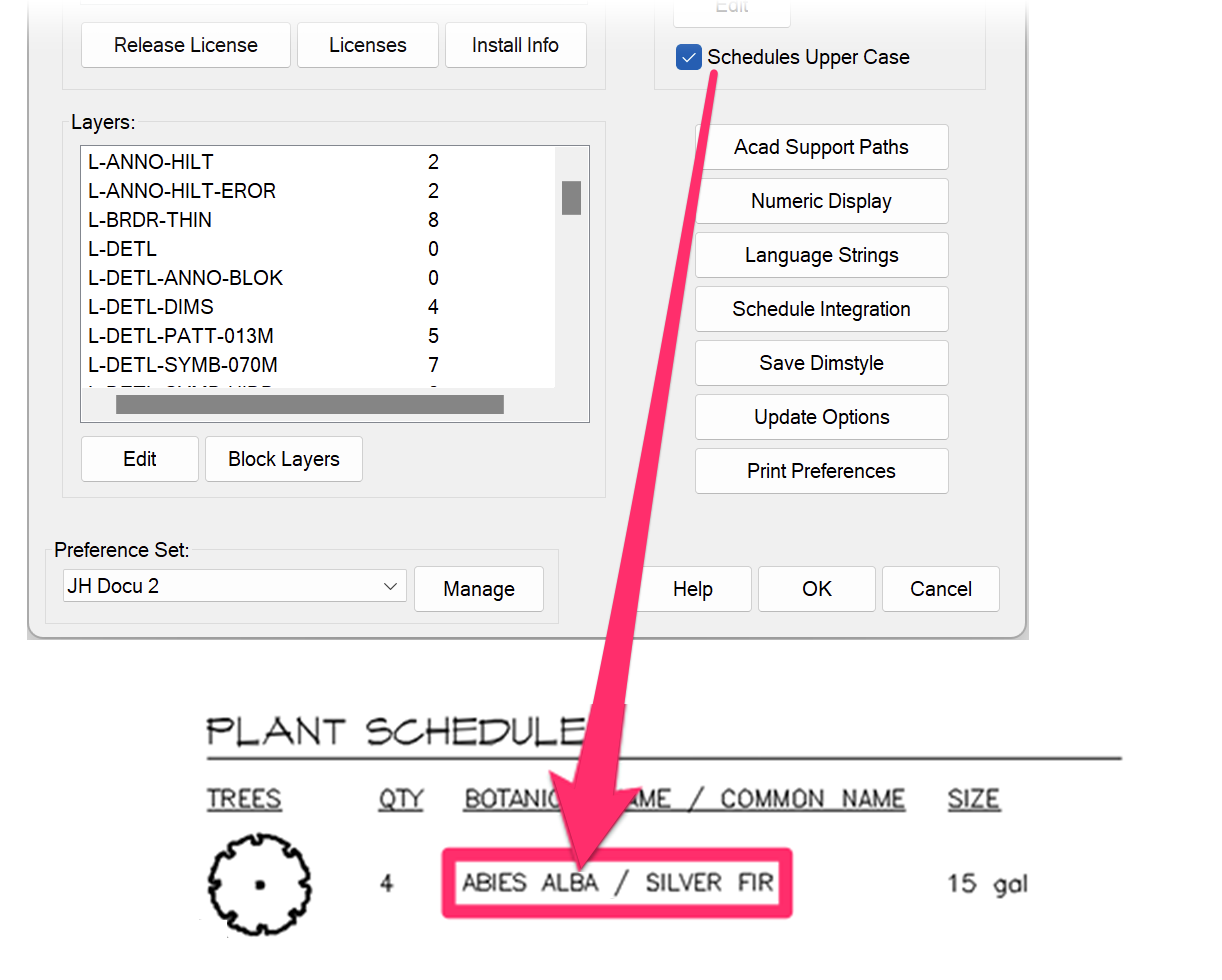
7. Schedules Upper Case: Check this option to put all schedules (Planting, Irrigation, Reference Notes, etc.) in all capital letters when placed in your drawing.
8. ACAD Support Paths: Jump to the Support File Search Paths to verify that they are set correctly for your installation.
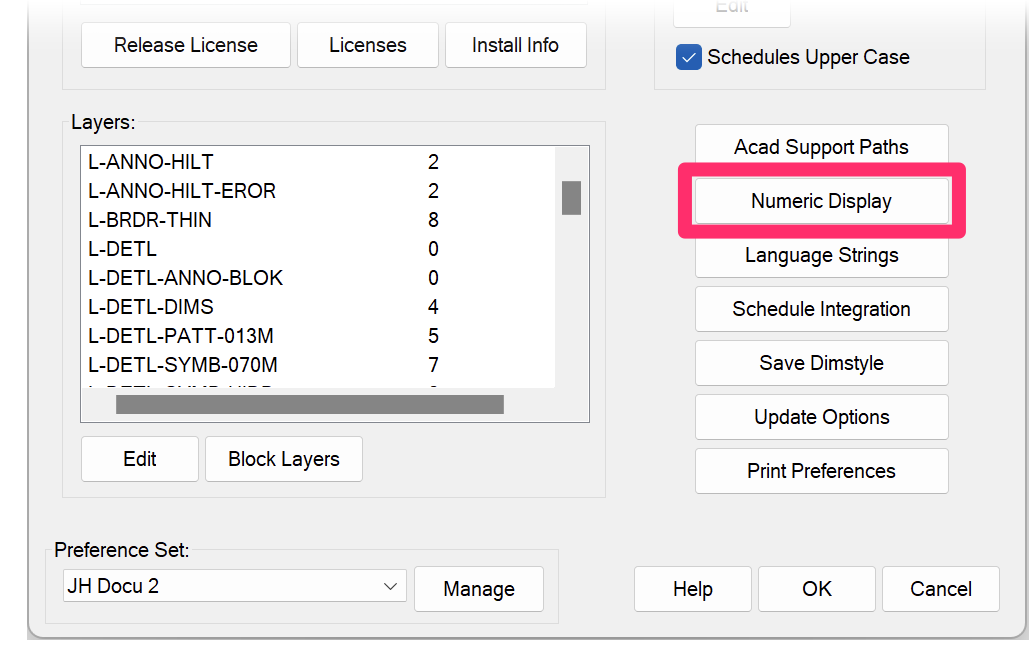
9. Numeric Display: Configure the display style of numbers, as well as currency symbols.
10. Language Strings: Add a secondary language to the titles of several possible items in the software.
11. Schedule Integration: Option to automatically send our RefNotes, Planting, and Irrigation Schedules directly to another service provider – for instance, your company’s estimating and invoicing system.
12. Save Dimstyle: Save a Dimension style (DimStyle) and apply it to the active Preference Set.
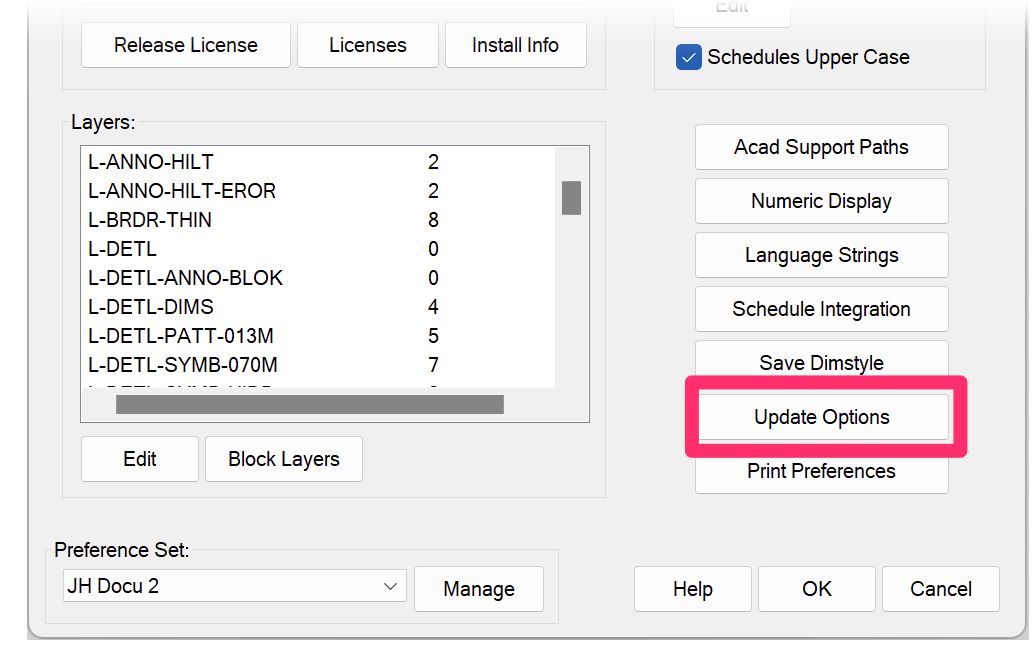
13. Update Options: Configure your settings for updating your installation.
14. Print Preferences: Open a dialog box where you can select from among several Preferences settings to print into additional layout tabs in your drawing. More information
15. Preference Set: Save a specific set of preferences to apply to a number of drawings. If desired, you can create and save several Preference Sets.
Land F/X Version Information
The General Preferences screen displays your current version of your Land F/X plugin for CAD (such as Planting F/X or Irrigation F/X).
Looking for your current version of one of our other plugins? See our documentation on:
- Planting F/X Plugin for Revit® version information
- Planting F/X Plugin for SketchUp version information
- Planting F/X Plugin for Rhino version information
Install Info
Click Install Info to see key details about your Land F/X installation.

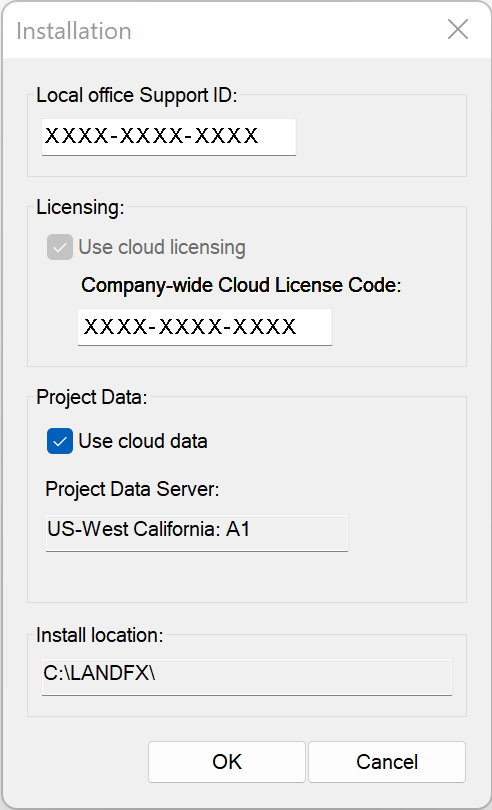
The Installation dialog box displays the following crucial information about your Land F/X installation:
- Local office Support ID: You'll need to enter this 12-digit code when carrying out specific processes such as installing Land F/X.
- Licensing: This section displays whether or not your office is using Cloud Licensing.
- Use cloud data: If this option is selected, your office is using Cloud Data. If not, your office is using Local Data. More information:
- Learn about our Cloud Data option (recommended for most offices).
- Learn more about our Local Data option (recommended for offices with slow or unreliable Internet, users in a remote location without a good Internet option, and those who choose not to renew their Land F/X subscription).
- Are you using Cloud or Local Data?
- Project Data Server: Your Project Data Server houses your Land F/X database, which stores your project data (including your plant palettes and your site amenity and equipment inventories), Preference Sets, and other important items. More information
- Install location: The location of your LandFX folder, a crucial component of your installation. More information
The image above shows an example of what you might see in the Installation dialog box in an office that's using Cloud Licensing and Cloud Data.
Editing Text Styles
Quick video

The Text Styles listed in the General Preferences are included in your installation. The most common styles to review early on are the Schedule Text and Schedule Title styles, which control the text for Planting, Irrigation, and Reference Notes Schedules.
Our Text Styles apply default settings such as font and point size to specific types of text you place in your drawings. For detailed information, see our documentation on:
- Our Text Style System
- List of Default Text Styles
- Customizing the Default Text Styles
- Creating Your Own Text Styles
- Plant Schedule
- Irrigation Schedule
- Site Schedules, such as:
- Reference Notes Schedule
- Concept Schedule
- Zoning Schedule
- Site Development (Estimator) Schedule
- Site Amenities Schedule
- Lighting Schedule
- Grading Schedule
- Layers
- Block Layers
- Fonts
- Text Styles
- DimStyles
- Hatches
- Blocks
- Color Wheels you've customized using our Site Color tool
- Planting Preferences settings
- Irrigation Preferences settings (now including settings for valve callouts)
- RefNotes: Customize how your office organizes Reference Notes (RefNotes).
- Planting: Customize plant codes and plant labels.
- Plant Sizes: Customize the list of plant sizes, default plant size, the number and type of fields in the schedule, and the default cost for each plant in your project.
- Irrigation: Customize the valve callouts, pipe data, and irrigation schedules.
- Details: Customize the Detail Module size and callout
- Setting Your Land F/X Up for Success: etting Your Land F/X Up for Success means making the software work for you. We'll explore best practices for project templates, Preference Sets, detail folders, and other key tools for optimizing your workflow that will help make your design experience more efficient – and more fun. (1 hr 1 min)
- Implementing Your Office CAD Standards: Find out how easily you can adapt your own office standards to Land F/X – and how effectively the software will then apply them to your projects. (1 hr 2 min)
- Customize for Office Color Standards: This webinar covers the necessary tools and techniques for a black belt in the art of office standards – from CTB plotting files to valuable Land F/X tools that enable instant layer color conversions and office color setup. (1 hr 2 min)
- Customizing Land F/X: Learn how to work with specific blocks, layer names, sheet protocols, and other distinct elements that make up your firm’s practices and preferences. (1 hr 3 min)
- Planting F/X Setup for a Multi-Office Firm: Wondering how to acquaint your office with our planting tools? Michael Bain, CAD manager at Boffa Miskell Limited, walks through his introduction of Land F/X into the New Zealand firm with 7 offices and 70+ landscape architects. Michael shows how easy it was to get the firm's standards into the software, and provides real numbers showing the time savings they experienced right away. (1 hr)
- Setting up Templates and Preferences for Repeat Clients: To save time and increase your accuracy, learn how to deliver a consistent drawing package for your repeat clients by setting up project templates and Preference Sets. (50 min)
Reload (Update) All Text Styles
Our REAT (Reload All Text Styles) keyboard command updates all text in the current drawing to reflect your Text Style settings in the active Preference Set. Learn more about the REAT command.
We've also added a Text Styles option in our BatchMan batch file processing tool that updates all Text Styles in multiple drawing files to match your default Preference Set.
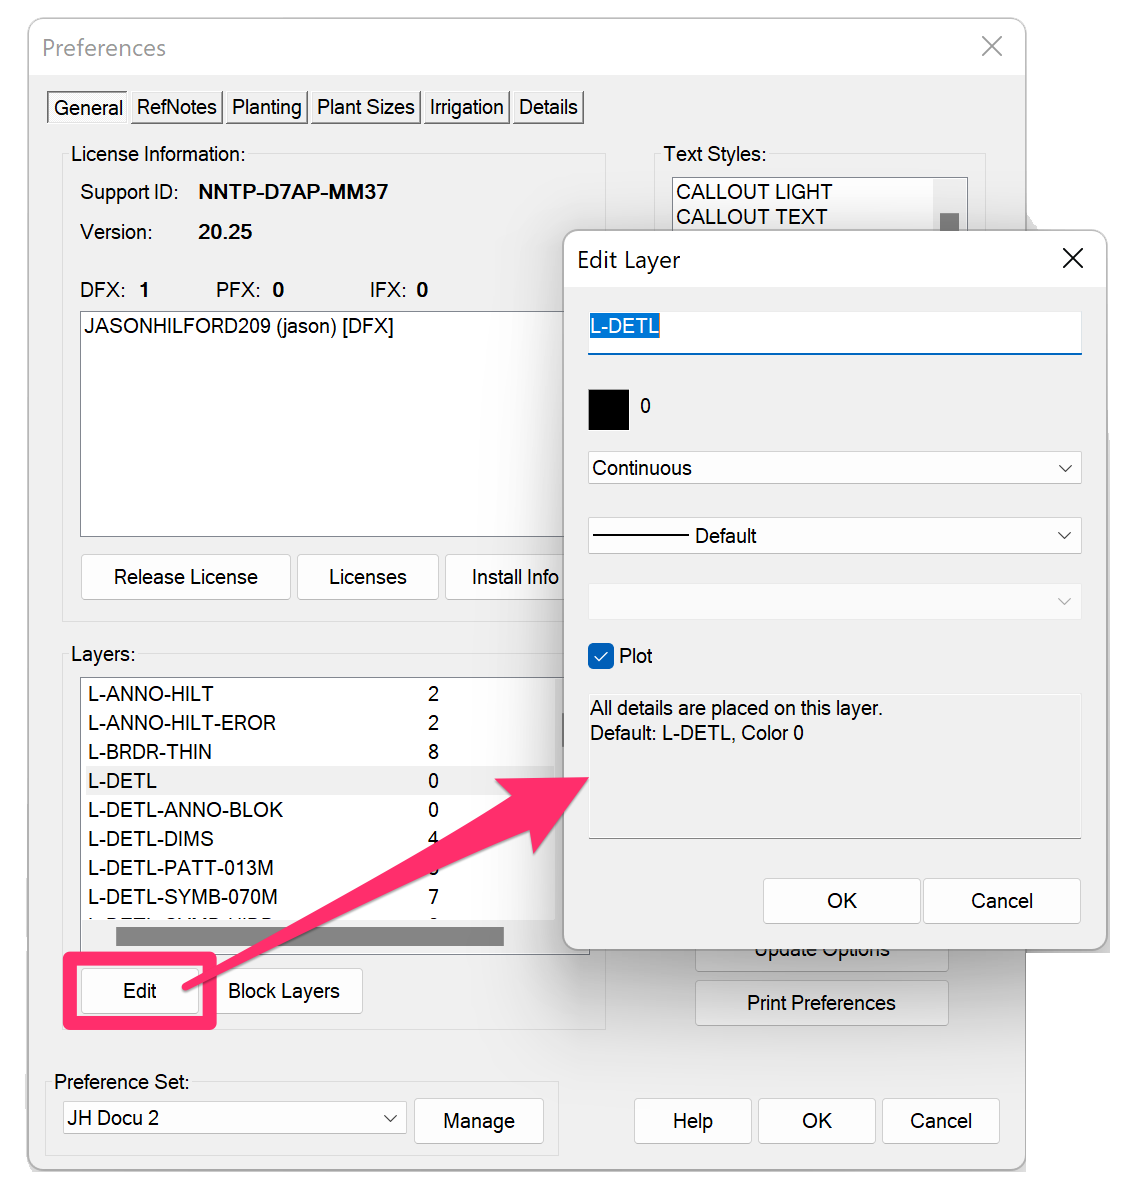
Editing Individual Layers
The General Preferences screen provides an option to edit individual layers to set a new name, color, linetype, and lineweight, as well as to set the layer to plot or non-plot. You'd use this feature if you had a particular thing (such as a label or pipe sleeve) that you wanted to appear thicker or thinner than we've set it to be, or to have a different default linetype from the one we've chosen.
To edit a layer, select that layer in the Layers area, then click Edit to open the Edit Layer dialog box.
For specific instructions on editing individual layers, see our Edit Layer Information documentation.
You can now assign a Truecolor to a layer.
Line Colors and Layers
Do our default line colors or other layer settings conflict with your office standard? If so, we offer an easy way to change your layer settings suit your preference. See our documentation on editing layer information.
You can also explore our documentation on:
Schedules Upper Case
The Schedules Upper Case checkbox controls whether or not the text in your schedules appears in all capital letters.
Check this option to place your schedules in all caps:
Uncheck this option to include lowercase letters in your schedules:
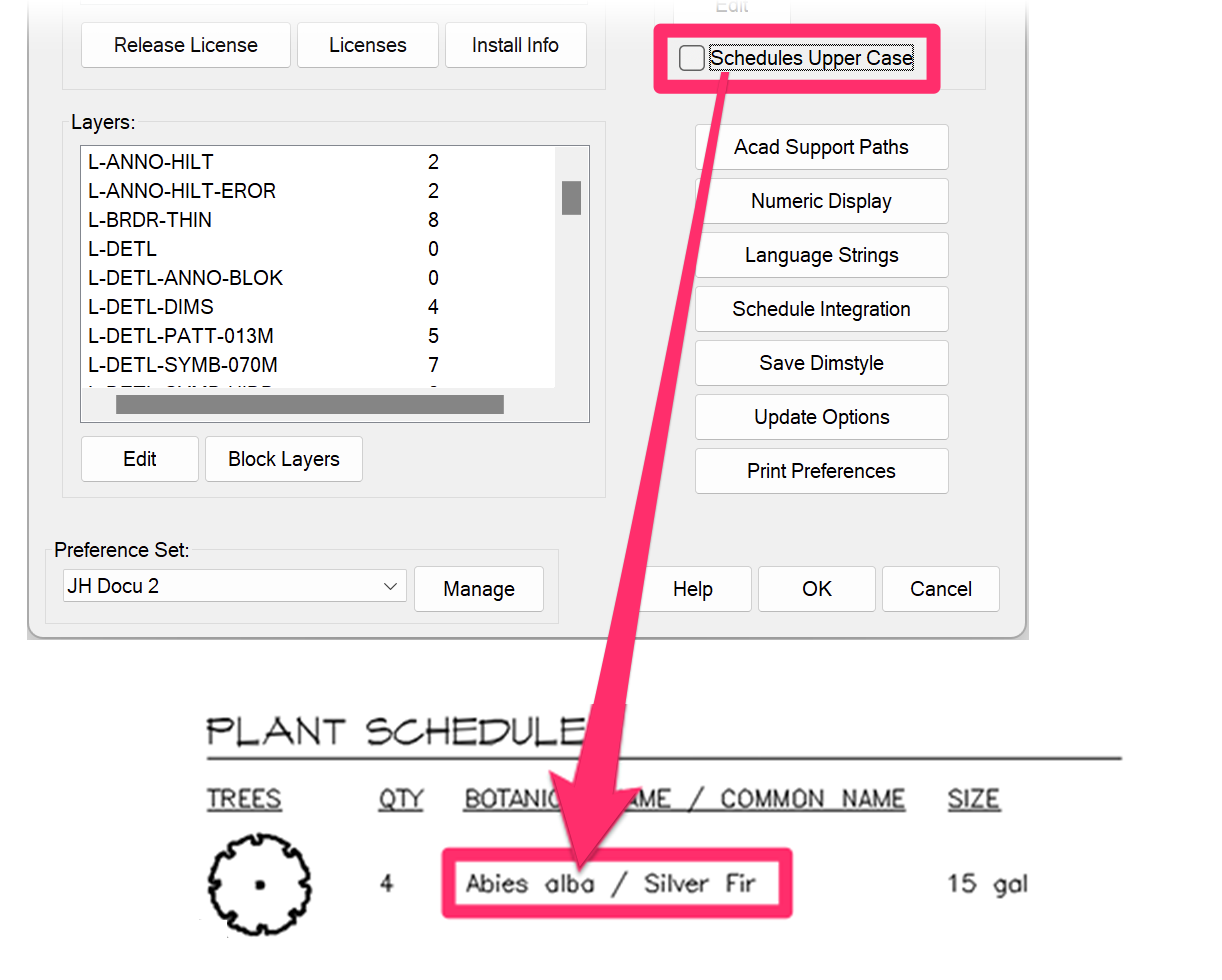
The Schedules Upper Case option will affect all schedules you place using our software, including:
Numeric Display
Use the Numeric Display settings to configure the style of numbers as they appear in your drawings.

1. Numeric Display: Select whether numbers in the millions will include commas.
2. Currency Symbol: Select a currency symbol for all costs reflected in your drawings (dollars, euros, etc.)
Language Strings
Click Language Strings to add a value in a secondary language to a number of possible titles and headings in the software.

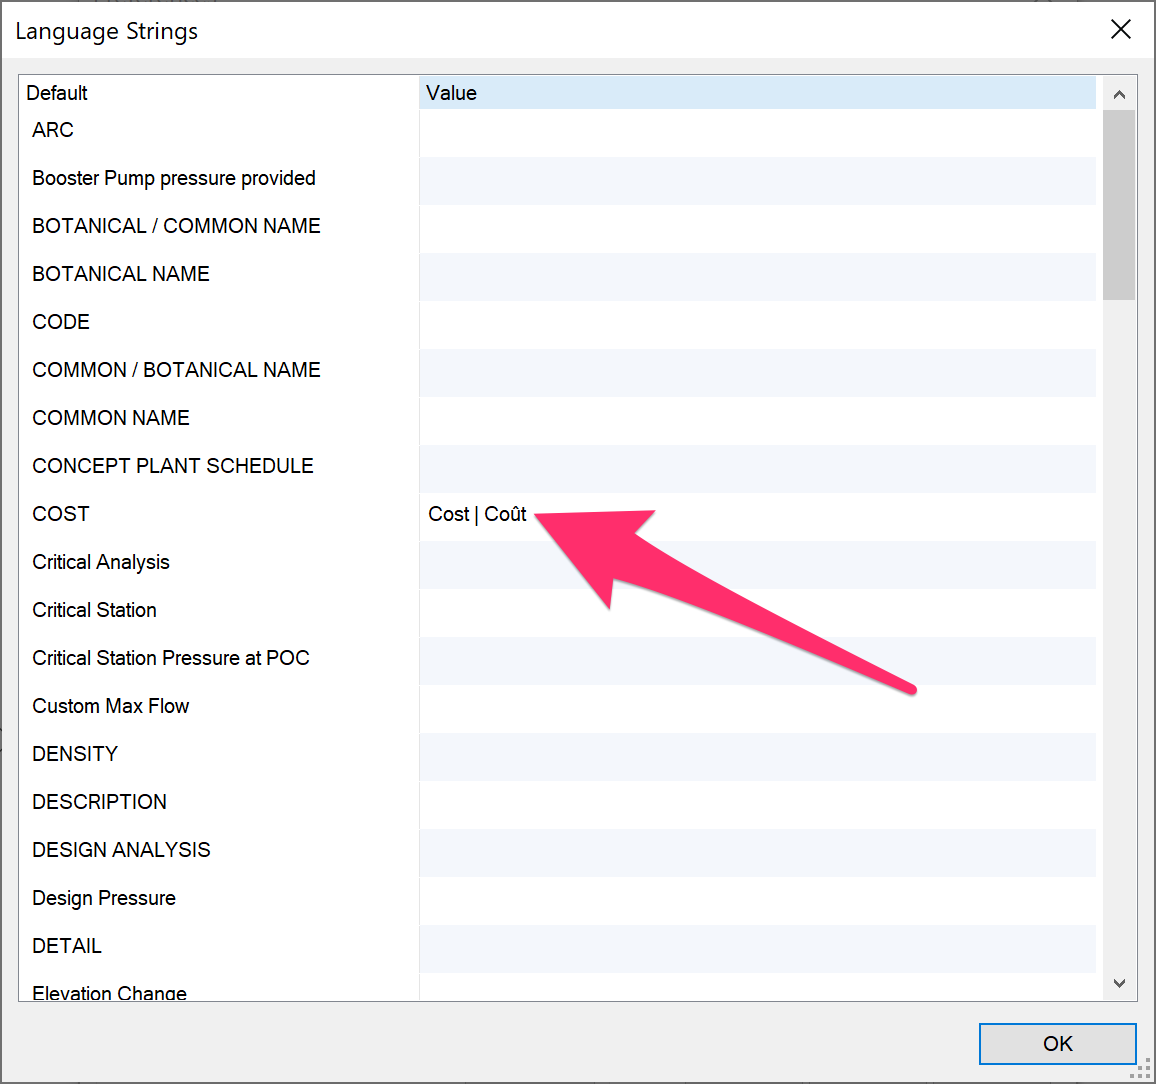
The Language Strings dialog box will open.
The left column lists all the terms in the software that can have secondary values.
For example, if you need the word Cost to appear in both English and French when listed in your schedules, add the value Coût (French for Cost) in the Value column to the right of the default term Cost..
Click OK when finished adding secondary language values.
Any schedules you place in your drawings will now include your secondary language values.
In our example, the schedule heading Cost will be followed by the secondary heading Coût in the Reference Notes Schedule.

Update Options
You can use the Update Options settings to control automatic updates of our software.

1. Automatically check for updates: Check this box to set automatic updates. Selecting this option will make the two menus available.
2. Frequency: Select whether the system will check for updates daily, weekly, or monthly.
3. Select User: Apply the automatic update settings to a specific user on your network.
Print Preferences
Click Print Preferences to begin generating an instant printable list of your Preferences settings.
In the Print Preferences dialog box, select the Preferences settings you'd like to print out. You can select from the following options:
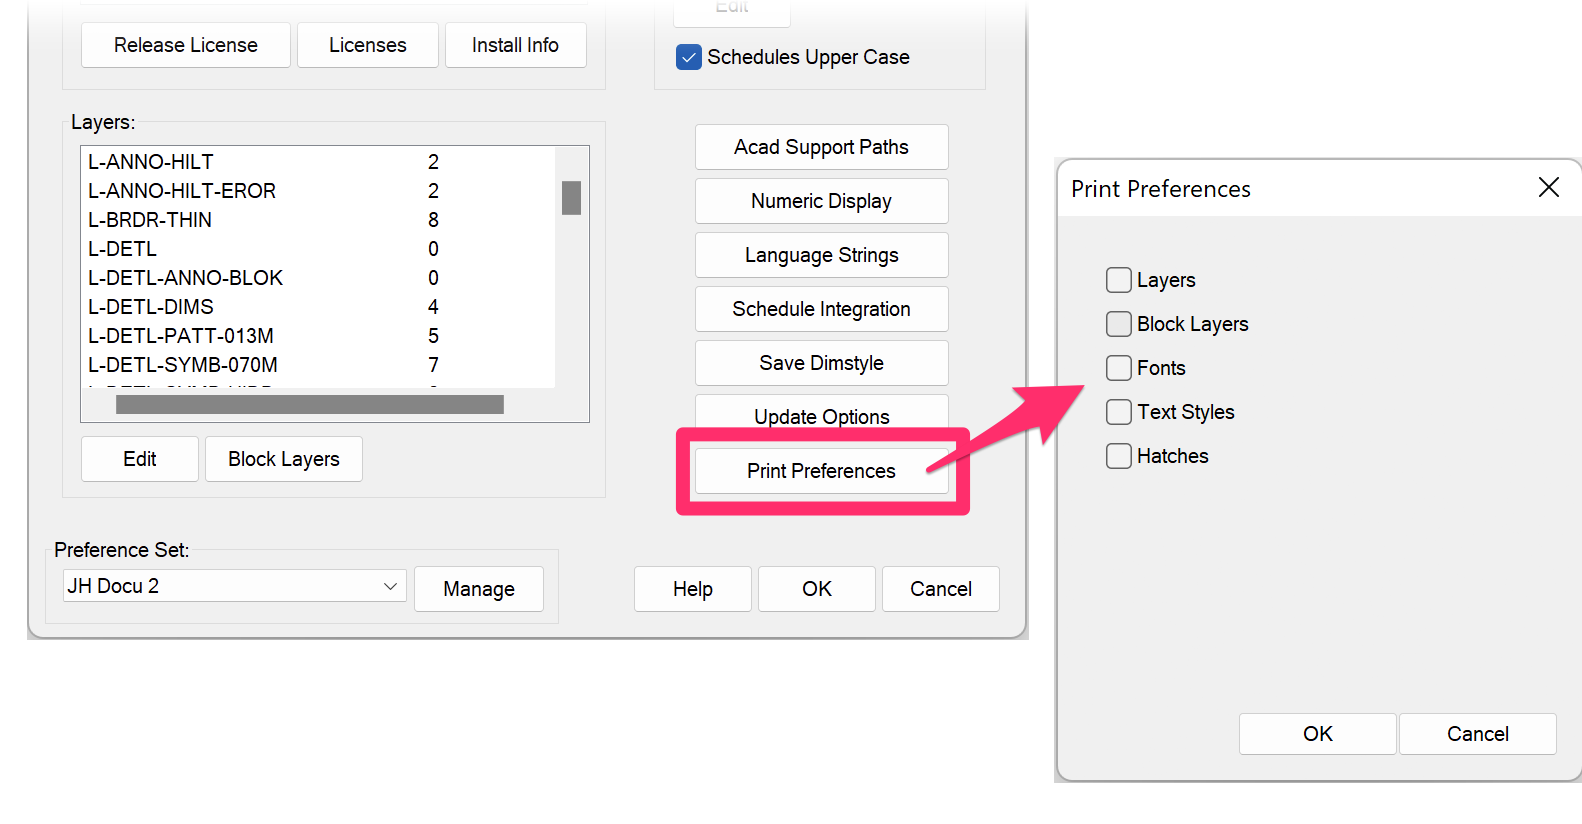
Layout tabs listing the Preferences settings you selected will be added to the current drawing. You can then print out these tabs as needed to add to your office standards.
Saving Your Preferences in a Preference Set
Preferences control the look and feel of your usage of our software to match your office standards. However, some projects may require different preferences, such as those produced for a client whose requirements differ from your office standard. These projects may require different text styles, or callout looks, or schedule setups, different colors, or any of the various items covered in Preferences.
Once you've configured your Preferences, you can save them as a Preference Set. You can create multiple Preference Sets – one for each client, project type, region ... the choice is yours. When starting a job for a particular client, for example, open the Preference Set you've created for that client. Your standards for that client will be applied automatically as you draft.
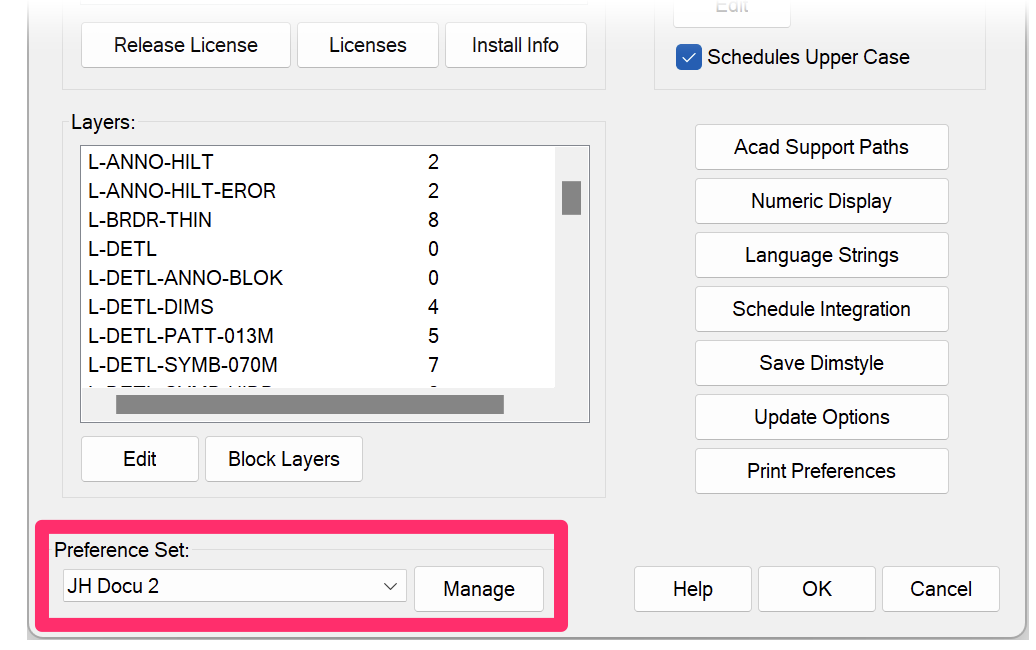
In all six Preferences screens, the Preference Set options are in the bottom left corner.
For detailed information on creating a Preference Set, see our Preference Sets documentation.
Other Preferences Categories
Related Webinars
Troubleshooting
Issue: You are unable to open any of the Preferences screens, and your office has our Cloud Data option
Issue: You want to use custom linetypes for different pipe sizes in your irrigation design