
Detail Report
Updated on: August 19, 2024
Quick video

Need an account of all details relating to the current project and the locations where they've been placed in the drawing? Create a detail report.
Detail Report Overview
To create a detail report:

F/X Details ribbon, Report button

or type FX_DetailReport in the Command line
You'll now see a Detail Report dialog box, which offers several options for placing your detail report.
Detail Reports are now powered by our Reference Notes (RefNotes) Schedule feature, which we improved with some major updates as of August 2024. More information
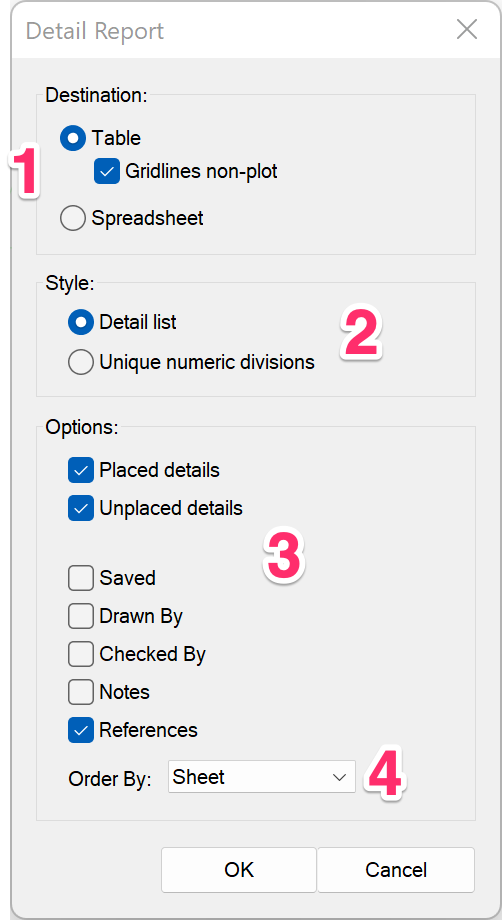
1. Destination: Select where you'd like to place the schedule:
- Table: Place the schedule in your drawing as a table.
- Gridlines non-plot: Check this option if you want the lines separating the table cells to be non-plot. Uncheck this option if you want the table lines to plot.
We've replaced the Drawing and Table options with this single Table option and the Gridlines non-plot checkbox. If you select Gridlines non-plot, the schedule will place with gray gridlines that will not show up when you plot your drawing (essentially the same as the former Drawing option). Deselecting this option will result in a schedule placing as a table with gridlines set to plot (essentially the same as the original Table option). This updated system allows you to edit your schedules much more easily.
- Spreadsheet: Export the schedule to a spreadsheet program such as MS Excel.
2. Options to report:
- Detail list: All your details
- Unique numeric divisions: Only only details with unique numeric division numbers
3. Select any or all of the following options to include them as columns in your detail report:
- Placed details
- Unplaced details
- Saved
- Drawn By
- Checked By
- Notes
- References
4. Use this menu to organize the details in your report by:
- Sheet
- Detail number
- Title
What will be listed in the References Column?
If you place your detail callouts in Paper Space, the system will be able to log the sheets where you've placed them. Those sheets will be listed in the References column – a powerful additional cross-referential capability. For details assigned to items other than callouts, such as plants or Reference Notes, the code of the assigned item will appear in the References column. In short, this column is intended to work along with the Unplaced and Detail Number column options, giving you as many tools as possible to track down details that either haven't been used or haven't been assigned or called out.
Your detail report will be either placed in your drawing or exported to a spreadsheet, depending on which option you selected.
Here's an example of a detail report placed in a drawing:
