Save Hatches & the PRINTHATCHES Command
Quick video
- Step 1: Save Your Hatches Into CAD
- Step 2: Run the PRINTHATCHES command
- Step 3: Select a Scale for the Hatch
- Step 4: Save Your Hatch Into Our System
- Deleting a Hatch
- Why Should I Save My Hatches Into the System?
- Can I Create My Own Custom Hatches?
- Reshooting the Thumbnail Preview Slide for a Saved Hatch
- Backing Up Your Saved Hatches
- Deleting an Unwanted Hatch
- Related Webinars
The AutoCAD hatch system is notoriously challenging. We developed our Save Hatch tool to make your hatches infinitely easier to place, scale, and organize.
Saving a hatch into our database makes that hatch accessible directly from CAD. More importantly, it allows you greater control over the hatching process. You can save your hatch patterns into our various hatch libraries, including Groundcover, Site, or Detail. (More on that below.)
Step 1: Save Your Hatches Into CAD
Important notes:
- Before you can save your hatch into our system, you'll need to:
- Save the hatch into AutoCAD and
- Path the hatch within AutoCAD
- As you may know, hatches are saved as PAT (.pat) files. We recommend creating a single temporary folder to store copies of all your hatch files. You can place this folder in the location of your choice – even directly on your computer's C drive.
This folder will be a temporary location for your PAT files for the purpose of importing them into CAD. Always keep a backup of your PAT files. You'll want to remove this folder from the Support File Search Path once you have saved all your hatches into our system.
The Support File Search Path
For CAD to be able to read your hatches, you'll first need to place them in what's known as the Support File Search Path. This folder path is available in the AutoCAD Options.
Open the CAD Options dialog box:

Manage ribbon, Options button
or type Options in the Command line
right-clicking in the Command line and selecting Options from the menu

Tools pull-down menu
In the Options dialog box, select the Files tab.
In most cases, Support File Search Path will be the top entry in the list of files.
Expand the Support File Search Path by clicking the plus (+) sign to the left.


The Support File Search Path will expand, and you'll be able to see all folders it currently includes.
Click Add, then click Browse.
Navigate to the folder that contains your custom hatch patterns (example: My Hatches), and click OK.


Your folder will now be included in the Support File Search Path.
Click OK to save your changes.
AutoCAD will now be able to read your hatches, allowing you to save them into our database.
Step 2: Run the PRINTHATCHES command
We've created our Print Hatches tool to help simplify the following process. Running this tool will automatically lay out all of a particular hatch category to display all hatches as they're currently saved into the system. So, for example, if you want to save a site hatch and you've followed Step 1 above to load the site hatches, you simply need to run Print Hatches and click Site. The system will do the rest!
Open our Print Hatches tool:
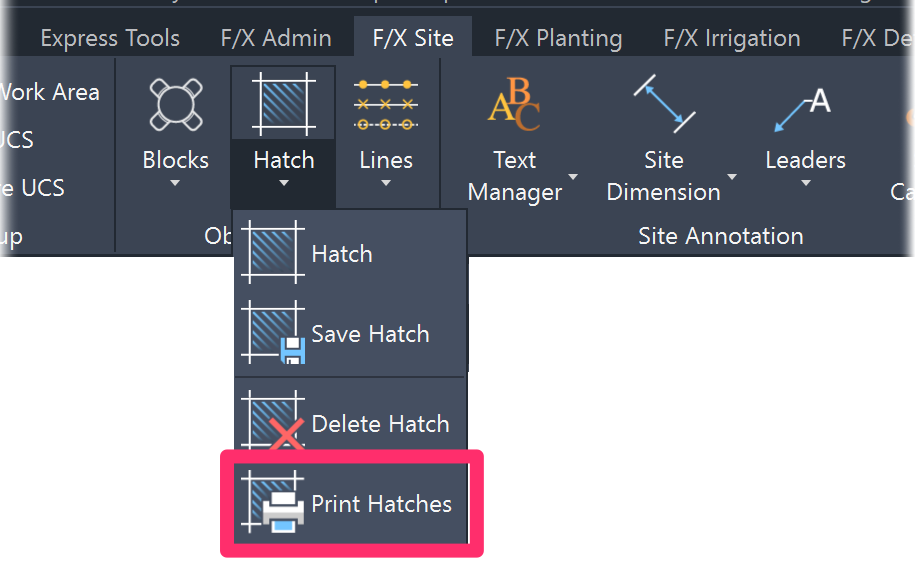
F/X Site ribbon, Print Hatches flyout
or type FX_PRINTHATCHES in the Command line

F/X Site pull-down menu
Select the hatch category where you want to save your hatch. The file for your custom hatch patterns will be created automatically based on the primary hatch category you selected, where you can then modify and save your hatches, and then save the generated DWG into your office standards folder for future reference and adjustments.
The printout includes a number of layout tabs, each of which contains several patterns. Here's an example:
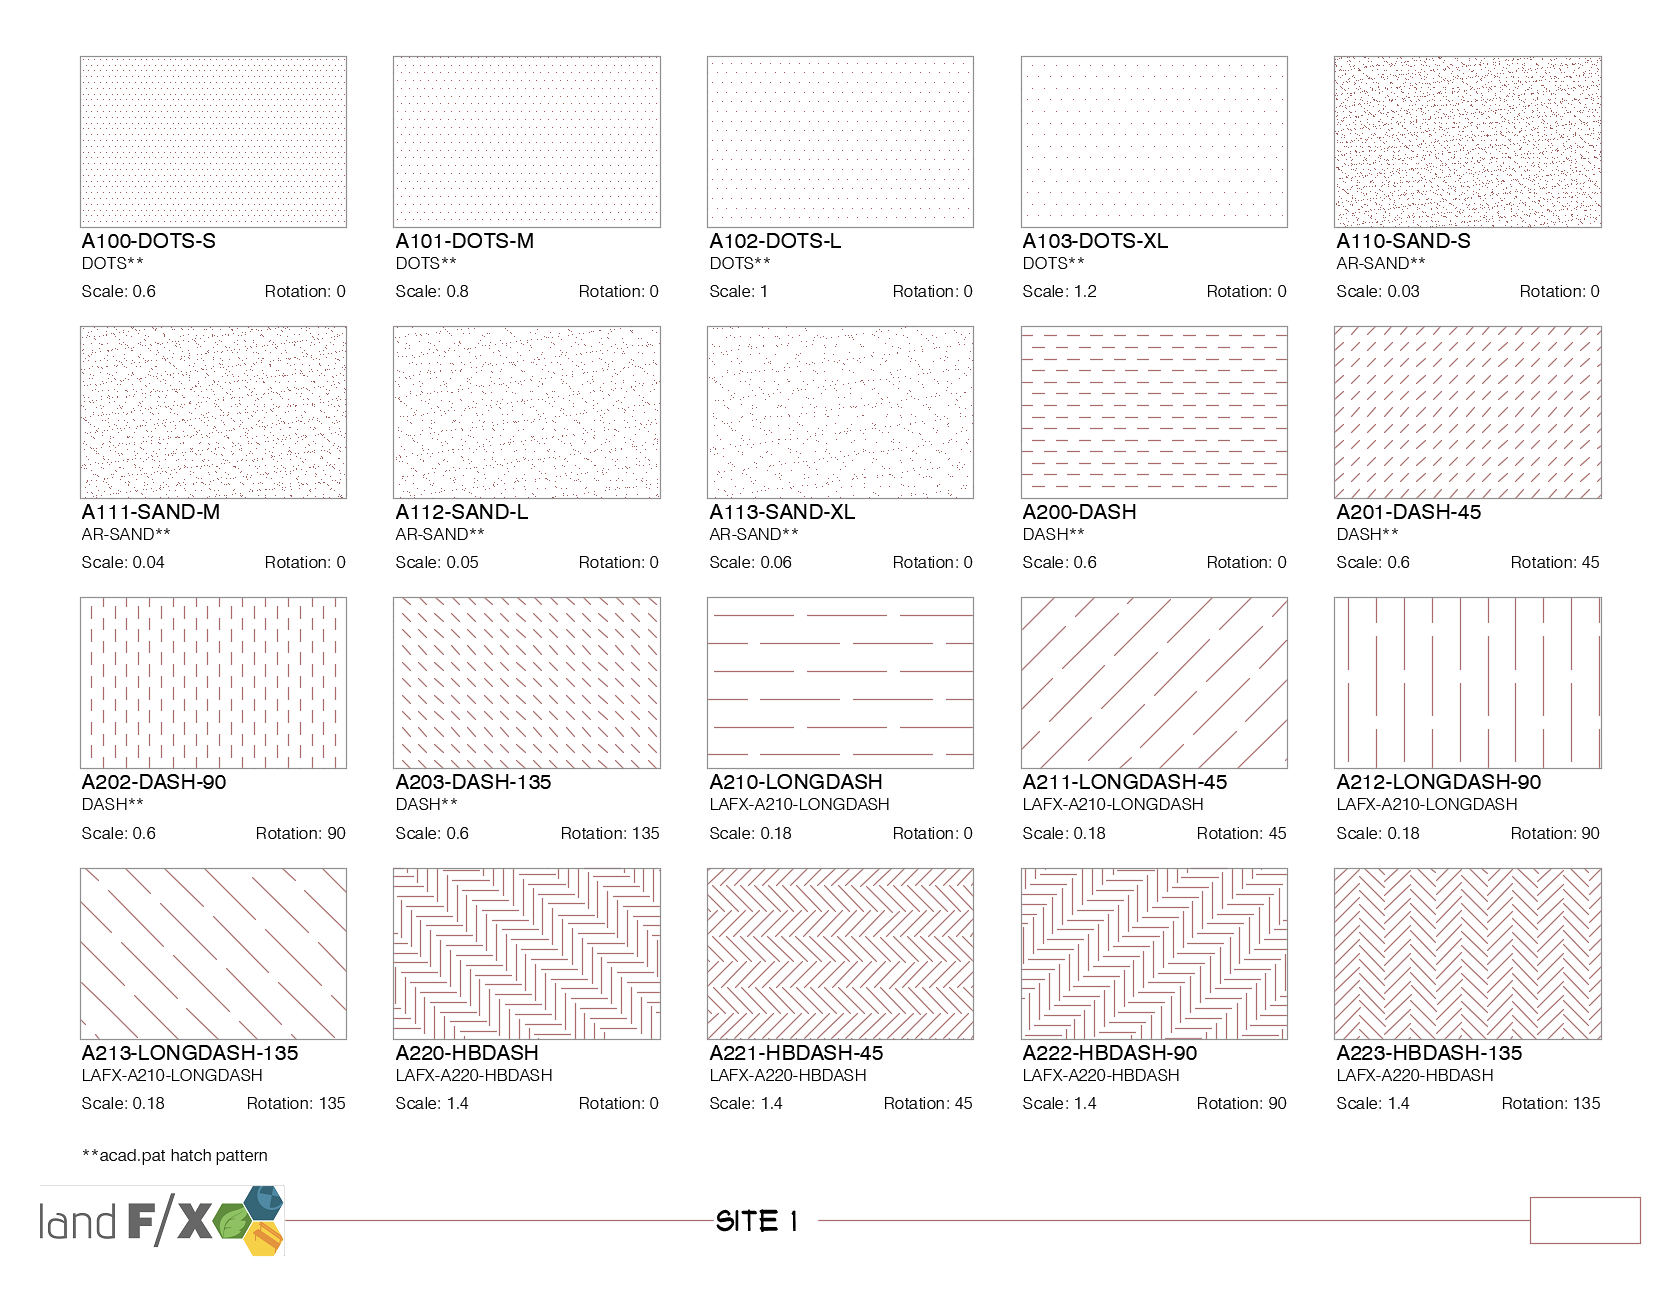
We've also provided a series of downloadable PDFs showing the hatch patterns you'll see when you run PRINTHATCHES. Use the link below to download all these PDF documents (one for each of our hatch pattern types) as a zip file.
Each of the patterns shown above is a different hatch that is available in the Land F/X database. The drawing includes a Title, Scale, Angle, and Pattern name for each hatch.
The Layout tabs are named to reflect our hatch pattern organization system.
To save one of your hatches as a Site hatch, open to the last available page with an available space to copy any previously placed hatch into an available spot. You're of course welcome to add new Layout tabs of your own to this drawing.
To copy a hatch pattern square in the printout, select the hatch and all text pertaining to it, then right-click it and select Copy Selection from the menu.
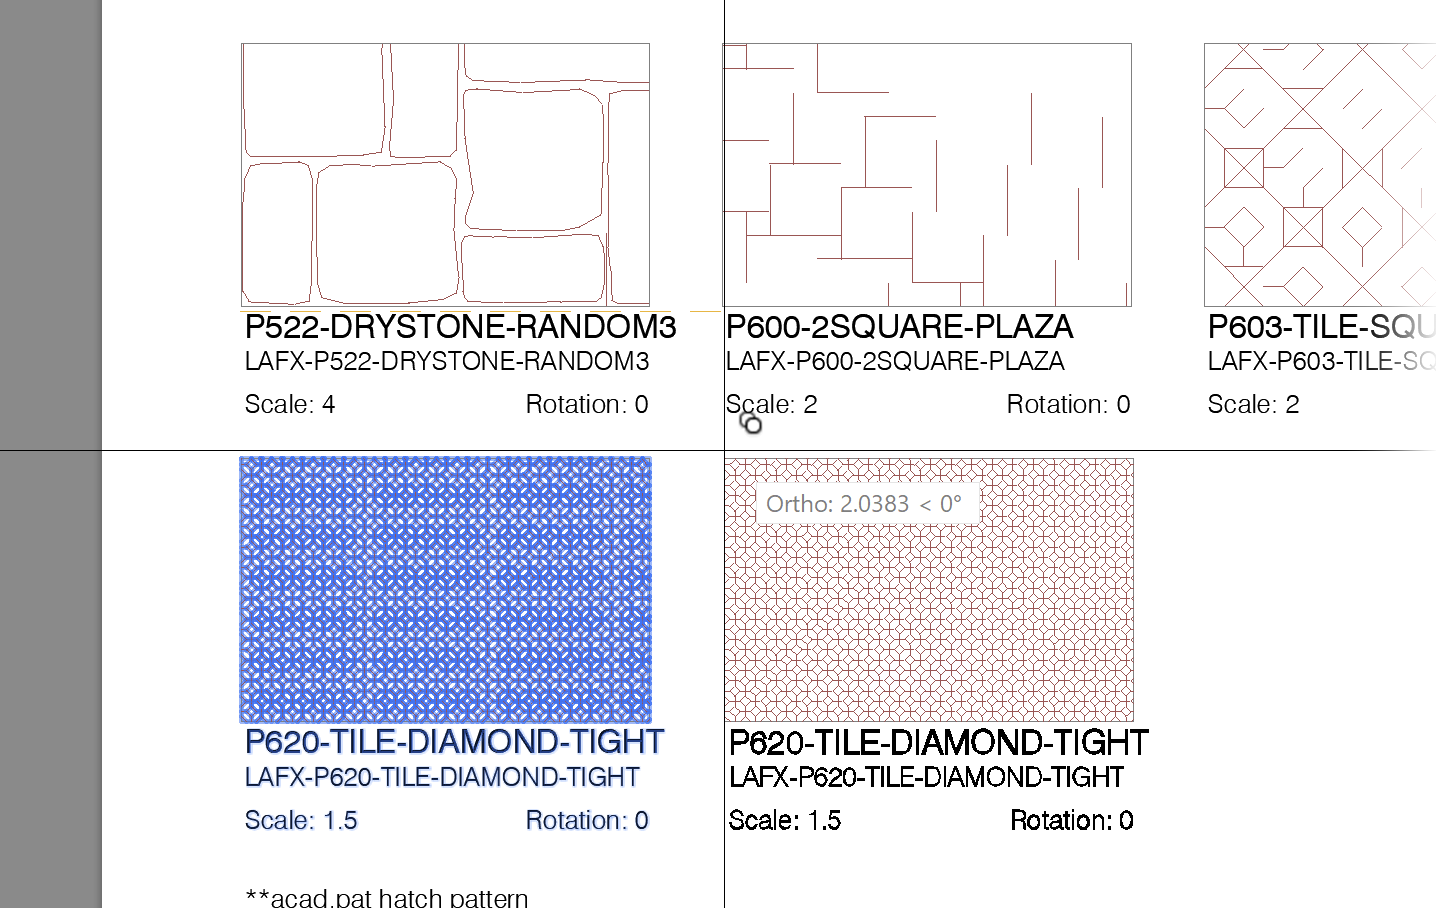
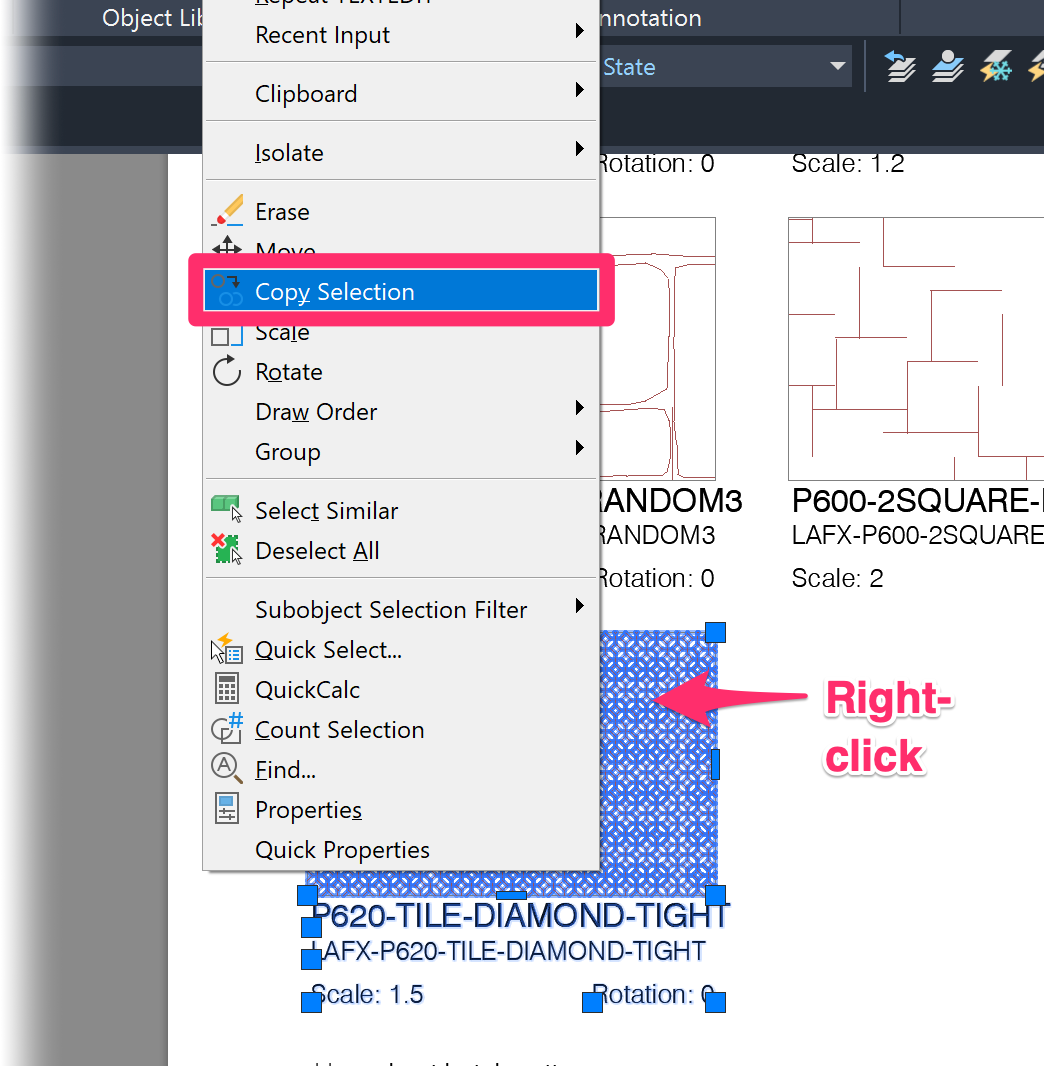
You'll now have a duplicate version of the hatch you copied. You can then use this hatch as a template for placing your new hatch.
Click the duplicate hatch you just placed.

The hatch will be highlighted, and the Hatch Creation ribbon will open at the top of your AutoCAD interface. The Hatch Creation ribbon includes a Pattern panel that shows thumbnails of all available hatches.
If you followed the steps above to add your hatch folder to the Support File Search Path, your hatches will appear in this list.

Expand the list of thumbnails by clicking the down-facing arrow in the bottom right corner of the Pattern area.

You can now scroll through the available hatch patterns to find and select the hatch you want to add.
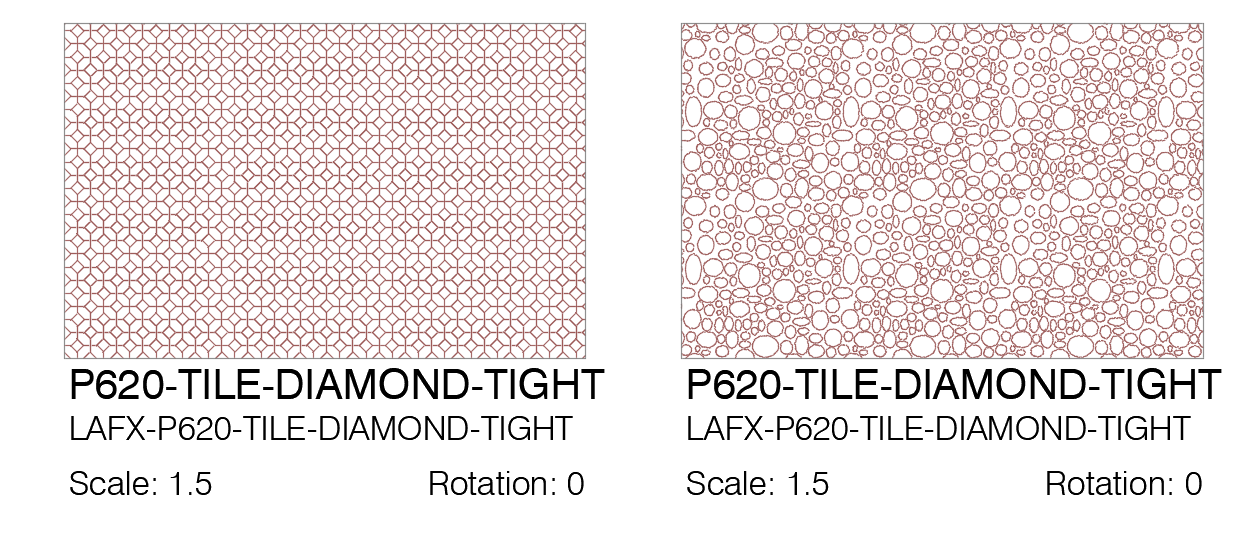
The hatch you select will now appear in the place of the hatch you had selected in the drawing.
Note that the hatch will come in at the same scale as the hatch that was originally in that location. Therefore, the new hatch may not look quite right.
Step 3: Select a Scale for the Hatch
You can now adjust the scale of the hatch in the Hatch Editor ribbon to suit your preferences.
As long as the hatch is selected, the Hatch Editor ribbon will remain open. With hatches, scale is a function of density. The larger the scale, the less dense the hatch will appear.

The scale of the hatch that's currently selected is 0.5200 (.52). In this case, we need to make the hatch less dense, so we'll give it a larger scale.

When we change the hatch scale to a larger number, such as .2000 (.4), we can see, as shown below, that the hatch is now less dense.
Here's how our hatch looks with our scale of .4 – not bad.

Now it's time to edit the hatch's text to reflect the new name and scale.
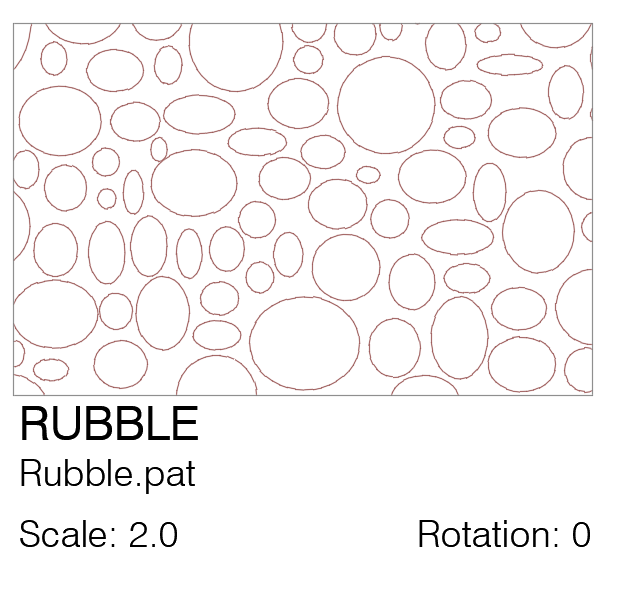
We now have an entry for our hatch with the correct name and scale.
You can also change the angle of your hatch by typing a value in the Angle field, also in the Hatch Editor ribbon.

Play around with the scale and angle of your hatch until it suits your preferences. We also recommend creating a different version of each of your hatches with each scale and/or angle you think you'll use. Make sure to edit the scale and angle of each hatch to reflect the correct value.
You can choose to save each scaled (or angled) hatch into the system once, regardless of the scale. Or you can save different versions of each hatch with different scales and/or angles. Our software allows you to edit the scale of your hatches when you place them. Although you cannot scale your hatches on a global level, you can go through them once, file by file, and set each to the scale you prefer. Once finished, you'll never have to scale your hatches again (unless you want to).
Remember: You're working in Paper Space with no scale. Once you save your hatch into the system, the hatch will be scaled automatically when you use it in either Model Space or Paper Space. Your screen is currently showing the final look of the hatch.
You'll probably want to print each of your hatches before saving them into out F/X database. That way, you'll be sure of what they will look like in an actual printed drawing.
Step 4: Save Your Hatch Into Our System
Now that you have a good idea of what your hatch will look like, it's time to save it into our system.
Why would you want to do this when you already have it saved in CAD? Because you'll find that hatches are simply easier to access and work with, as well as more logically organized, when you've saved them into the system. This process may seem complex, but remember: You only need to complete it once for each of your hatches.
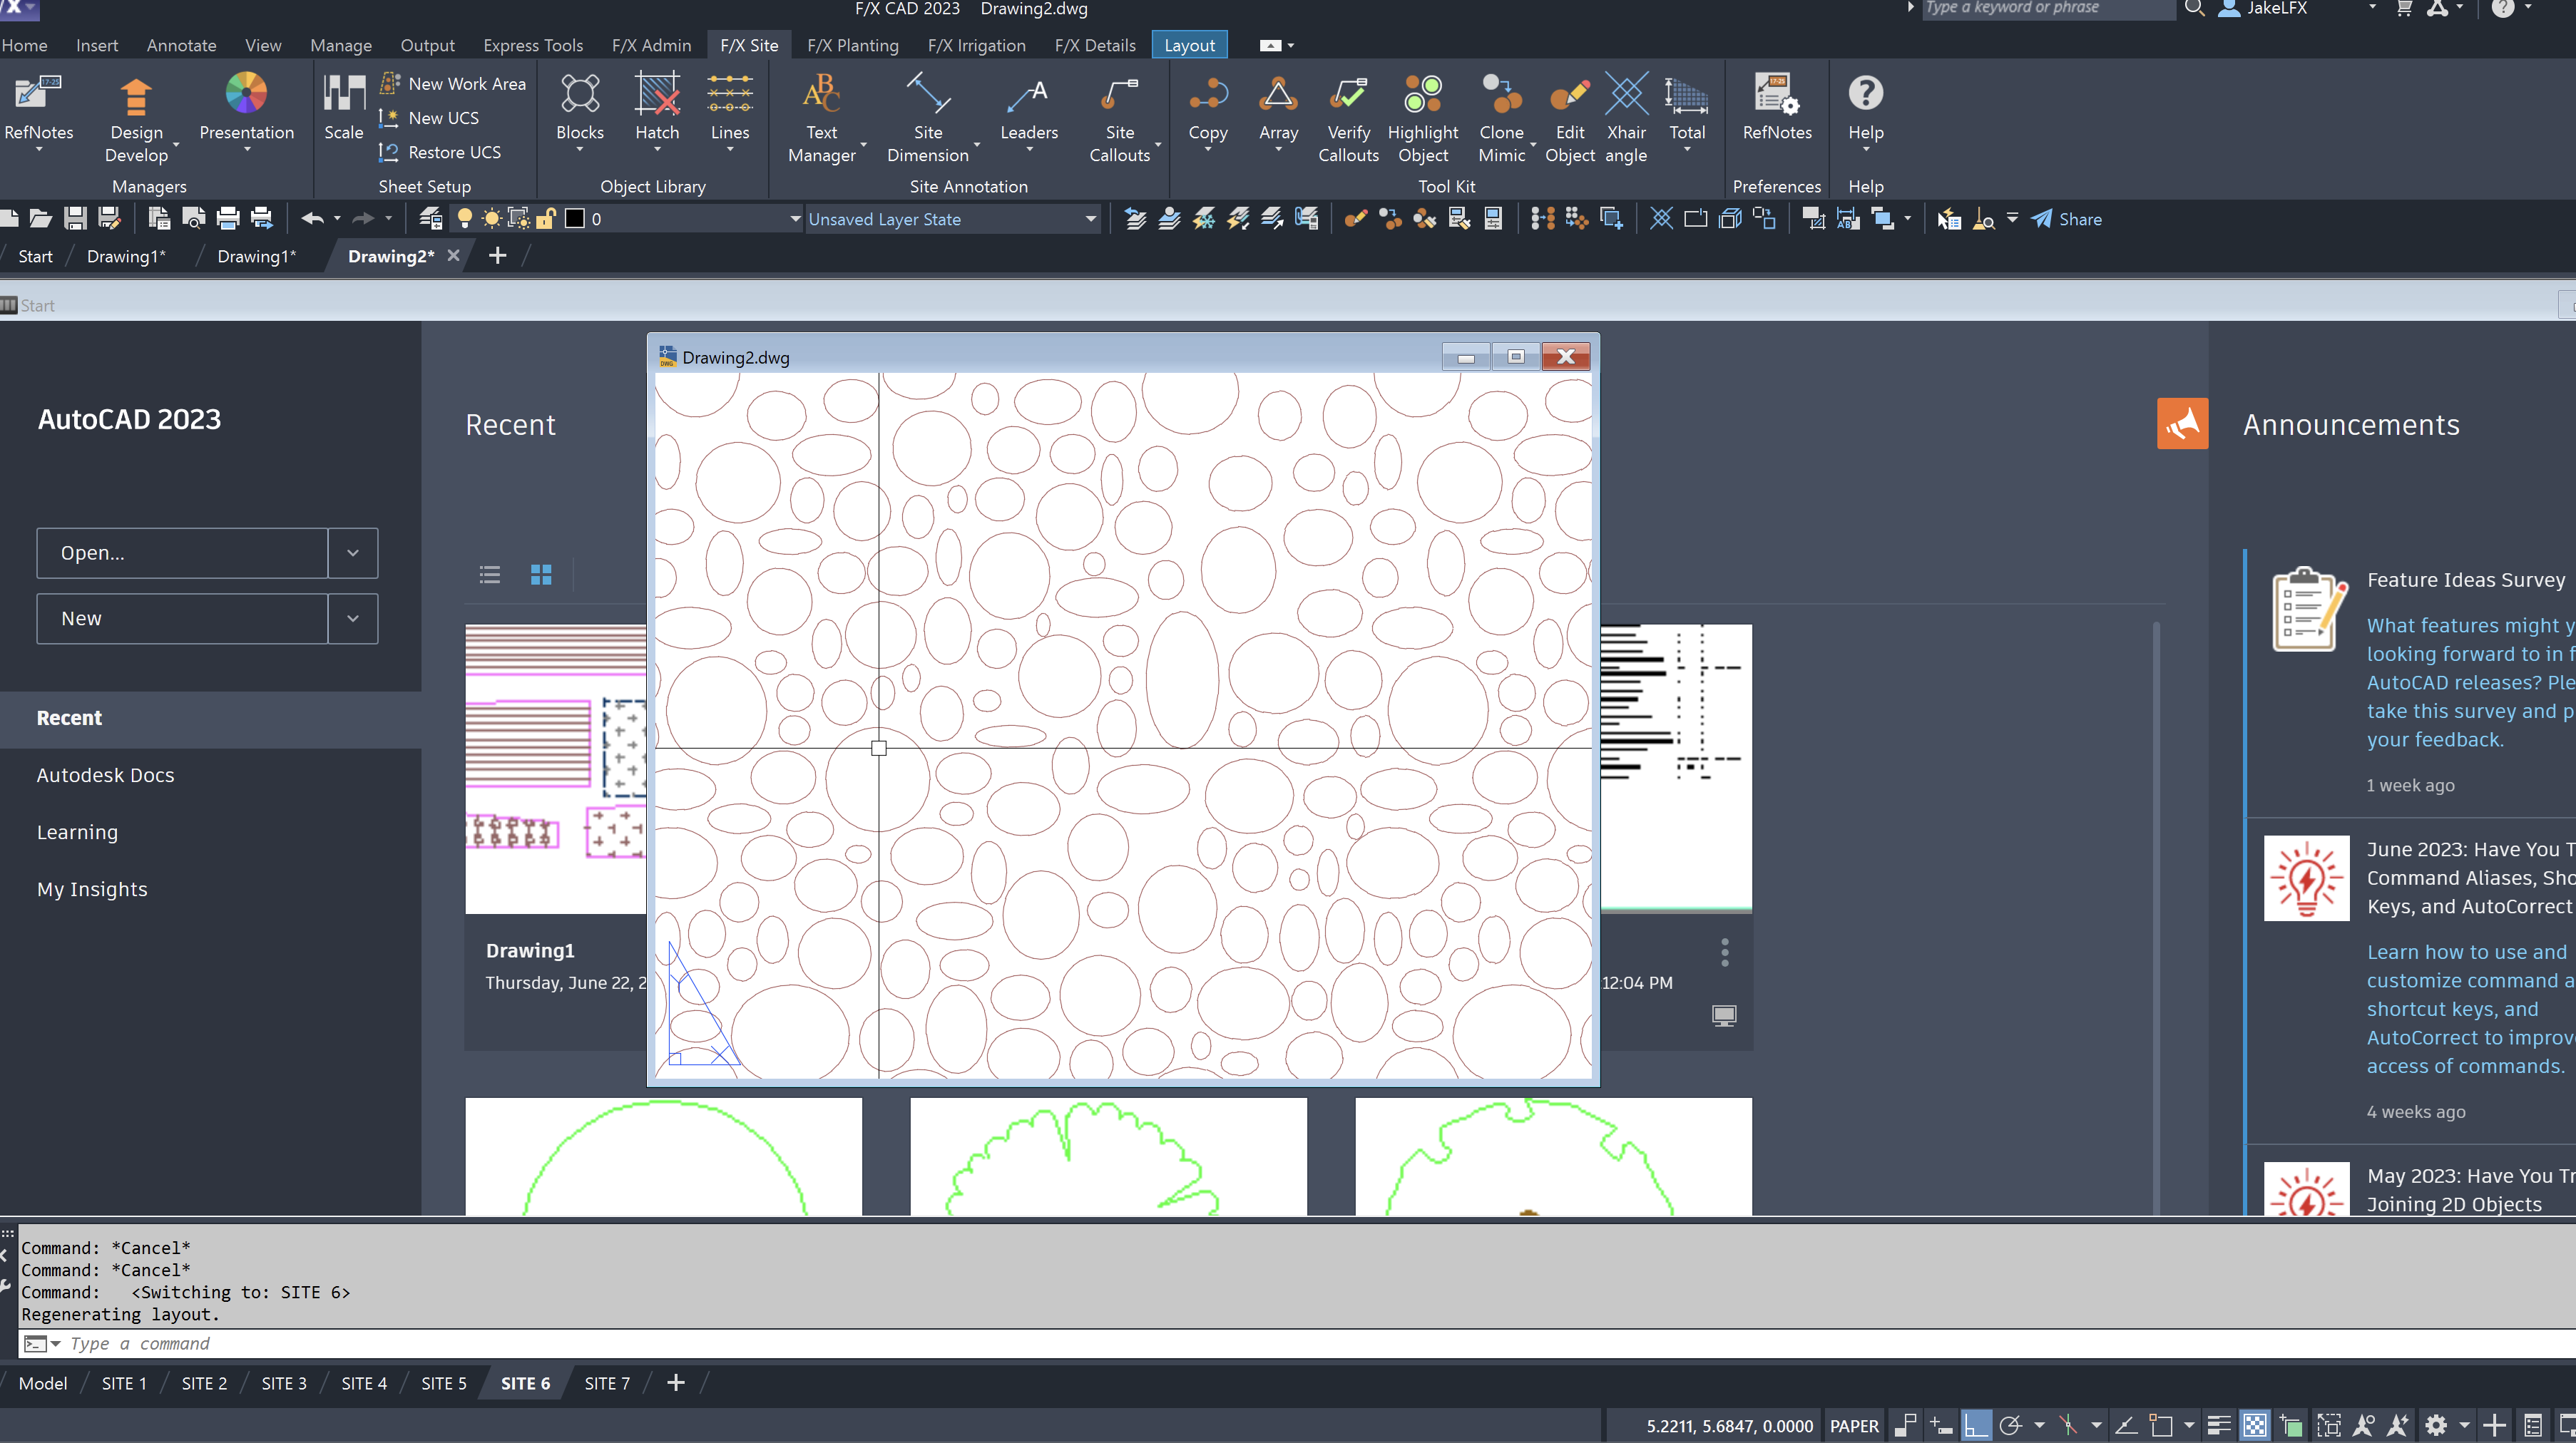
Zoom in quite closely to the pattern, and let it fill the screen. Remember: What you see on your screen will become your small preview thumbnail of the pattern, so avoid zooming too far in or out.
We also recommend setting the drawing file window to a 4:3 ratio.
We've found that 6" tall and 8" wide is a great setup to make the hatch pattern fill the slide properly.
Now open our Save Hatch tool:
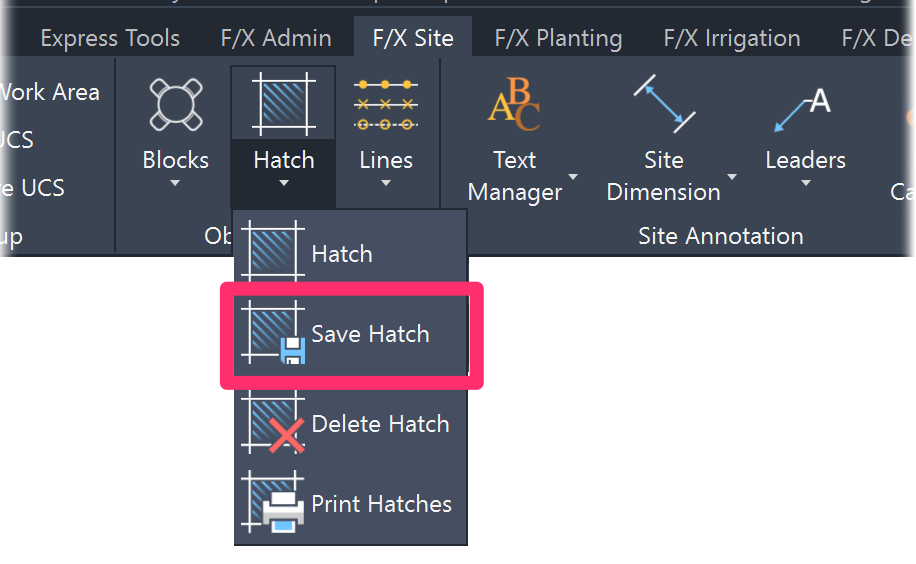
F/X Site ribbon, Save Hatch flyout

F/X Admin pull-down menu
or type FX_AddHatch in the Command line
The cursor will turn into a pickbox, and the Command line will prompt you to Select hatch.
Click within the hatch pattern on your screen to select that hatch.
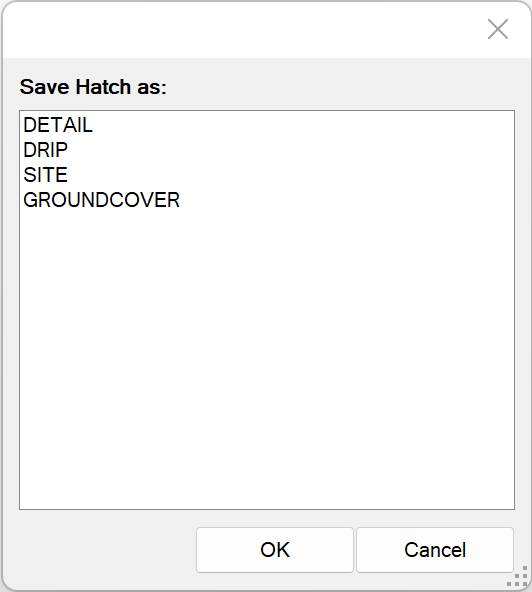
The Save Hatch as dialog box will open.
Select one of the following hatch libraries (ignore the entry for Drip).
- Detail
- Site
- Groundcover
Click OK to save the hatch to the library you selected.
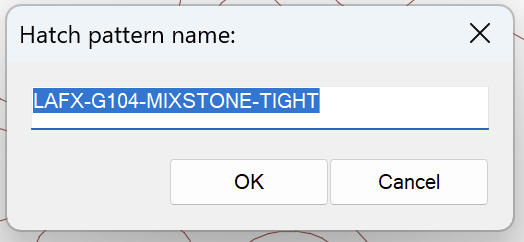
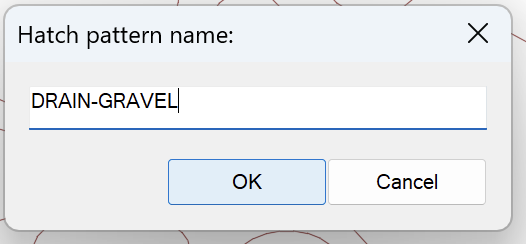
In this example, the name LAFX-G104-MIXSTONE-TIGHT represents the hatch pattern.
If you change this name, the system will make a copy of the PAT (.pat) file with the new pattern file name and place it in the Landfx/Patterns folder.
You'll now see a dialog box where you can control several aspects of the hatch pattern.
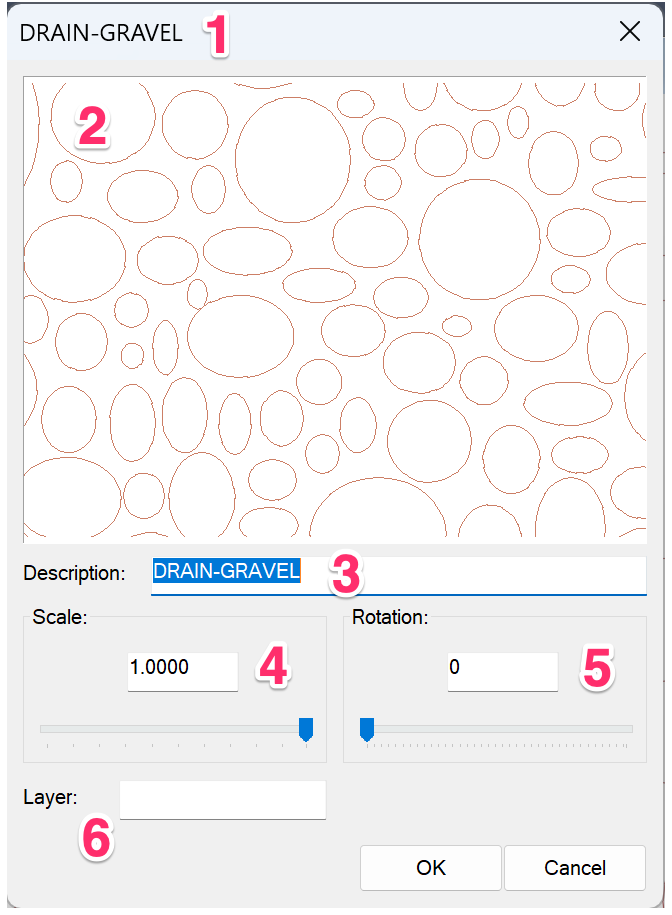
1. The name of the hatch pattern will change to the name you've given it.
2. Thumbnail view of the hatch pattern
3. Description: Type a name for your hatch pattern.
Note that the description is what the system now uses to organize the hatch.
4. Scale: Control the scale of the hatch by either typing a scale value or using the slide.
5. Rotation: Control the rotation, by degrees, of the hatch pattern by typing in this field or using the slide.
6. Layer: If you want, type the name of the layer where you want your hatch to be placed.
Specifying a layer name here will place the hatch on that layer instead of the default, including when you're placing hatches for Area/Volume Reference Notes (RefNotes). You can refine your drawing setup routine by loading in the definitions of these layers that you define by using our Layer States tool to save a list of layers and their properties.
Click OK to save your settings.
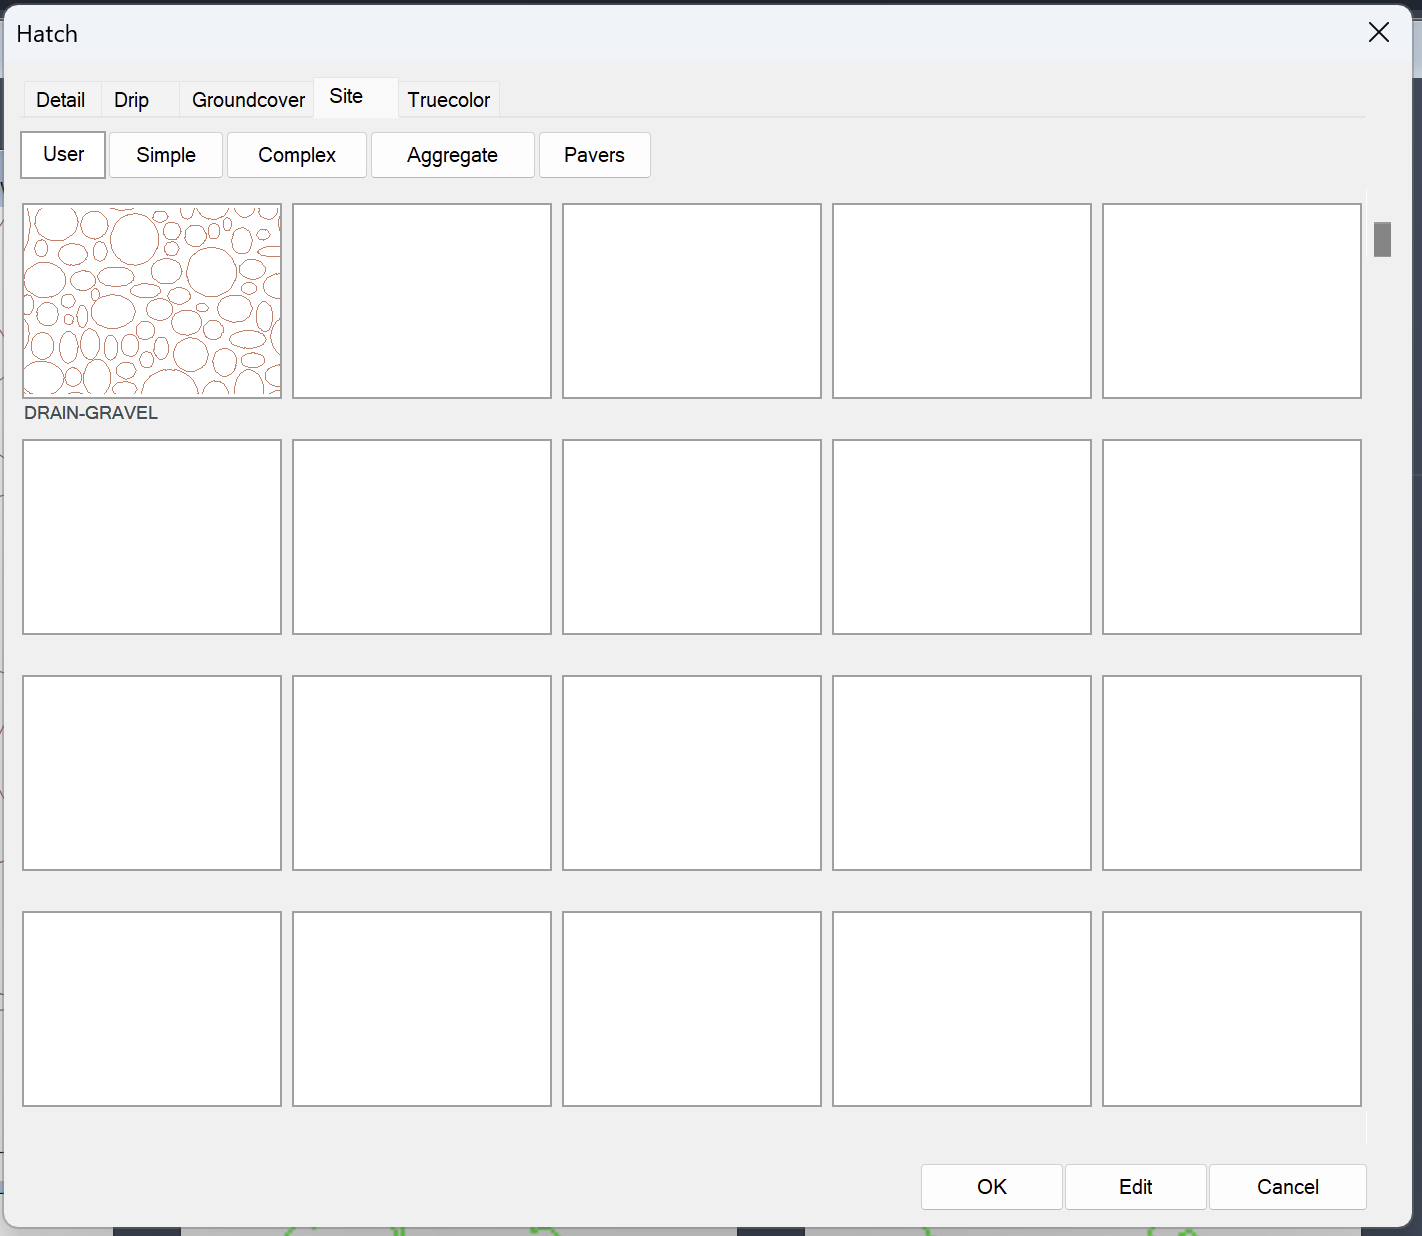
The hatch pattern will be entered into the library you selected (in our example, the Site library), and will be available when you place that type of hatch.
Your saved hatch will be shown added to the User tab. Want to customize the User tab and give it the name of your choice? Here's how.
When you place your hatch pattern into both Model Space (with your scale set, and a Paper Space viewport set at the same scale), and in Paper Space. The pattern will automatically be scaled for the same look on both.
You set the scale of the pattern when you first entered it into Paper Space to save it. If you change your mind about the scale – for instance, if you decide you now feel the pattern should be a little denser in appearance – you can always highlight the pattern when viewing the hatch library it is in, and then click the View button. You can then adjust the scale or rotation as desired. For more information, visit our Editing Hatch Patterns documentation.
Deleting a Hatch
If you want to remove a custom hatch pattern you have saved into the system, type DELETEHATCH in the AutoCAD Command line and then press Enter. You'll then be guided through deleting your hatch.
Why Should I Save My Hatches Into the System?
Save Hatch is more useful than may be obvious at first glance. When placing hatch patterns from AutoCAD, you really never know what the scale should be. Plus, the scales will vary from pattern to pattern. In the past, figuring out the appropriate scale to set for any particular pattern would require complex charts. With Save Hatch, you can save and access a pattern quickly. You can also predetermine the scale or adjust it easily on the fly for future use.
The scale function is the key decision to be made when placing a hatch pattern, and AutoCAD seems to offer no real consistency for determining what a scale should be. The ability to make that decision ahead of time – and not have to worry about the scale of a particular pattern in the future – is a nice advantage.
You can also have one particular pattern saved several times, each with different scales and angles. For example, you might save a Rubble pattern with different densities, or scales, for different uses. You can save these versions saved with the scale defined in the pattern name, such as Light Rubble, Medium Rubble, and Heavy Rubble.
Can I Create My Own Custom Hatches?
Although we offer the built-in capability to add existing hatches using Save Hatch, AutoCAD inherently does not have an official method of generating a hatch file (.pat).
Although it's technically possible to create your own hatch, the process is extremely involved and is best left to a professional in this area. For this reason, we recommend finding a similar pattern rather than creating one. A quick Web search will help you find a number of existing hatch patterns (some for a small fee).
We've vastly increased our default hatch options, and we intend to continue adding more, so if you have requests or suggestions, let us know and we can see about adding them into the system in some fashion.
Reshooting a Thumbnail Preview Slide for a Saved Hatch
Quick video
Our Save Hatch tool creates a thumbnail preview slide for each of your saved hatches, allowing you to see a sample of that pattern when selecting hatches. If you're not happy with the preview slide created for a hatch, you can reshoot it by placing that hatch in Model Space, zooming in so only the hatch pattern is showing, and then using the MSLIDE command to create the preview slide.
Remember to match the aspect ratio of the target image as closely as possible with your display window. So for instance, if your AutoCAD window is spanning two monitors, the resulting slide could have an aspect ratio of 8:3, while the one in the dialog is 4:3, which will result in it not being zoomed in enough.
Backing Up Your Saved Hatches
As with any files or content you've customized, make sure you back up your saved hatches. Hatch patterns are stored as PAT (.pat) files.
Because our hatches patterns are cloud based, you don't need to worry about backing up our default patterns. However, you'll want to back up any hatch pattern you've saved into our system or otherwise customized.
To back up your custom hatches, locate the PAT files that contain them. The PAT files saved into the system are saved to the folder Landfx\Patterns. The corresponding slides and XML files are saved in the folder LandFX\Hatch.
Save your backup files to your normal backup locations, following our backup recommendations.
As with any CAD-related items you back up, we recommend also backing up copies of all these items to a CAD Standards folder.
Deleting a Custom Hatch
Have a hatch pattern you've added but want to remove from our library? Type DELETEHATCH in the Command line and press Enter. Then select the hatch to delete. Note that Land F/X default hatches can’t be deleted – they will continue to repopulate. Only custom hatches you've added can be deleted.
Related Webinars
- Hatches We dive into the Land F/X hatch libraries, take a look at how Land F/X manages hatches, and show you how to integrate your own custom hatches and develop a better understanding of the inner workings of the Land F/X hatch system as a whole. (58 min)
- Planting F/X Setup: If you're trying to make Planting F/X work with your firm's existing style standards, this webinar is for you. (58 min)


