
Placing a Rotor or Spray Head: You Don't See the Nozzle Size You Want
Issue
You tried to place a rotor head or spray nozzle, and you don't see all the options listed. The nozzle size you want to use for that emitter is not in the list of nozzle options.
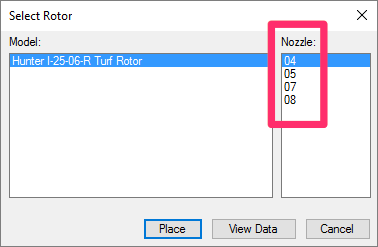
For example, you might see the nozzle range pictured to the right (04, 05, 07, 08), but you want to use a larger nozzle for this rotor.
Cause
The available nozzle sizes for each rotor are tied to the design pressure you selected for that rotor when adding it to your project.
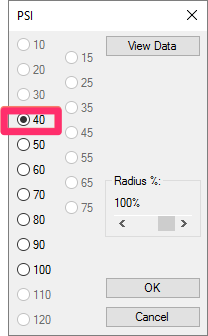
In this example, the selected rotor has been assigned a design pressure of 40 PSI in the project
Depending on the rotor you've selected, your desired nozzle size may not be available for the design pressure you've selected for that rotor. In fact, we've based the availability of rotor nozzles directly on each rotor manufacturer's specifications for each design pressure.
Solution
Your solution will depend on whether or not you've already placed heads in your drawing.
You have already placed heads in your drawing
If you've already placed heads in your drawing, you can simply use our Replace feature to replace your heads and add them back.
1. Open our Edit Equipment tool:

F/X Irrigation ribbon, Edit Equipment button

Irrigation Piping toolbar

F/X Irrigation menu, Edit Equipment option
or type EquipInfo in the Command line
2. Select one of the problematic heads on your drawing.

4. Add the head(s) back to your project, selecting a more appropriate pressure for your system.
You have not already placed heads in your drawing.
If you haven't yet placed heads in your drawing, you'll need to determine a design pressure for your chosen rotor that will allow for your desired nozzle size. You'll then need to remove the rotor or spray head from your project and then add it again – this time, selecting the correct design pressure.
First, delete the rotor from your project by highlighting it in the Irrigation Manager and clicking Delete.

You can then add the rotor back to your project. When adding it, use the View Data button to find out the correct design pressure. Clicking this button with the rotor selected will open the manufacturer's catalog entry for the rotor. When adding a rotor to a project, View Data button is available:
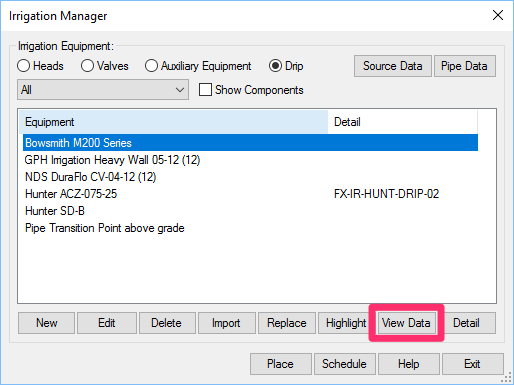
• In the Irrigation Manager
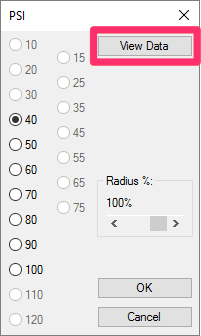
• In the PSI dialog box
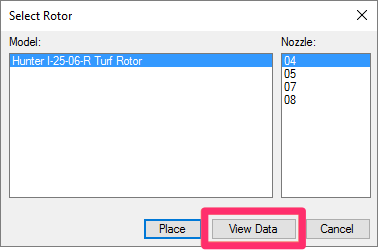
• In the Select Rotor dialog box
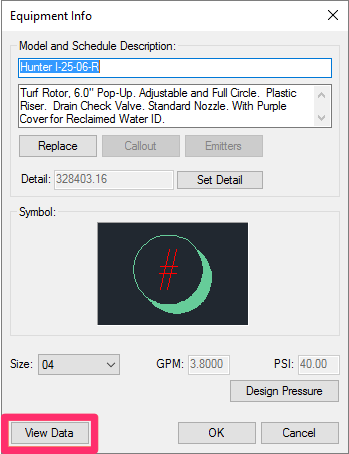
• In the Equipment Info dialog box
When you click View Data from any of these locations, you'll be brought to the manufacturer's online catalog entry for that head. There, you can examine the various design pressure rates available for each nozzle size for that head. Here's an example:
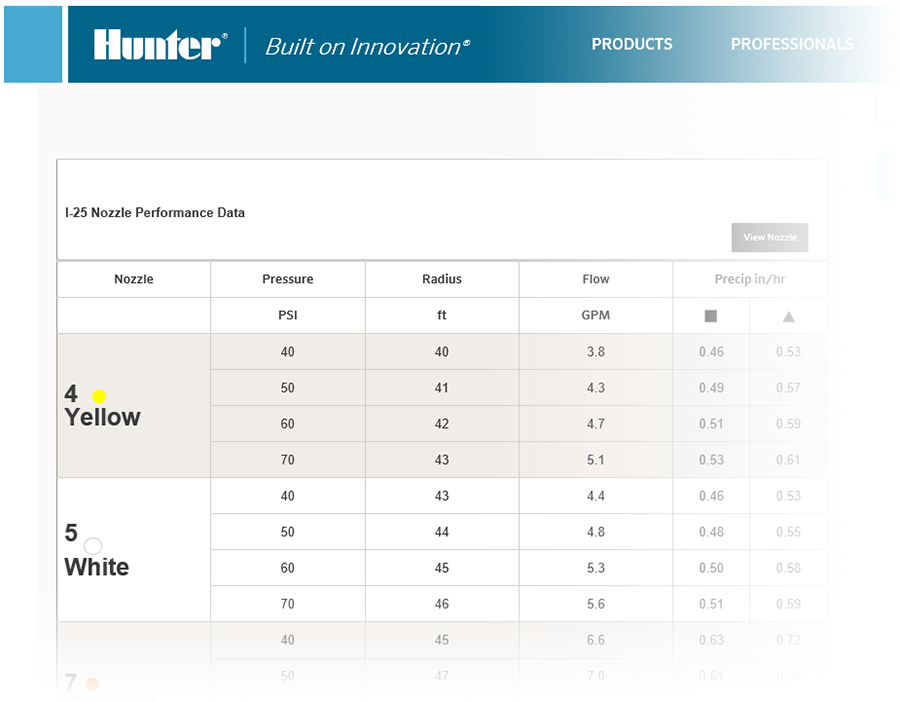
Each manufacturer catalog will look different, and each catalog will likely change over time. The image above is just an example.
Once you've selected the correct design pressure, you can select the nozzle of your choice.
Contact
- Land F/X


Our software tailors AutoCAD®, Revit®, SketchUp®, and Rhino® to the needs of landscape architects, irrigation designers, and other professionals. We automate your most tedious tasks and ensure accuracy, giving you more time to design.