Plant Manager: Planting F/X for Revit® Plugin
Quick video
- Plant Manager Overview
- Adding Plants to Your Project
- Editing Plant Parameter Data & Assigning Symbols to Plants
- Placing Plants in Your Plan
- Plant Categories
- Deleting Plants
- Related Webinars
- Troubleshooting
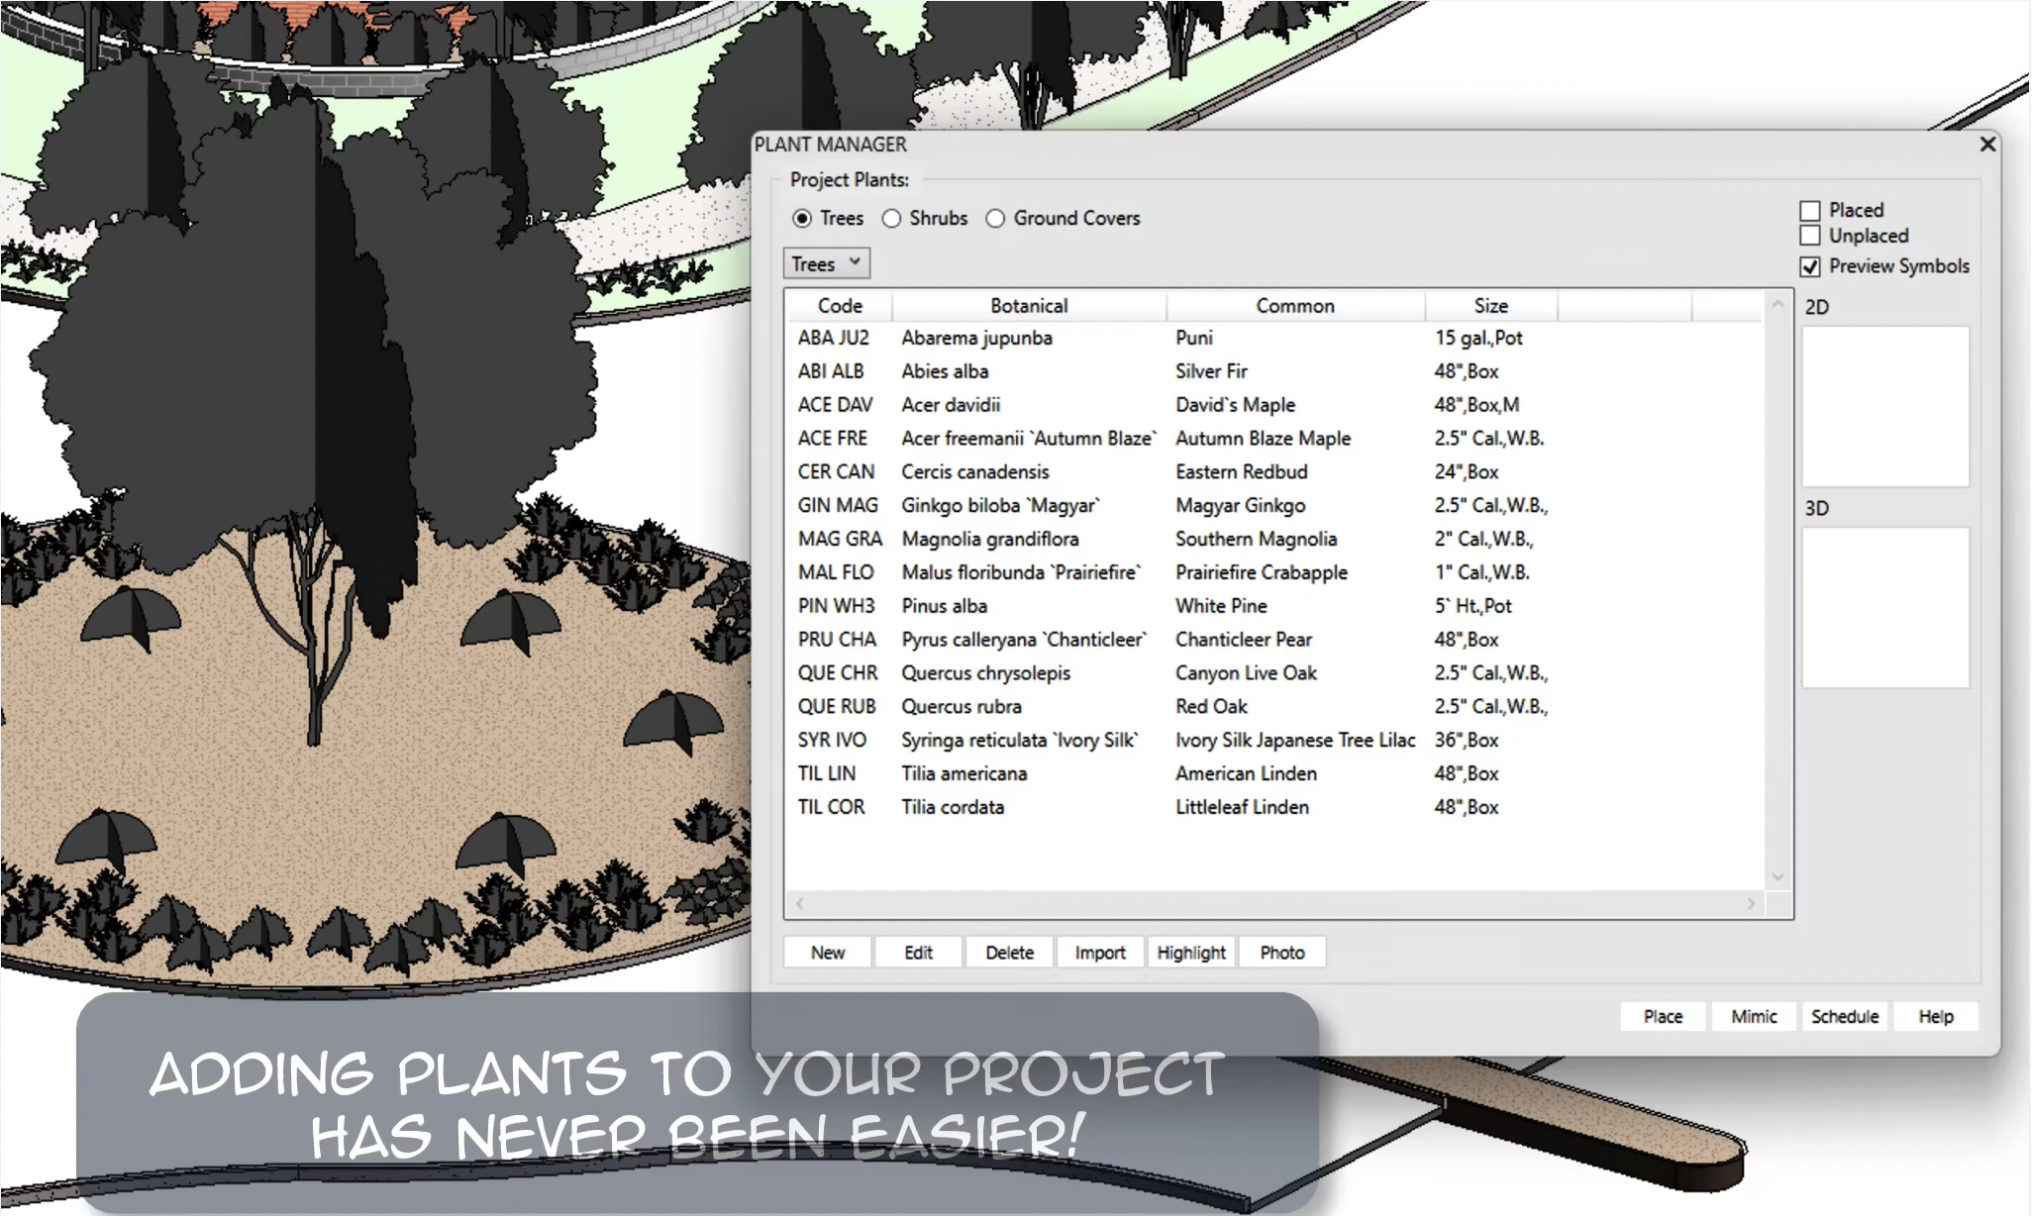
The Plant Manager in our Planting F/X for Revit Plugin is a project palette of plants listed with all their data, and organized into Trees, Shrubs and Ground Covers. It’s your hub for your planting data.
Plant Manager Overview
Open the Plant Manager tool:

Planting F/X ribbon, Plant Manager flyout
The Plant Manager will open as a dockable palette right inside Revit.
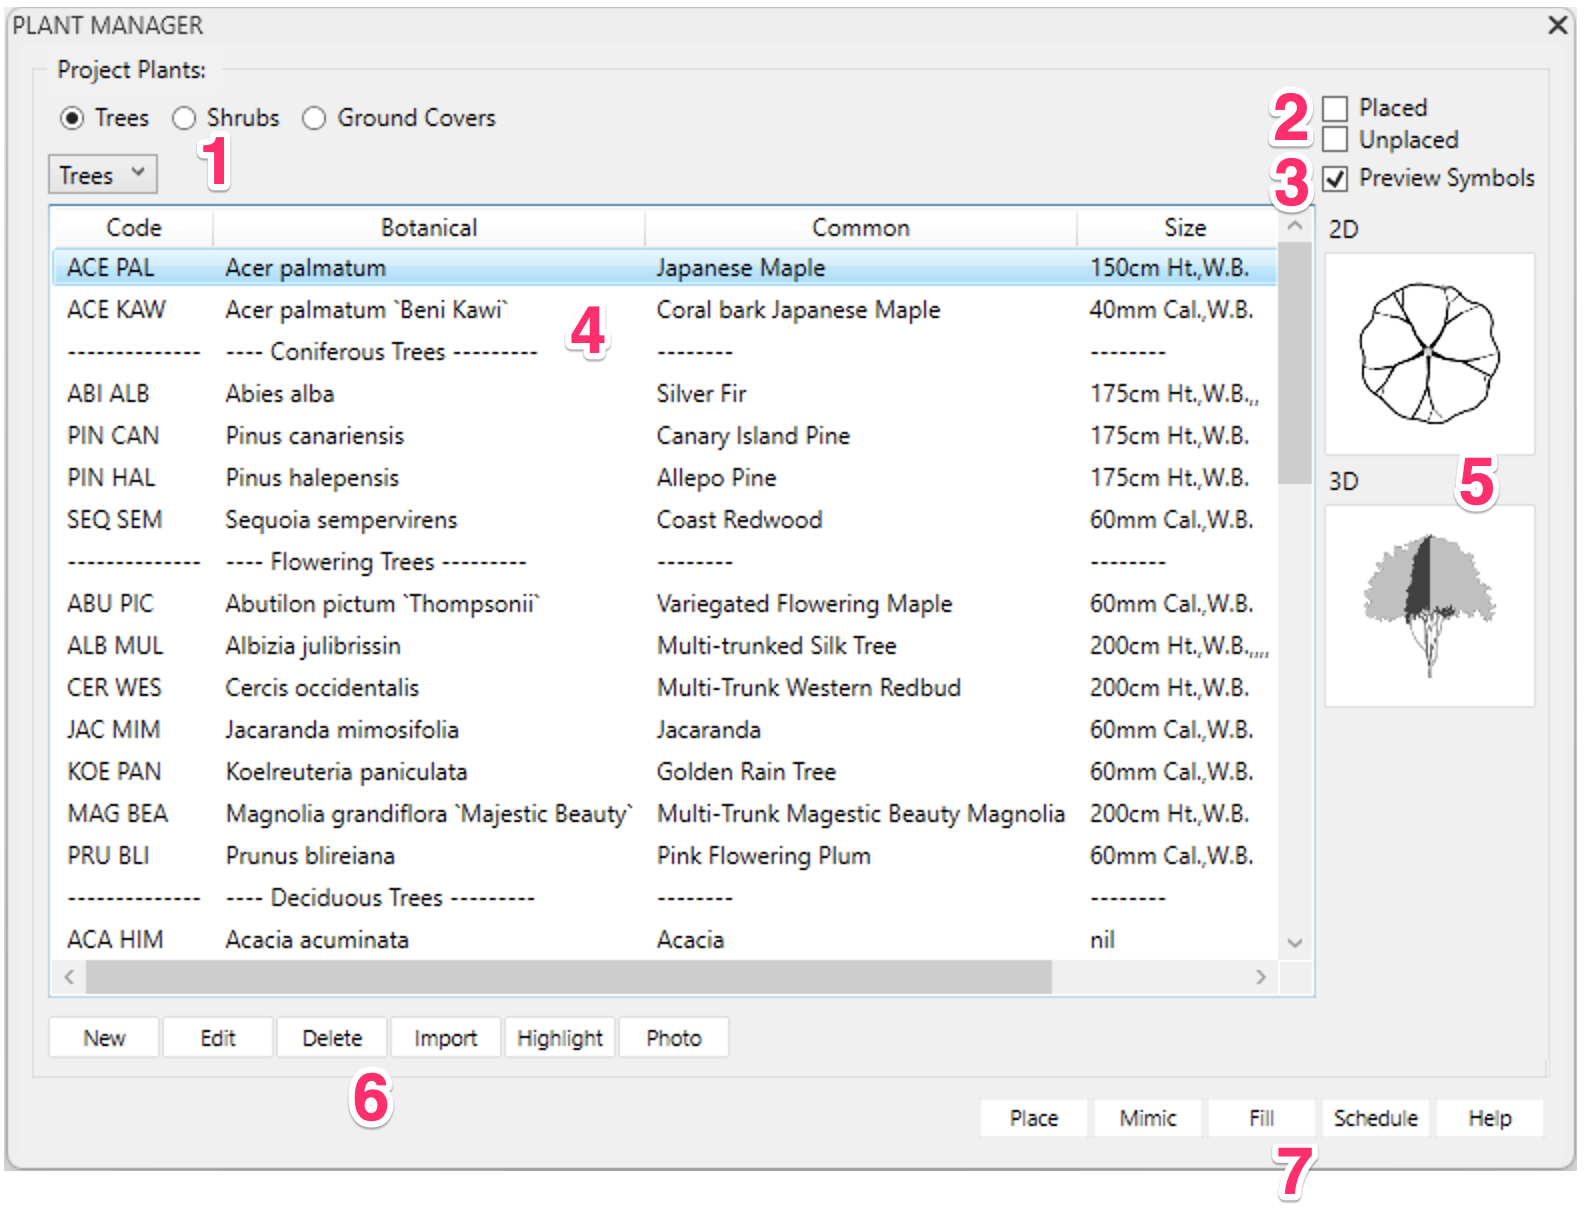
1. Select a plant category.
2. Use these checkboxes to see only placed or unplaced plants in the list.
3. Check this box to preview your plant symbols as you add them.
4. Previews of 2D, 3D, and Color Render versions of the chosen plant symbol. If no symbol is assigned, these previews will be blank.
5. Your plants will be listed in this area as you add them to your project.
6. Buttons allowing you to:
- Add new plants to your project
- Edit plants
- Delete plants from your project
- Import plants from another project or template
- Highlight all instances of a selected plant in your plan
- Place plants in your plan
- Assign a Photo to the selected plant
7. More buttons allowing you to:
- Place plants in your plan
- Mimic a plant in the list onto symbols in your drawing to change the drawing symbols
- Fill a floor or toposolid/sub-division with plants using our Fill with Plants tool
- Create a Plant Schedule
Adding Plants to Your Project
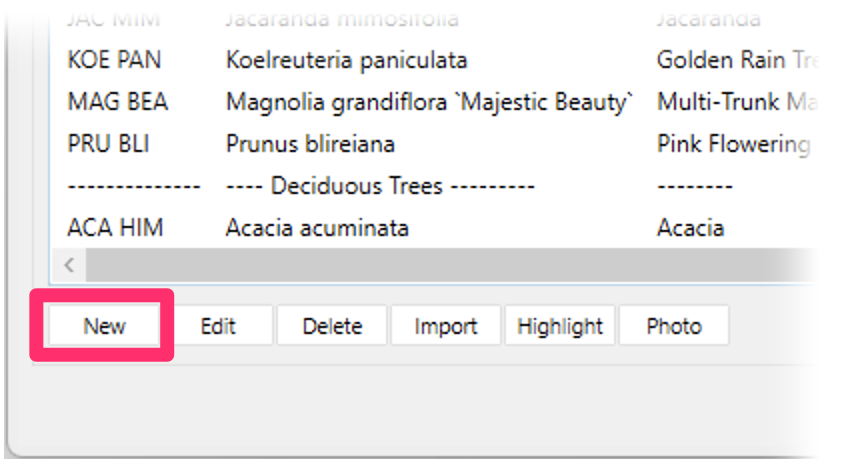
When you're ready to build your plant palette, you'll add plants to your Planting F/X project by clicking New.
See our documentation on adding plants to a project in Revit.
To learn what a Planting F/X project is and how it works, see our documentation on Planting F/X projects in Revit.
Editing Plant Parameter Data & Assigning Symbols to Plants
After you've added plants to your project, you'll need to edit them and assign them with symbols before you can place them in your plan. See our instructions for editing plants in a Revit Planting F/X project.
Placing Plants in Your Plan

After you've added plants to your project, you can click Place to start placing them in your planting plan. See our documentation on placing plants in Revit.
Important: You need to use this Place button or the Land F/X ribbon tools to place, copy, or array plants. The native Revit Copy and Array tools do not copy the object data in a way that our Label and Verify Labels tools can track, resulting in incorrect quantities. Only use Land F/X tools for placing any plants in your plan.
Plant Categories
Project plants are organized into three categories:
- Trees
- Shrubs
- Ground Covers
When you select one of these categories (example: Shrubs), the plants selected for that category will display in the list.

Trees and shrubs are represented by individual symbols (.rfa families) in your Revit project file. Groundcovers are depicted by filled regions, with a single hatch representing a contiguous region containing the same plant. For more information, see our Edit Plant in Revit Planting F/X documentation.
Deleting Plants

Click Delete to delete a plant from your project.
Take care when deleting plants! When you delete a plant, all data associated with that plant, including its symbol, will be deleted from your project.
Related Webinars
Quick video
- Getting Started with Planting F/X for Revit: Start your journey with Revit and our Planting F/X plugin. We also present our roadmap for future development and show off some new features such as automatic rootball placement and some recent additions to our collections of families and label styles. (1 hr 22 min)
- Intro to Planting F/X for Revit Plugin: As always, our goal with this plugin is to bring the planting design learning curve as low as possible. We cover installation, Planting F/X projects, the Plant Manager, plant placement as families or floors, group labels, Verify Labels, instant schedules, and rendering options with our default family library. (1 hr 12 min)
- Revit for Planting Design: We focus on more tools and show how to tackle more complex workflows in Revit with Planting F/X. We go over customizing the defaults, implementing some labeling strategies, editing floor types, and working with multiple views. We also showcase some new tools and review our most recent development progress. (1 hr 3 min)
- Importing Plans into Revit: If you're being asked to bring your design into Revit and you're a landscape architect or irrigation designer, this webinar is for you. We'll cover first steps, basic orientation of Revit, the pros and cons of certain strategies, importing the DWG linework either 2D or Civil 3D and making toposurfaces and floors, and first-step methods for importing your landscape and irrigation plans. (1 hr 5 min)
Troubleshooting
Issue: Revit Plants don’t show up in 3D View, but do show up in site view
Issue: You placed a tree or shrub in 2D view in revit, but the symbol did not appear
Issue: The Plant Manager in Revit is extremely slow to load when you first open it
Issue: LandFX: Your license is invalid and this product has not been activated properly on this system
Issue: Your plants are rendered in color in our Planting F/X for Revit plugin, and they should not be
Issue: "This is not a Land F/X plant" error resulting from missing LAFX parameters on placed plants
Revit® is a restricted trademark of Autodesk®.