
Change Layer Colors
Updated on: October 14, 2024

- Change Layer Colors Overview
- Saving a Backup File of Your Color Settings
- Applying Your Color Settings to the Current Drawing
- Changing Layer Colors for One Client's Projects
- Troubleshooting
The Change Layer Colors tool allows you to make global changes to line colors in a drawing. This feature is useful in converting your office standard colors on a drawing to match a client's or consultant's standards, or vice versa.
Note: For this tool to function correctly on a drawing, the drawing must have all its lines drawn with Color by Layer.
See Change Layer Colors in action! Check out our Detail F/X Overview webinar. The Change Layer Colors demonstration starts at 32:55 in the video.
Change Layer Colors Overview
Open the Layer Colors tool:

F/X Admin ribbon
or type PChangeAllLayerColors in the Command line

F/X Admin pull-down menu
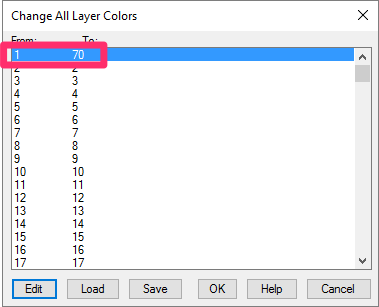
The Change All Layer Colors dialog box will open. Here, you'll see a list of all color numbers from 1 to 255.
Highlight the number of the color you wish to edit in the drawing, then click Edit.


The AutoCAD Select Color dialog box will open.
Select a new color for the color number you selected in the Change All Layer Colors dialog box. In our example, we'll select color number 70, a fluorescent green.
You can now select a Truecolor when selecting a layer color.
Click OK when finished.
Back in the Change All Layer Colors dialog box, the highlighted number will reflect the change you have just made between the From: and the To: columns.
In our example, color number 1 will be changed to color number 70, which we selected above.
Repeat these steps for each color number you want to change.
Saving a Backup File of Your Color Settings
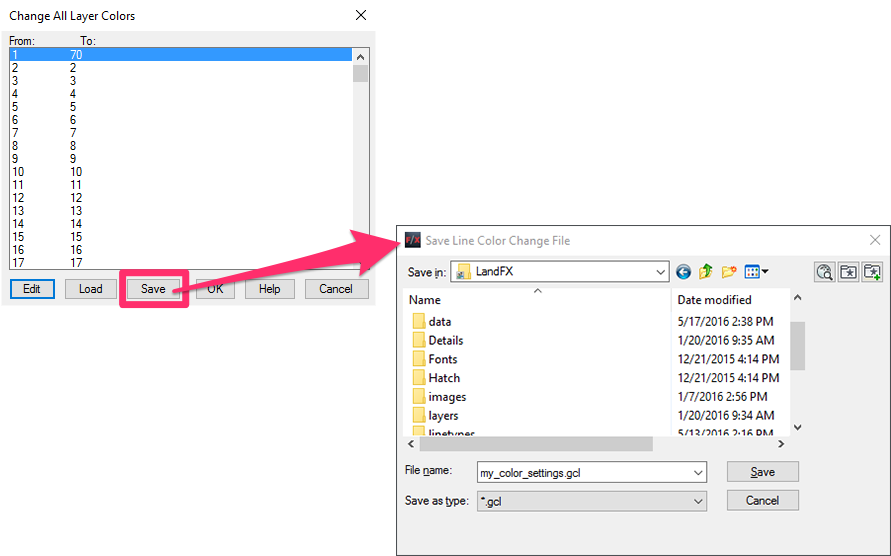
When finished, you may want to save your color settings. If so, click Save, and save the file in the location of your choice. The file will have a GCL file extension.
Applying Your Color Settings to the Current Drawing

Once you're finished changing the colors to suit your needs, click OK.
All changes you've made will be applied to the current drawing.
Loading Your Saved Color Settings
If you've saved previous configurations of line color changes, you can load those settings directly from the Change All Layer Colors dialog box.
Click Load, and navigate to the GCL file where you saved your color settings.

Back in the Change All Layer Colors dialog box, you'll see the color settings from the saved file.
Click OK to apply the saved color settings to the current drawing.
Changing Layer Colors for One Client's Projects
The Change Layer Colors tool is designed to apply a general standard that will apply to your office's entire Preference Set. But what do you do when a particular client is extremely particular about line colors?
We usually recommend creating a separate Preference Set for a client that has specific demands for the appearances of plant labels, leader arrows fonts, etc. However, in the case of clients who set a certain standard with layer/line colors, the Change Layer Colors tool is your best ally. When creating a project for such a client, you would work in your normal layer colors. Then, at the time of submittal, you'll use Change Layer Colors to convert from your layer colors to those of the client.
You can also use our BatchMan tool to carry out this process for a large number of drawing files at one time.