Manual MySQL Installation
- Check For and Uninstall Previous Versions of MySQL
- Download and Install MySQL
- Error 1067 – When Starting Service
The MySQL database contains all the dynamic content, such as plant symbols and irrigation components, on the Land F/X server for Local Data users.
If your installation of our software fails and you have Local Data, you may need to install MySQL manually. Don't know whether you have Local or Cloud Data? Find out here.
Note: When you install MySQL manually, you MUST install it on the actual computer from which you are performing the installation. Do not, for example, attempt to install MySQL to your office server from a different workstation.
- Where is your LandFX folder? In most cases, it will be on your C: drive (C:/LandFX), which is our default installation location. However, you'll need to confirm the location of the LandFX folder on your computer before you can install MySQL successfully.
- Do you already have a version of MySQL installed on your computer? To find out, see Check for and uUninstall previous versions of MySQL below.
Step 1: Check for and uninstall previous versions of MySQL
Before you can install the latest version of MySQL, you'll need to uninstall any previous versions of MySQL from your computer.
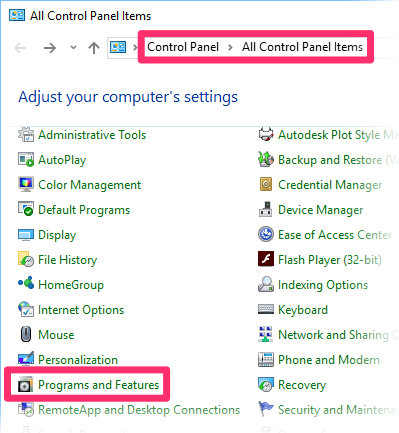
1A. Open your computer's Control Panel, and select Programs and Features.


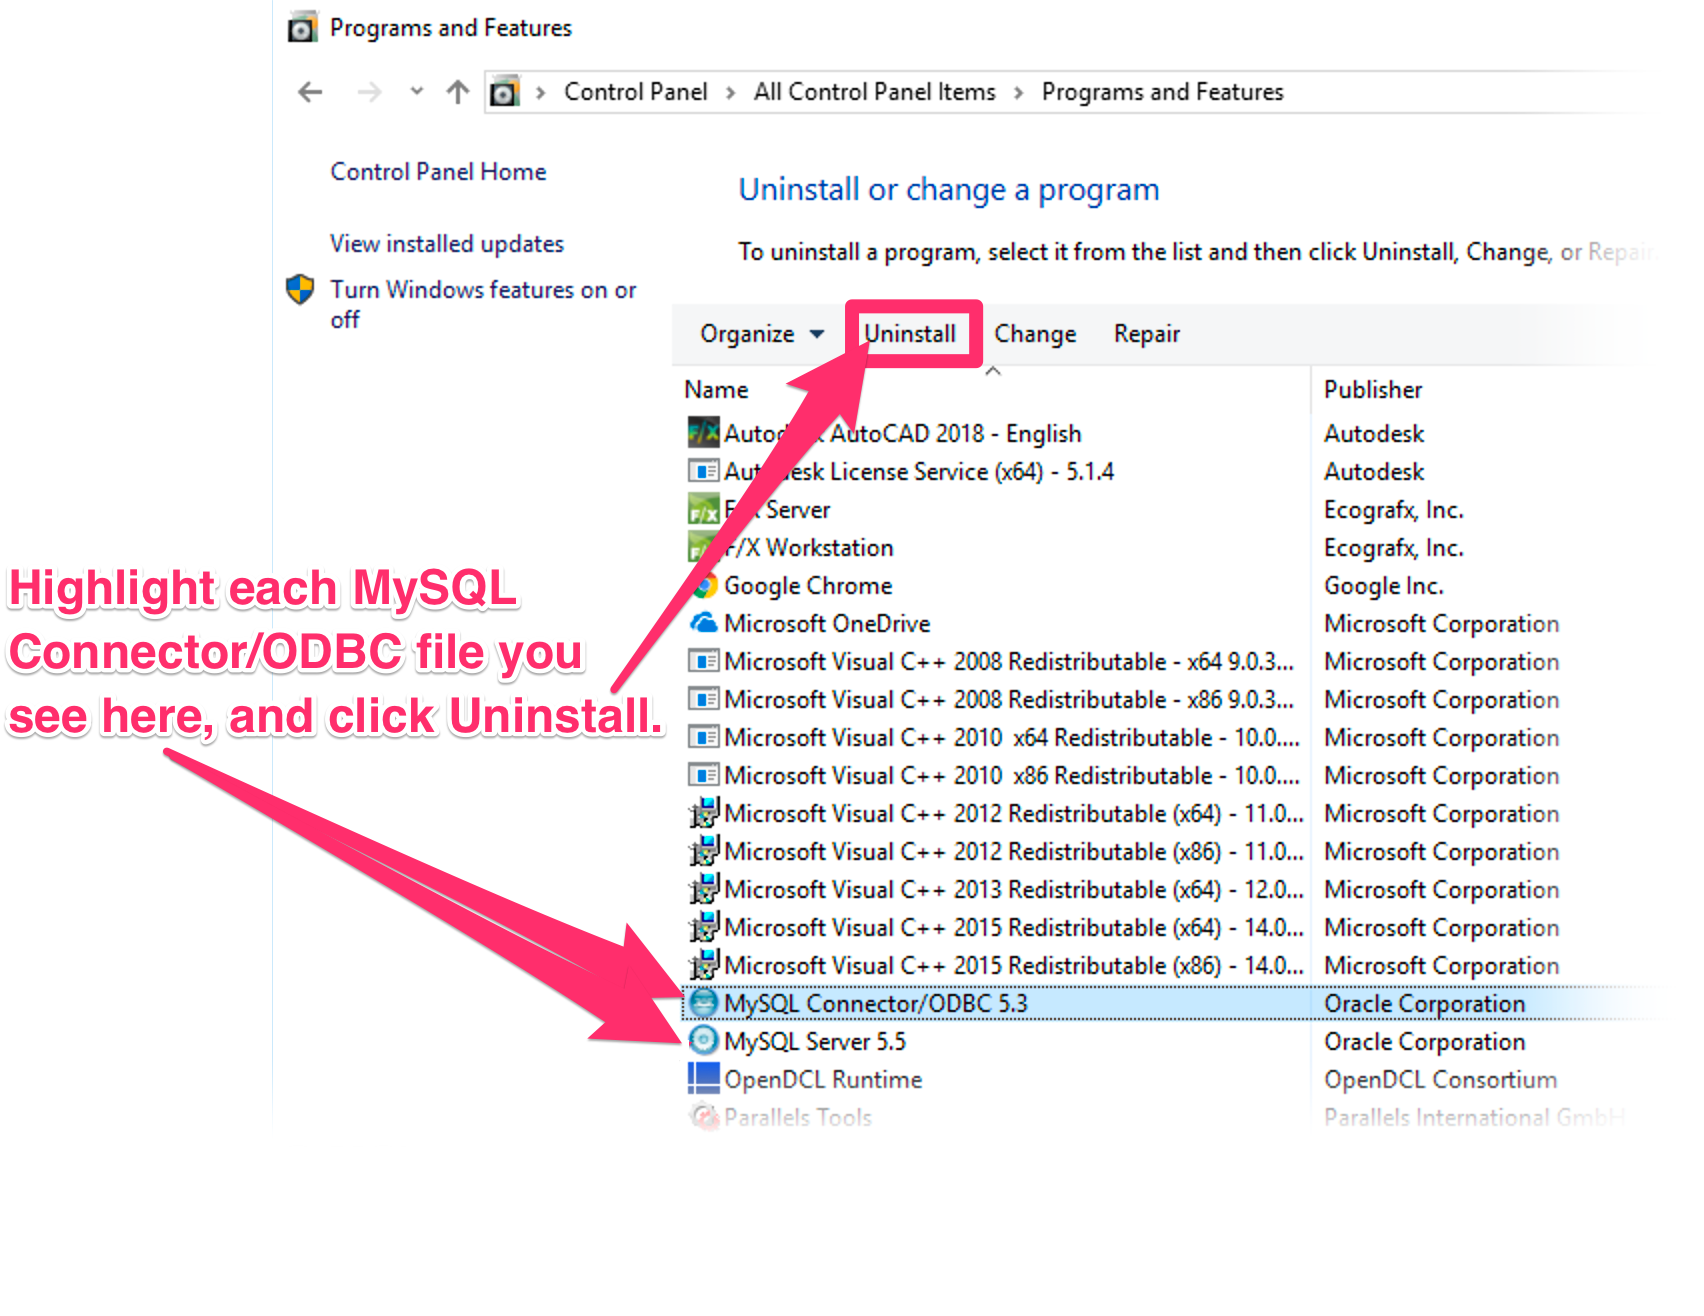
1B. Uninstall all MySQL Connector/ODBC files you see here. You might see different versions of these files, such as 5.1, 5.3, etc.
Click each ODBC Connector file, than click Uninstall. Follow the steps to uninstall each of these files, including MySQL Server.
Once you've uninstalled all versions of MySQL, you'll be ready to complete the steps to download and install the latest version of MySQL.
Step 2: Download and install MySQL
2A. Download the MySQL Installer. Right-click the following link, then select Save Link As or Save Target As. Then download the installer to your desktop.
2B. On your desktop, find the MySQL installer file you just downloaded. Double-click the installer file to begin the installation.
2C. The MySQL Installation Wizard will open.
Click Next to begin the installation.


2D. If you accept the downloading terms, click the I Accept the terms in the license agreement box, and click Next.
2E. Click the Custom button in the next screen and click Next.


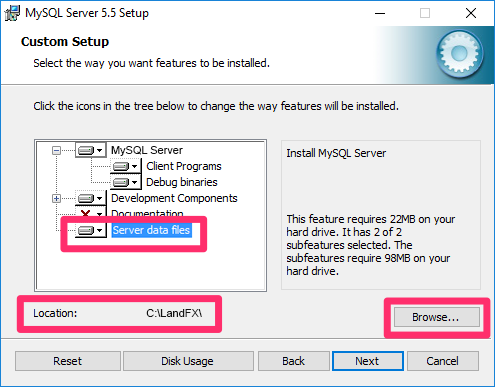
2F. Select MySQL Server from the list of folders. Confirm that the Location for this option is set to C:\Program Files\MySQL\MySQL Server 5.5\
Do you see a different folder path here?
If so, you'll need to click Browse and create the correct folder path.


In the same dialog box, highlight Server data files. Click Browse, and navigate to your LandFX folder. In most cases, the location will be C:/LandFX.
You must set this location to the LandFX folder on the computer on which you are performing the MySQL installation – NOT your office server.
2G. Click Next.


2H. Click Install.
If asked Do you want to allow this app to make changes to your device? click Yes.
2i. Verify that the option to Launch the MySQL Instance Configuration Wizard is checked. Click Finish.


2J. Click Next.
If you already have another version of MySQL installed on your computer, you'll see a list of MySQL Server instances to alter. Select the version of MySQL you are currently installing (in our example: MySQL Server 5.5). Then click Next.
2K. Select Standard Configuration, then click Next.


2L. Select Install As Windows Service, then click Next.
You may see the following error message informing you that a Windows service with the name MySQL already exists.

If so, you'll need to click OK and then uninstall the earlier version of MySQL using your Control Panel.
If you do need to uninstall MySQL, you can proceed with the following step once you've completed the uninstallation.

2M. In the next screen, make sure the Modify Security Settings box is checked.
The root password is landfx. Type landfx in the New root password field. Then type landfx in the Confirm field. Click Next.
2N. Click Execute to proceed with the installation.


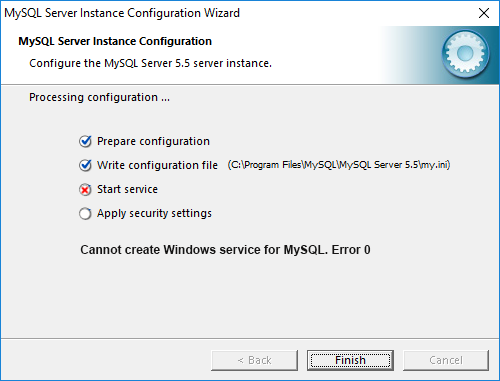
Did the installer fail to start service at this point, generating an error message similar to the one pictured to the left?
If so, here's how to resolve the issue.

2o. Confirm that you've received the message Configuration file created. Click Finish to complete the installation.
2P. Open your Windows Start menu. Select All Programs, then navigate to MySQL Command Line Client.


When prompted for a password, type landfx and press Enter.
This password is case sensitive and must be typed in all lowercase.
You'll see a command prompt displaying mysql>.
Copy and paste the following commands at the command prompt, one at a time, each followed by the Enter key.
CREATE DATABASE landfx;
(then press Enter)
CREATE USER 'ODBC';
(then press Enter)
GRANT ALL ON landfx.* TO 'ODBC';
(then press Enter)

If installing to a laptop, type the following command:
GRANT ALL ON landfx.* to ''@'localhost'; (NOTE: '' is not a double quote – it is two single quotes.)
Firewall exception
Make sure to open port 3306 on your Firewall so your computer will allow requests to connect to the MySQL database. You can do so by creating a firewall exception for Port 3306.
Error 1067 – When Starting Service
Did you receive an Error 1067 message when attempting to start your MySQL service? If so, here's how to resolve the issue.


