Manual Installation of Land F/X Workstation
Updated on: September 23, 2024
- Prerequisites
- Step 1: Configure your database connection
- Step 2: Download the latest Land F/X menus
- Step 3: Create the necessary registry keys and string values
- Step 4: Download and run the Chromium Runtime installer
- Step 5: Install OpenDCL
- Step 6: Update the Support Path
- Step 7: Load your Land F/X menus
- Step 8: Update your Land F/X Text Styles
The following steps are only for IT to use in the event that our regular F/X Workstation installer has failed. If you need to simply install the Land F/X Workstation component, follow our steps to download and run the latest automatic F/X Workstation Installer.
The automatic F/X Workstation installer, linked above, should repair your Land F/X installation in the vast majority of cases. If the installer fails in some way, you'll need to bypass the Workstation Installer and use the manual installation steps outlined below.
Prerequisites
To complete this installation, you will need:
The location of your LandFX folder
The name of your office server (if you have one).
If you are unsure of either of these items, please contact your IT administrator.
Step 1: Configure your database connection
In this first step, you'll set up your connection to our database – a process that will depend on whether you have a Single-User or Multi-User installation of Land F/X.
Complete the following steps if you have a Single User installation with either Local or Cloud Data. (If you have Cloud Data, the SQLite database will prepare you in case you need to switch to Local Data temporarily.)
1A. Use the link below to download the necessary SQLite database files. Save the linked zip file to a location where you can easily locate it, such as your desktop or Downloads folder.
1B. Locate and double-click the LandFX-SQLite.zip file you just downloaded. the file will unzip, and you'll be left with a folder named LandFX-SQLite.
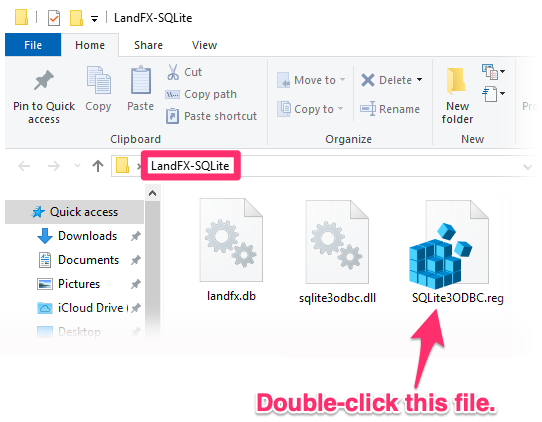
1C. Open the folder LandFX-SQLite. It should contain the following three files:
- landfx.db
- sqlite3odbc.dll
- SQLite3ODBC.reg
1D. Drag the file sqlite3odbc.dll into the folder C:/Windows/System32:
Don't see one or more of these folders? You'll need to create them.


1E. Drag the file landfx.db into the folder C:/ProgramData/LandFX/data.
Important: If you don't see the folder ProgramData on your C: drive, follow our steps to view hidden files and folders. You'll only be able to see this folder if you have your hidden files and folders turned on.
Still don't see one or more of these folders? You'll need to create them.
1F. Double-click the file SQLite3ODBC.reg.
This step will configure your system to use the new SQLite database. Once the configuration is complete, move on to Step 2.
Close
If you have a Multi-User installation using an office server or shared online folder, follow our steps to configure the data source (ODBC).
Don't already have the ODBC data source installed? If not, follow our steps to reinstall the MySQL Connector (ODBC Driver).
Close
Step 2: Download the latest Land F/X menus
2A. Download the latest Land F/X menus from the following link.
2B. Double-click the file you just downloaded. This step will unzip the file and create a folder in the same location.
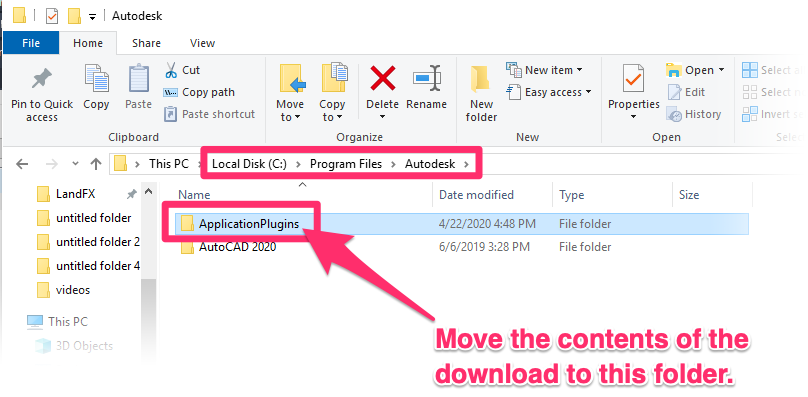
2C. Move that folder's contents to the location C:\Program Files\Autodesk\ApplicationPlugins on your computer.
You can now proceed to the next step: Download and run the Chromium Runtime installer.
Step 3: Create the necessary registry keys and string values
3A. Create the following registry key:
HKEY_LOCAL_MACHINE\Software\Ecografx\Land F/X
Then create the following string value within the key path you just created:
InstallPath
How to add a registry key and string value
Finally, edit this new InstallPath string value by following our steps to edit a reg key or string value. In the Value Data text field, type the path to your F/X Server installation.
3B. Now create the following RegKey:
HKEY_LOCAL_MACHINE\Software\Wow6432Node\Antwise Solutions\AntView
Then create the following string value within the key path you just created:
InstallPath
Edit this new InstallPath string value and add the following text to the Value Data text field:
C:\Program Files\Autodesk\ApplicationPlugins\landfx.bundle\Contents\Resources\antview
If your Program Files are not on your C: drive, you'll need to update this path accordingly.
3C. Register the AntView OCX with Windows:
Run the cmd prompt as Administrator, then run the following commands:
cd %ProgramFiles%\Autodesk\ApplicationPlugins\landfx.bundle\contents\resources\antview\Win64
regsvr32 -i AntView.ocx
Step 4: Download and run the Chromium Runtime installer
4A. Click the following link to download the Chromium Runtime installer.
4B. Locate and double-click the file MicrosoftEdgeWebView2RuntimeInstallerX64.exe you just downloaded. Chromium Runtime will install on your computer.
You can now proceed to the next step: installing OpenDCL.
Step 5: Install OpenDCL
Click the following link to download the OpenDCL driver:
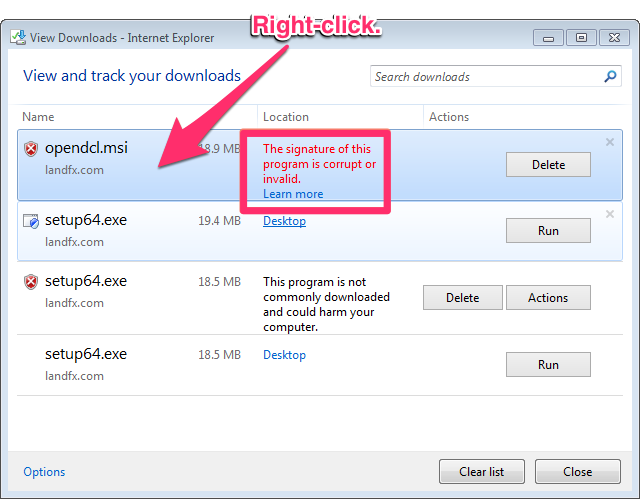
This step will create a file in the location you chose for the download. Double-click that file to install OpenDCL. It's an extremely simple installation process.
Error Message: The signature of this program is corrupt or invalid

Once you've installed the OpenDCL library, you can move on to the next step: updating the Support Path.
Step 6: Update the Support Path
6A. Open the Options dialog box:

Manage ribbon, Options button
type Options in the Command line
right-click in the Command line and select Options from the menu

Tools pull-down menu
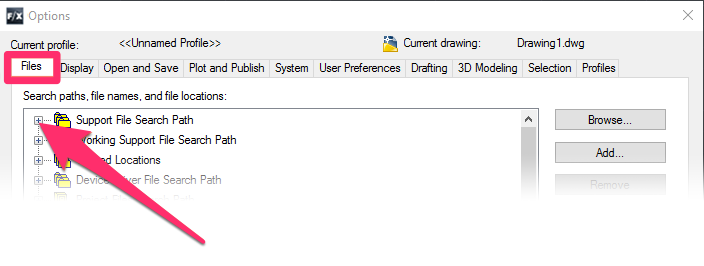
6B. In the Options dialog box, select the Files tab. In most cases, the Support File Search Path will be the top entry in the list of files.
Expand the Support File Search Path by clicking the plus (+) sign (as pictured to the right).
6C. The Support File Search Path will expand, and you'll be able to see all folders it currently includes.
If you see any existing Land F/X entries in this list (for example, any entries beginning with C://Program Files/LandFX), you'll need to delete them now by highlighting them and clicking Remove.
Take care not to remove any other entries from the Support File Search Path.

Once you've deleted any existing Land F/X entries from the Support File Search Path, you can continue to the next step.

Once you're sure the Support File Search Path contains no Land F/X entries, click Add, then click Browse.
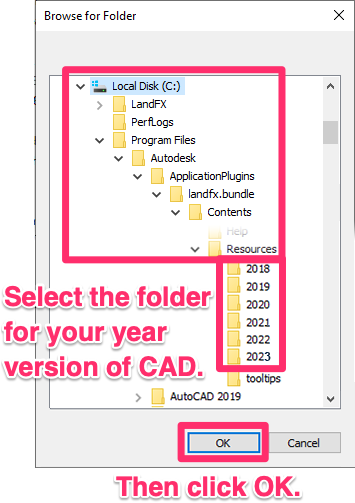
6E. Navigate to the following folder path:
ProgramFiles\Autodesk\ApplicationPlugins\landfx.bundle\Contents\Resources\20xx*
*20xx represents your year version of CAD.
Select the appropriate folder for your version of CAD within this path – for example, 2020 for AutoCAD or F/X CAD 2020.
Then click OK.
Before you can complete this step, you'll need to verify that you (or any users whose installation you are configuring) have read/write permissions for this folder path.
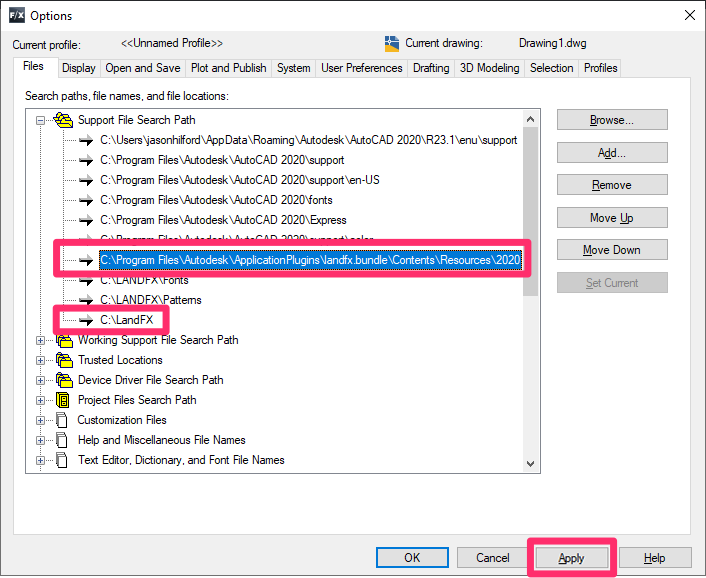
6F. Click Add and then Browse again, and navigate to your LandFX folder to add it to the Support File Search Path.
Your LandFX folder might be on the server in a large office, or on your local hard drive (usually your C: drive) for a laptop, standalone, or home installation.
Both folder paths you added should now appear in the Support Path as pictured to the right.
Don't see an entry for the LandFX folder in the Support File Search Path?
Solution: Download the latest installer, and run it from your LandFX folder. After running the installer, double-check that these paths are correct.
6G. Click OK to save your changes.
Once you've added your LandFX folder to the Support File Search Path, you can proceed to the final step: Loading your menus from their new location.
Step 7: Load your Land F/X menus from the new local location you set up above
You can now load your Land F/X menus. When you load the menus, navigate to the file location you set up in Step 5 above.
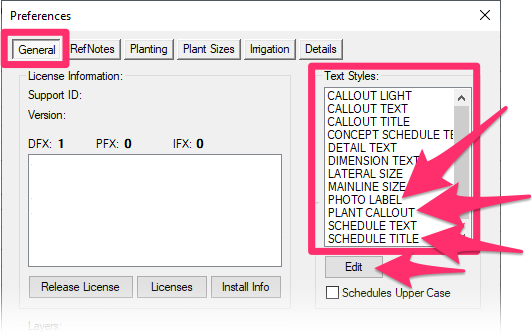
Step 8: Update your Land F/X Text Styles
Follow our steps to customize the Land F/X Text Styles, selecting your chosen fonts for the following Text Styles:
- Schedule Title
- Plant Callout
- Photo Label
This step is necessary because we are unable to include specific proprietary files, which are bundled in the standard install, in these manual steps.
Your installation should now be complete.