
Schematic Irrigation Troubleshooting
Updated on: August 05, 2022
Quick video
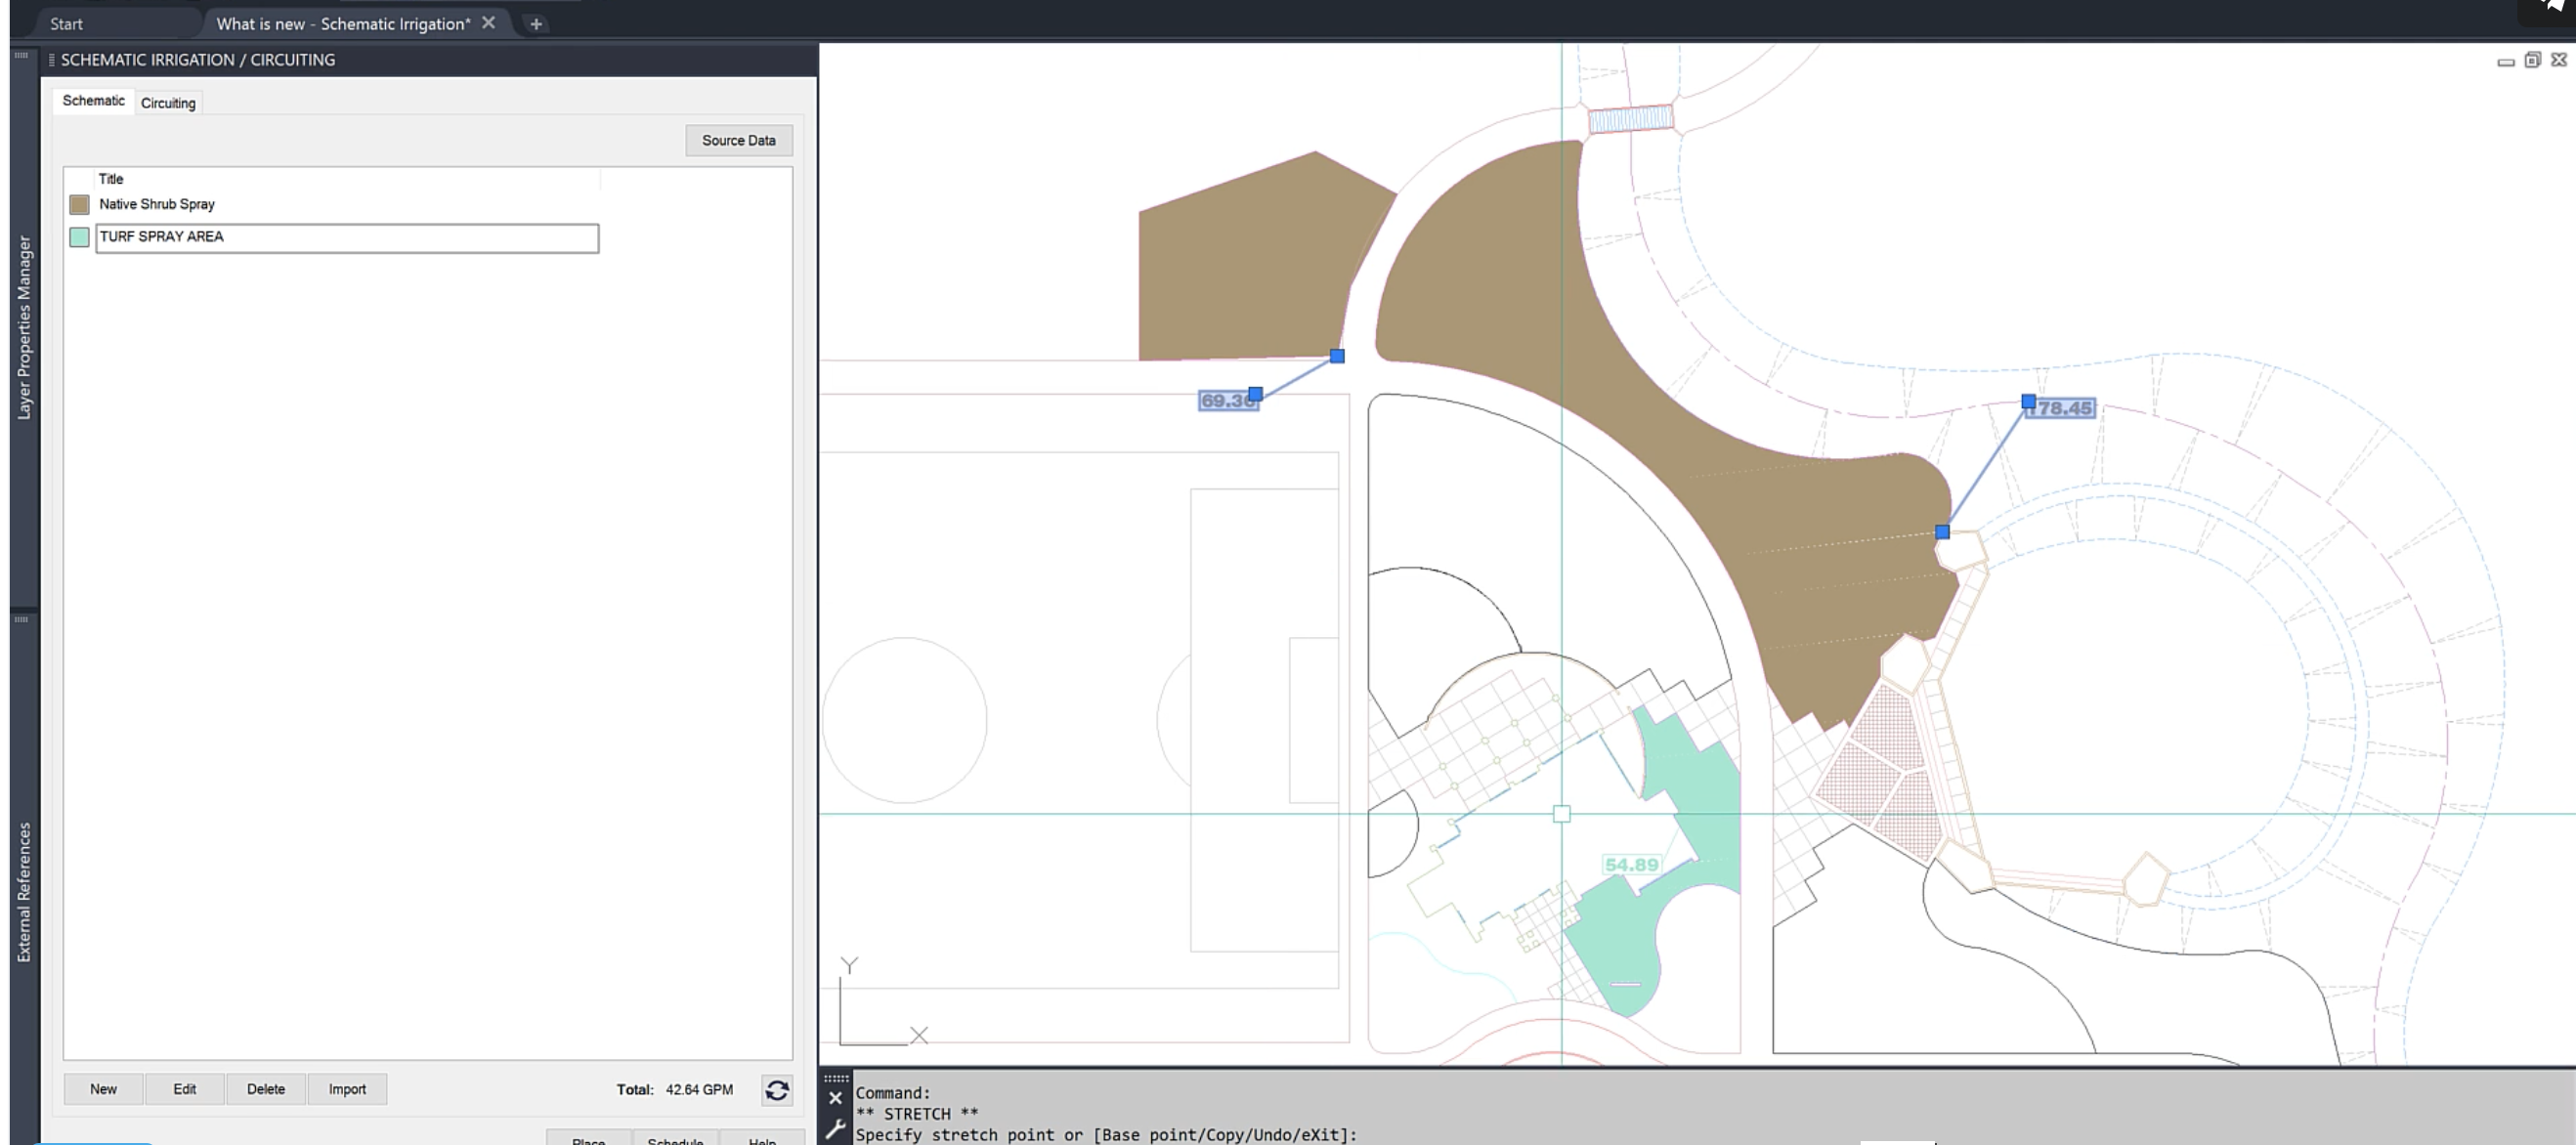
Issue
A Schematic Irrigation area in your drawing is not behaving correctly. For example, flows to some Schematic zones may not be dividing between valves properly.
Cause
In Schematic areas, you essentially have one thing to troubleshoot: the bounding polyline. Chances are, an issue with that polyline is causing the Schematic area to function incorrectly.
Solution
Initial Troubleshooting
If something seems to be going wrong with Schematic, your first step should be to draw a rectangle off to the side and place a Schematic area there. Does it work correctly in the test rectangle? If so, you can be sure the problem is resulting from a problem with your polyline!
Correcting the Issue
Here's the quick and easy fix: Copy your polyline to the side, and use the BOUNDARY command on it:
Type BOUNDARY in the Command line and press Enter.
The Boundary Creation dialog box will open.
Click OK.

The Command line will prompt you to Pick internal point. Click within the copied polyline. AutoCAD will turn it polyline into a new, closed boundary.

In some cases, that re-created boundary will work and be perfect. In other cases, the BOUNDARY command will give you the following error message:
A closed boundary cannot be determined.
If the BOUNDARY Command Gives You This Error ...
It's time to zoom in and investigate your bounding polyline. Chances are, the issue is arising because it's not completely closed.
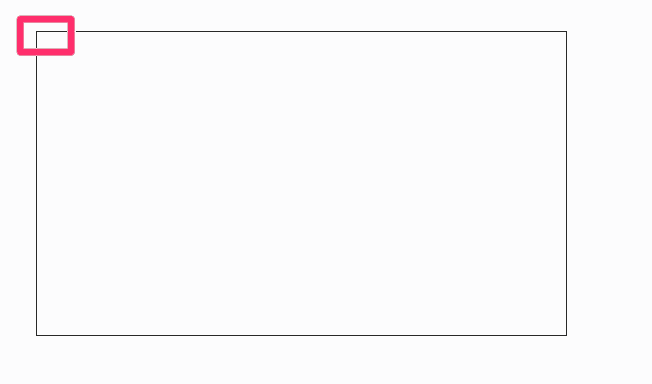
Here's an example: The rectangle pictured to the right may appear to be closed.
If we were to see the error A closed boundary cannot be determined when running the BOUNDARY command, we'd know it's time to zoom in and check the polyline.
Let's start with the top left corner.
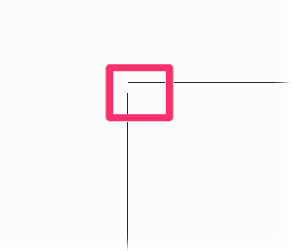
When we zoom in, we can see that the polyline is not actually closed.
This is what happens when a designer "eyeballs" a polyline closed rather than using the CLOSE command.
To correct this issue with your Schematic zone, you'll need to close the bounding polyline:
Right-click the polyline boundary to open the menu pictured to the right.
Select the Polyline option from the menu, then select Close from the submenu.
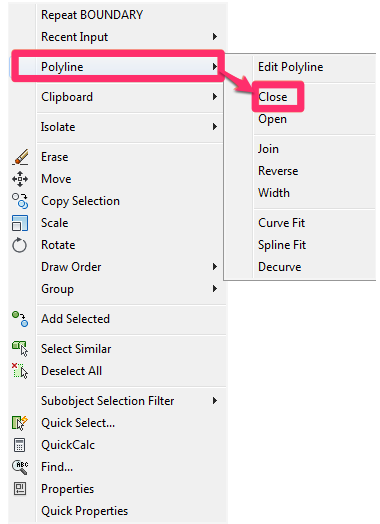
The bounding polyline will close. Your Schematic area should now work correctly.
To prevent this issue in the future – not only for Schematic Irrigation, but for any CAD function that requires a closed polyline, always use the CLOSE command when drawing a closed polyline (type C in the Command line and press Enter). You can now be sure that the polyline is properly closed.