
Site Amenities Manager: Planting F/X for SketchUp Plugin
- Site Amenities Manager Overview
- Adding Site Amenities to Your Project
- Editing Site Amenity Data and Assigning SketchUp Components
- Placing Site Amenities in Your Plan
- Deleting Site Amenities
- Importing Site Amenities from Another Project
- Highlighting Site Amenities
- Mimic Tool
- Placing a Site Amenities Schedule
The Site Manager in our Planting F/X for SketchUp Plugin is a project palette of site amenities listed with all their data. It's your hub for your project's site amenity data.
To learn what a Planting F/X project is and how it works, see our Planting F/X projects in SketchUp documentation.
Site Amenities Manager Overview
Open the Site Amenities Manager:

LandFX toolbar, Site Amenity Manager button
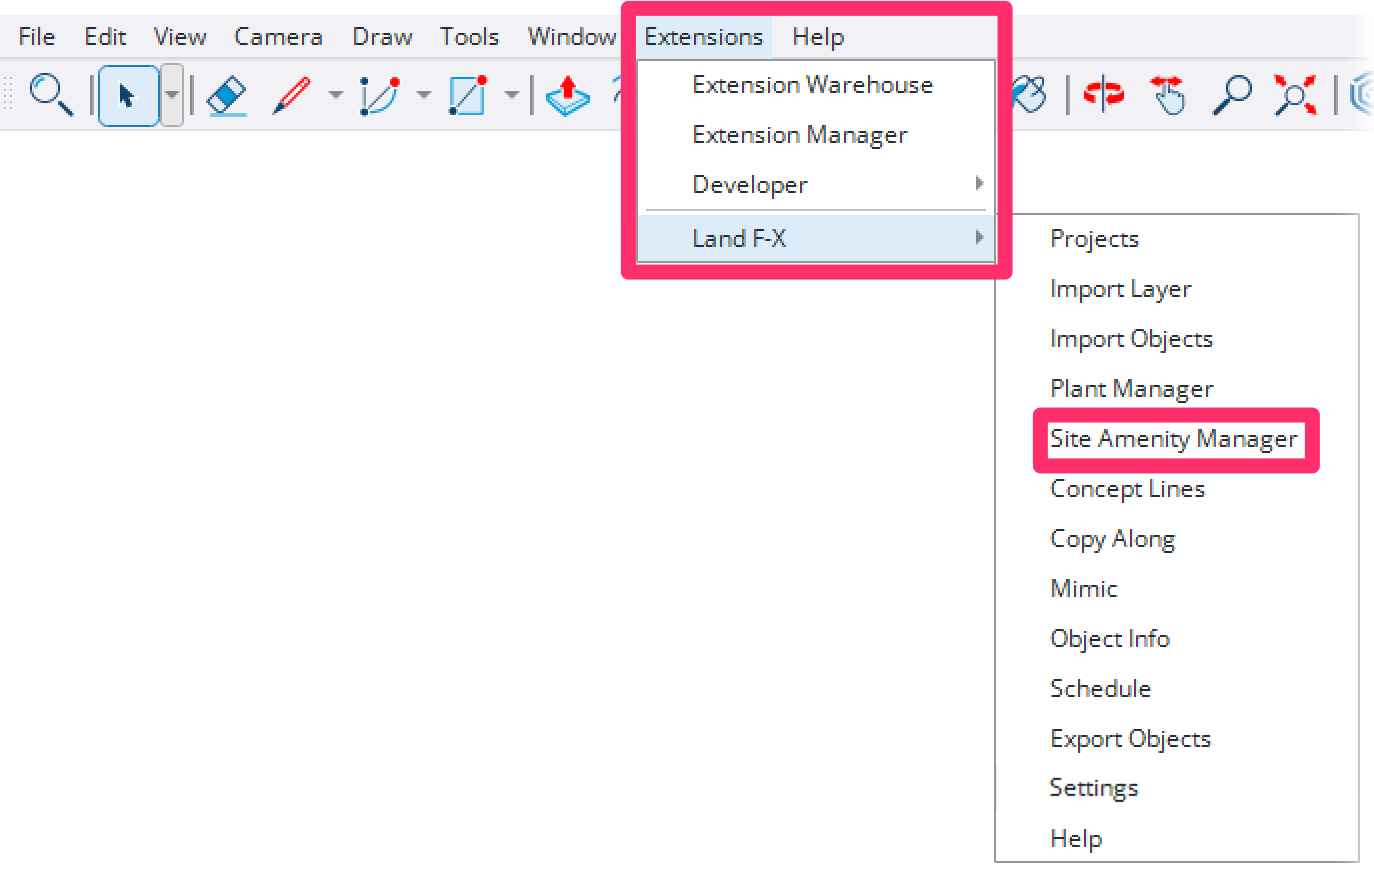
Land-FX menu, Site Amenity Manager option

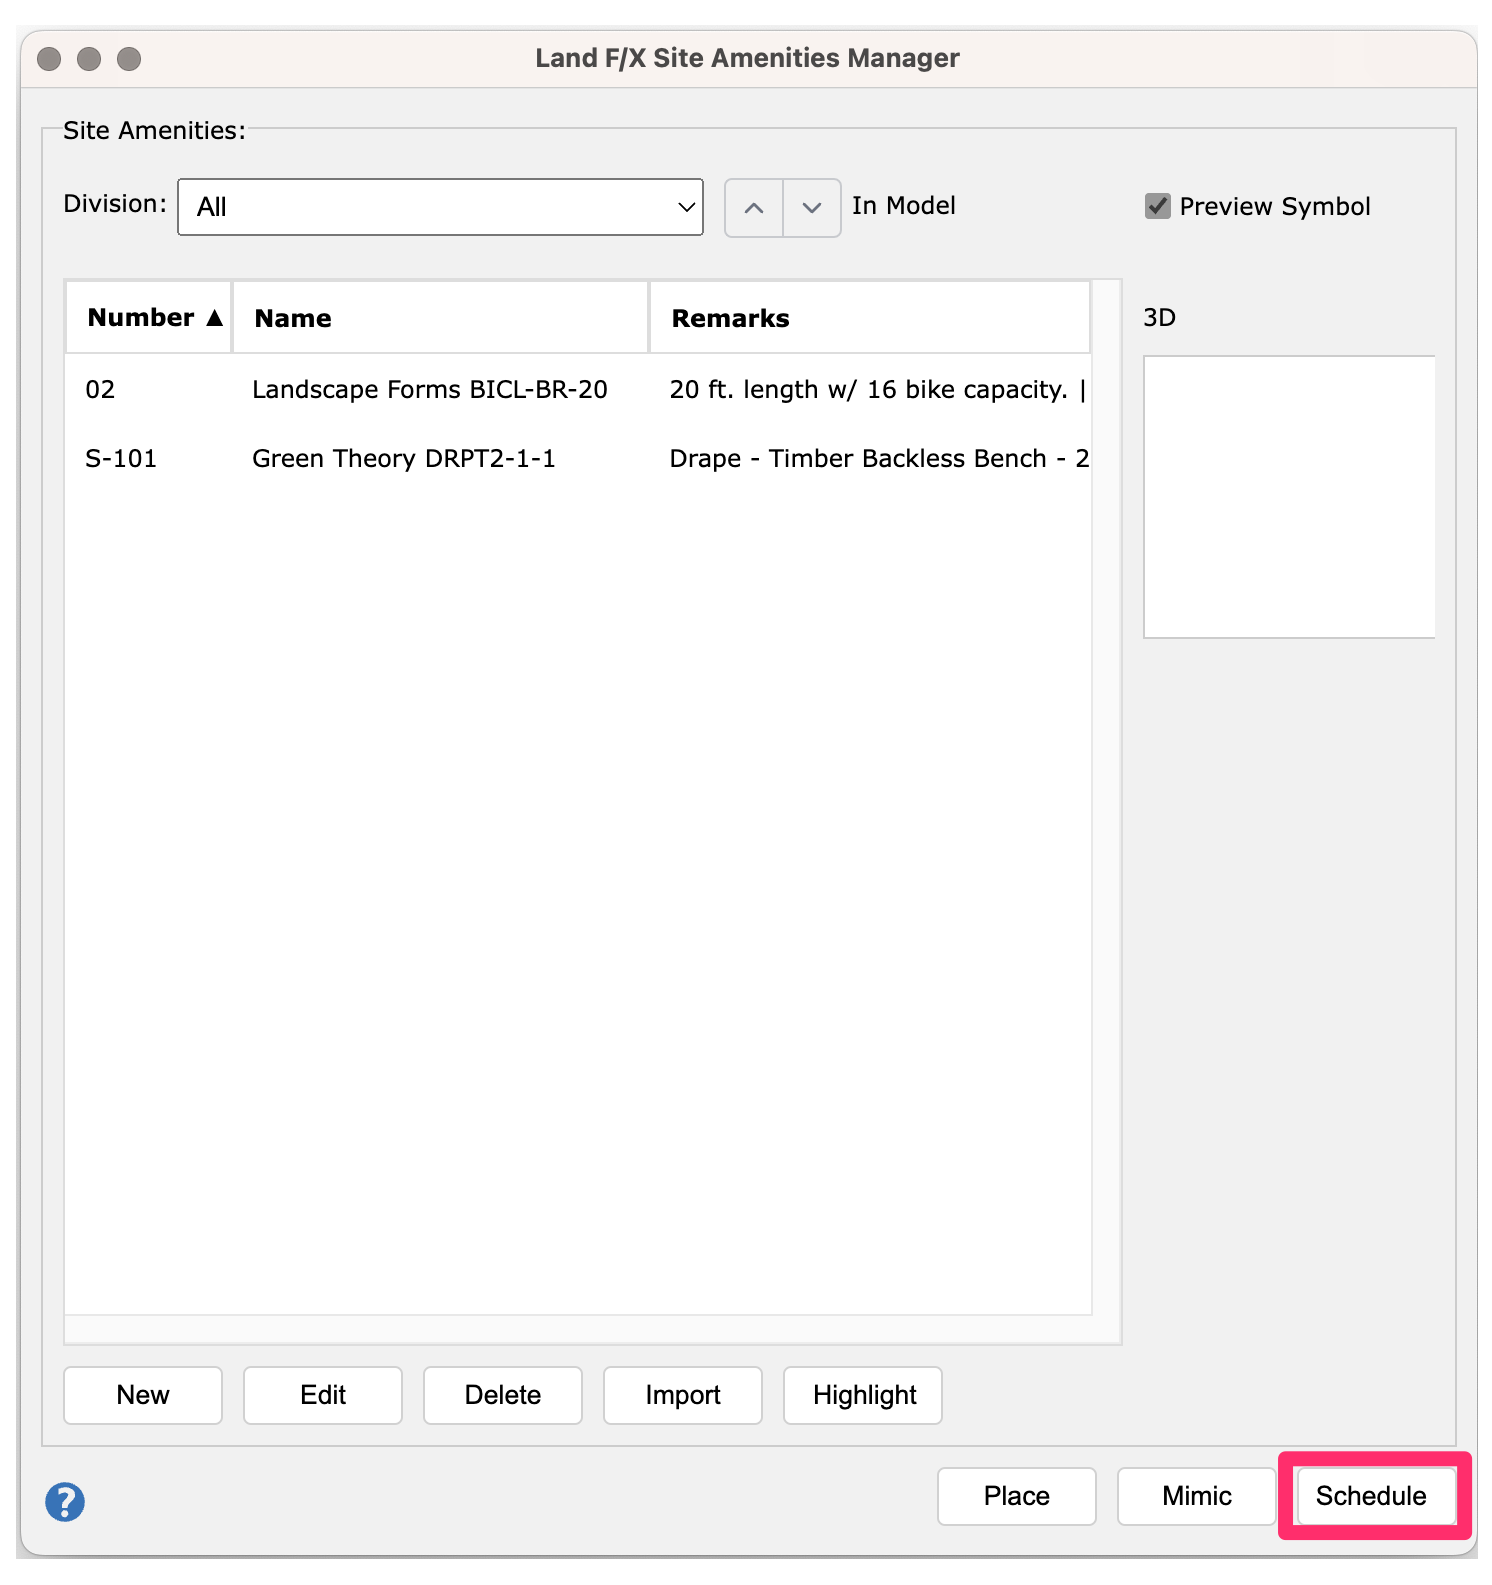
1. Use the drop-down menu to filter by a particular division. Only site amenities of the selected division will be shown in the list. Select All to show all site amenities, regardless of division.
2. Use the In Model buttons to filter by site amenities that have or have not been placed in your model.
3. Check the Preview Symbol box to show or hide the thumbnail preview of the selected site amenity.
4. The main section of the Site Manager is the site amenity list. Each row represents a site amenity in your project. Each site amenity is assigned three columns of data:
- Number
- Name
- Remarks
Click a column header once to sort the site amenity list by that column data in ascending order. Click the same column header a second time to sort the site amenity list by that data in descending order.
Click and drag the border lines between column headers to resize the columns.
5. A thumbnail image of the selected site amenity’s SketchUp component is shown on the right. If no site amenity is selected, this thumbnail will be blank. If the selected site amenity has no SketchUp component assigned, a gray + symbol will be displayed here.
If the selected site amenity has a SketchUp component assigned but it cannot be found, a broken image icon will be displayed here.
6. Buttons allowing you to:
- Add New site amenities to your project More information
- Edit the selected site amenity More information
- Delete the selected site amenity More information
- Import site amenities from another project More information
- Highlight placed instances of the selected site amenity More information
7. More buttons allowing you to:
- Place the selected site amenity More information
- Copy the selected site amenity using our Mimic tool More information
- Place a Site Amenities Schedule More information
Adding Site Amenities to Your Project
When you're ready to build your plant palette, add plants to your Planting F/X project by clicking New.
See our documentation on adding site amenities to a project in SketchUp documentation for more information.

Editing Site Amenity Data and Assigning SketchUp Components

To edit the data or assigned SketchUp component of a site amenity in your project, select it in the Site Amenity Manager list and click Edit.
See our documentation on our Object Info tool for more information.
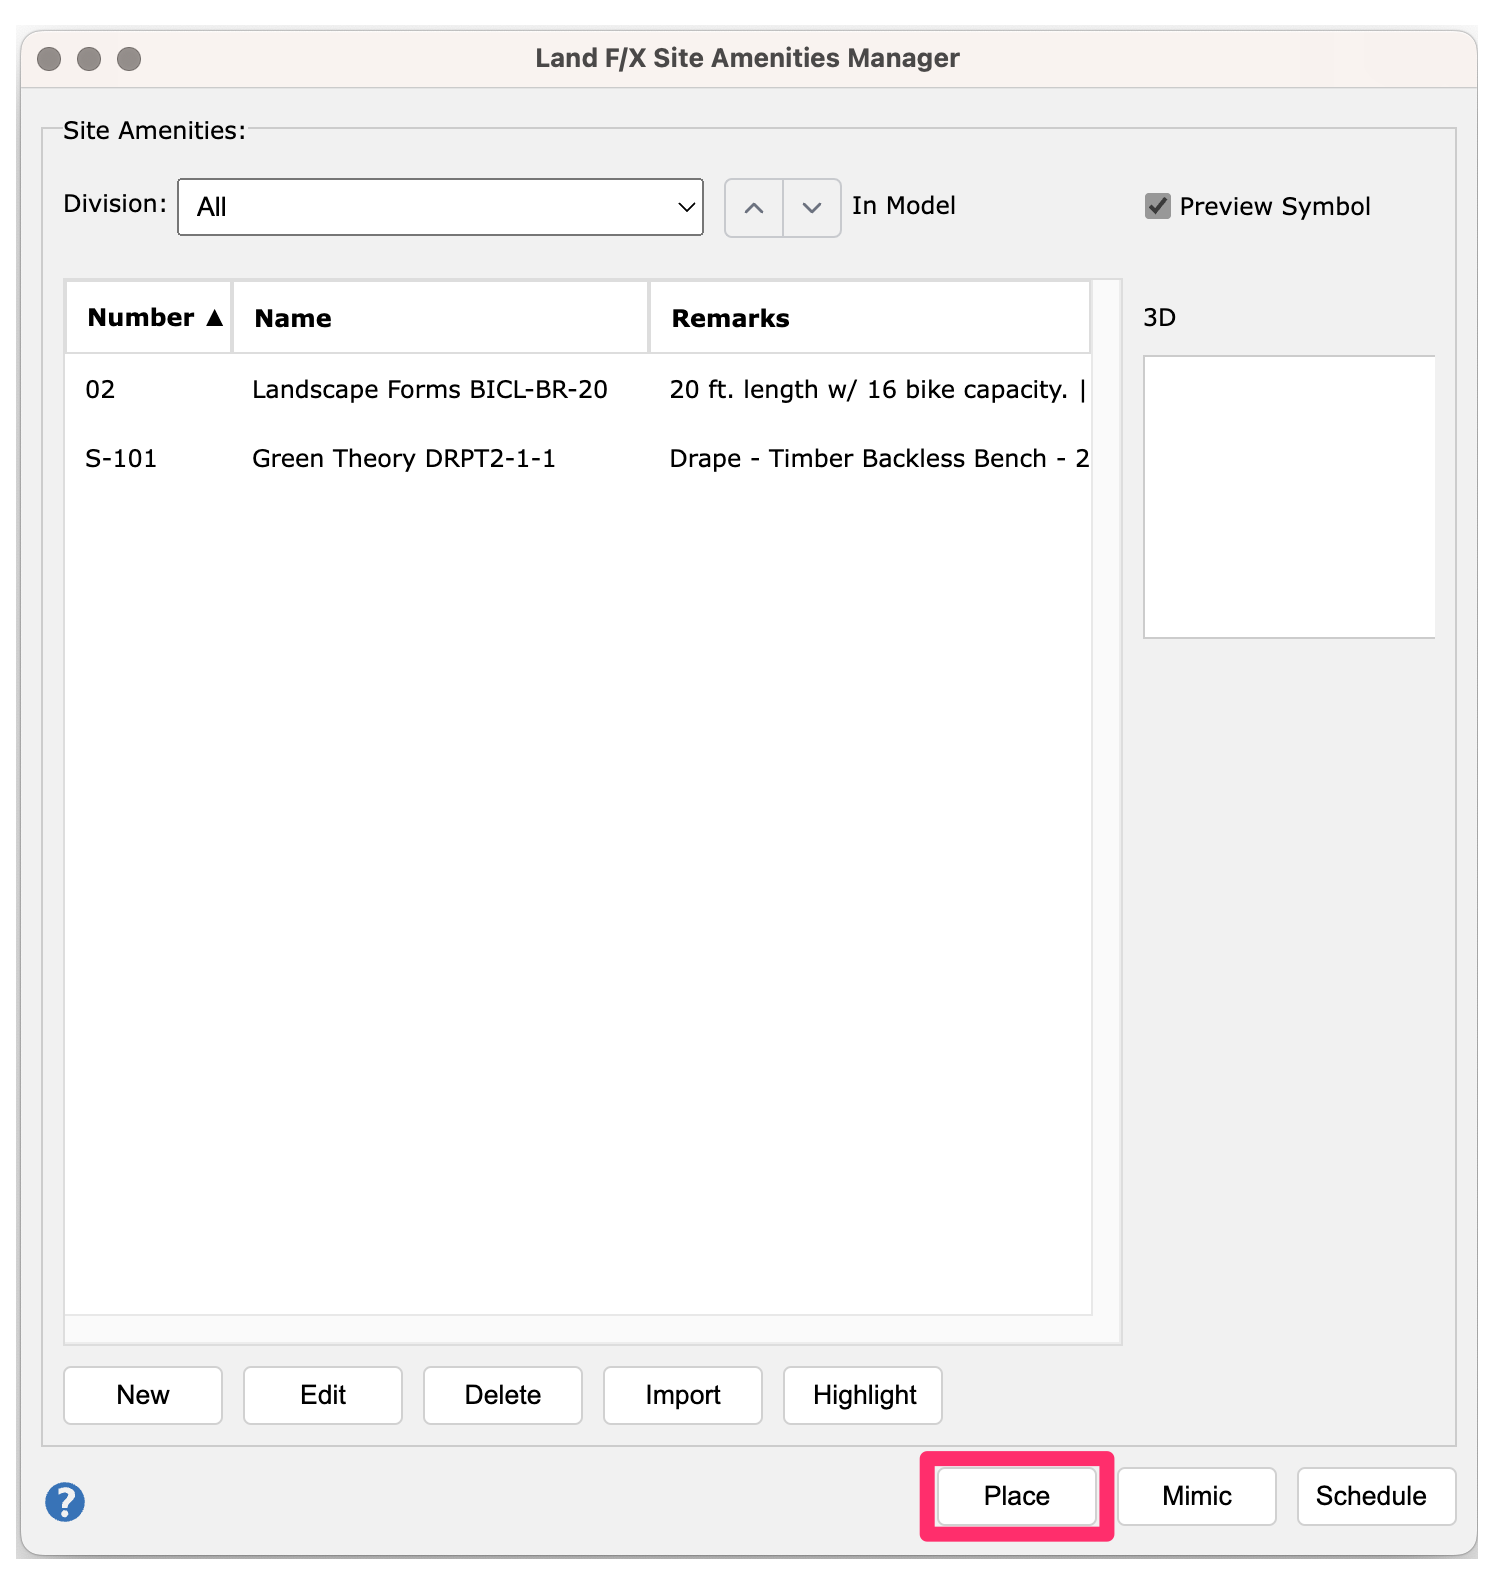
Placing Site Amenities in Your Plan
You can begin placing a site amenity from the Site Amenity Manager in one of two possible ways:
- Double-click the site amenity, or ...
- Single-click the site amenity to select it, then click Place
For more information, see our documentation on placing site amenities in SketchUp.
Deleting Site Amenities
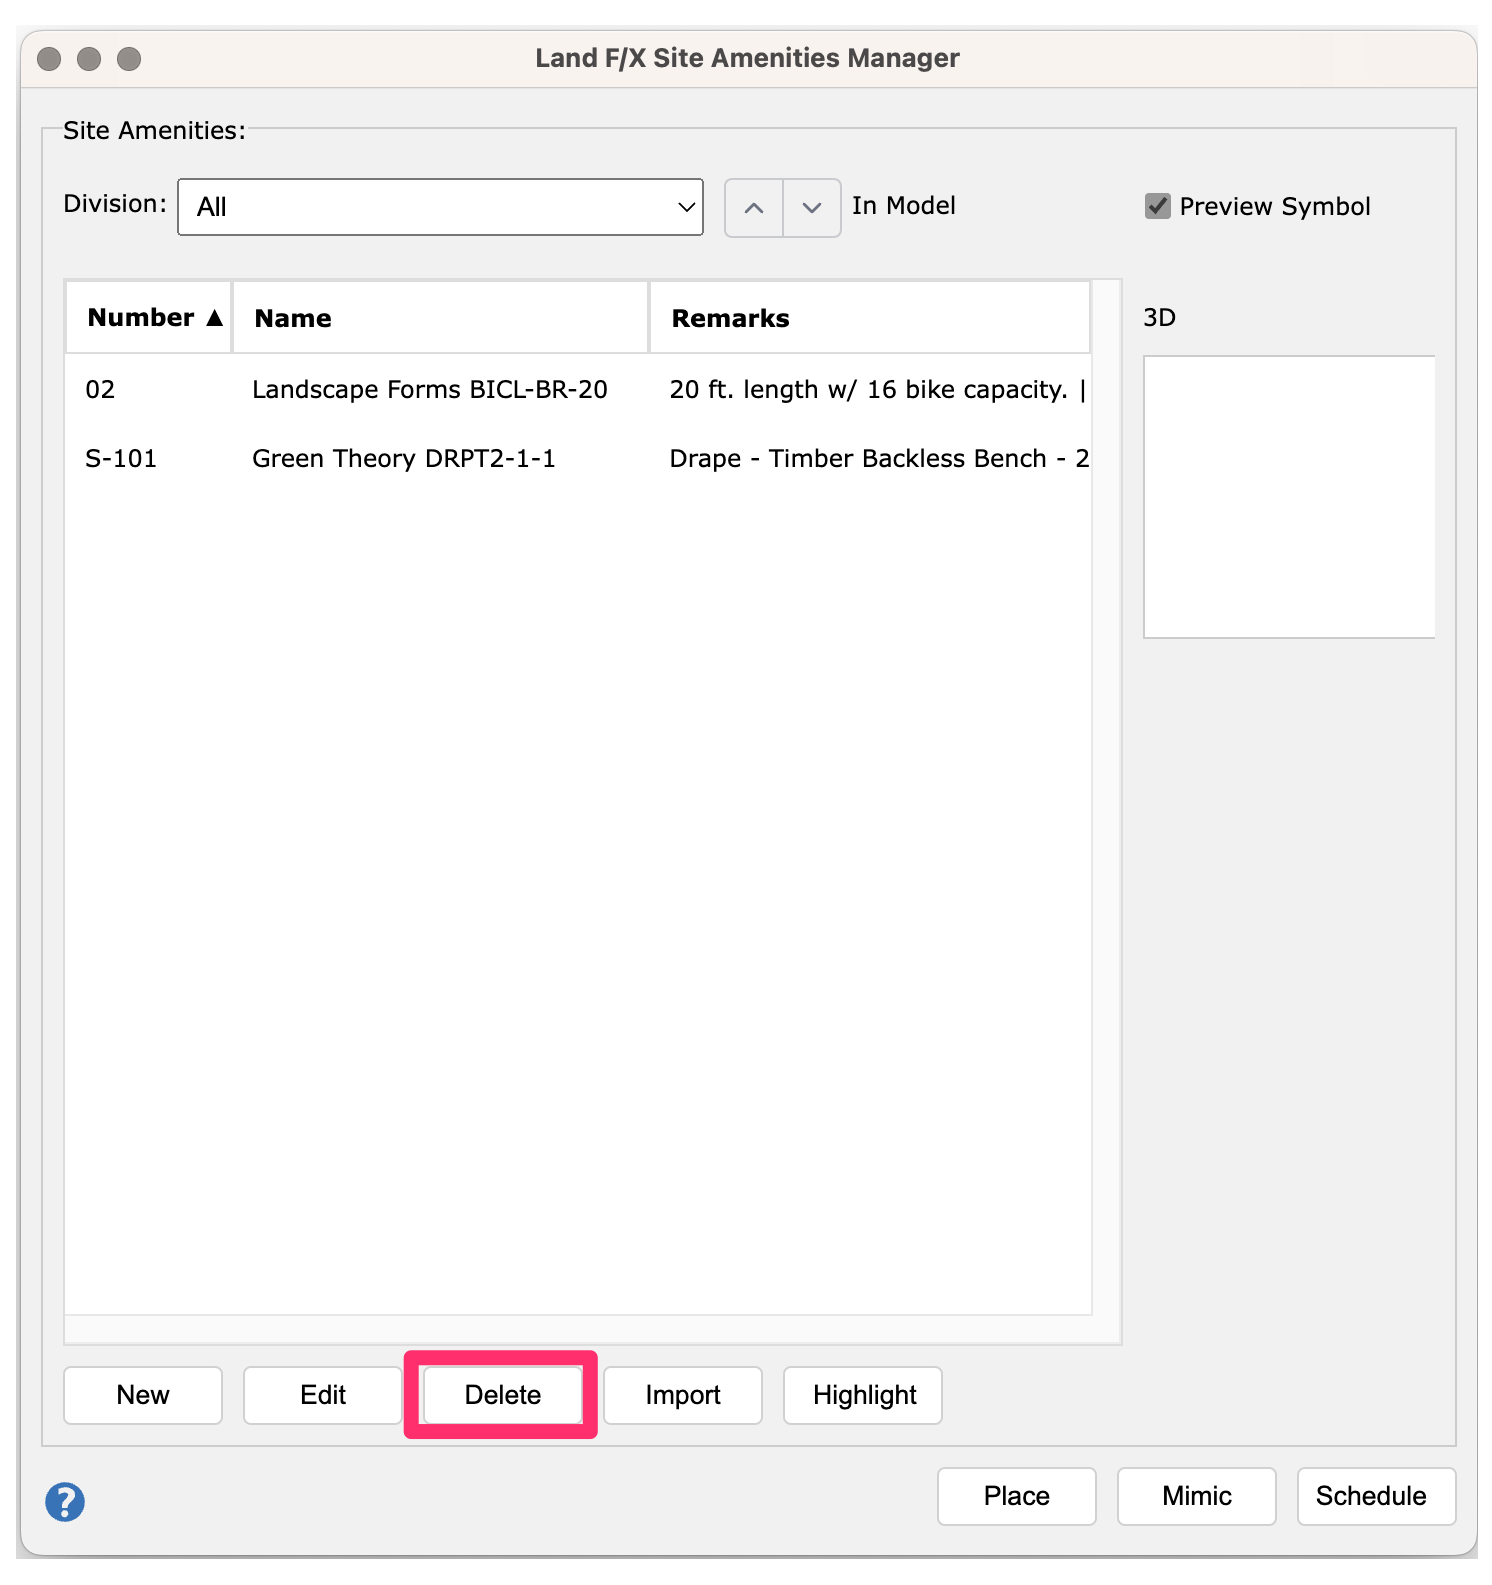
To delete a site amenity from your project, select it in the Site Amenities Manager list and click Delete.
A confirmation dialog box will appear. If you’re sure you want to remove the site amenity from your project entirely, click Yes.

If your model includes placed instances of the site amenity's SketchUp component, you'll see a second dialog box asking whether you would like to delete them.
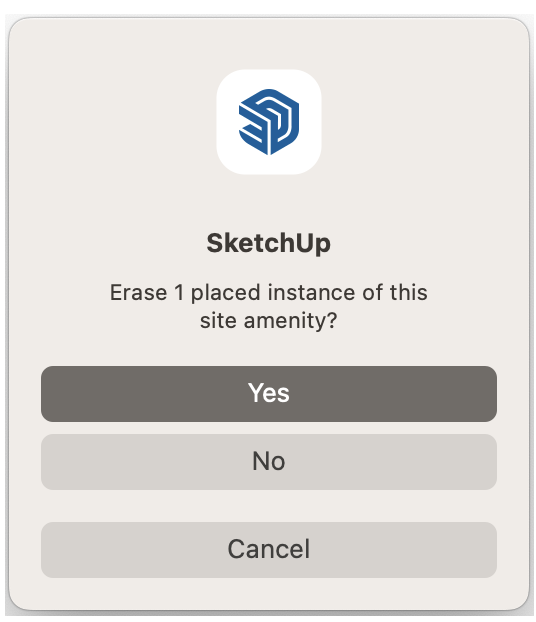
If you want to remove the site amenity from your project entirely and erase all placed instances of the site amenity's SketchUp component from your model, click Yes in this dialog box. This action cannot be undone.
If you want to remove the site amenity from your project entirely but keep the placed instances of the site amenity's SketchUp component in your model, click No. Note that the remaining placed instances will effectively cease to be Land F/X objects and will behave solely as ordinary SketchUp components. This action also cannot be undone.
If you no longer want to delete the site amenity from your project, click Cancel.
Both the model and Site Amenity Manager will update accordingly to reflect the changes.
Importing Site Amenities from Another Project

To import site amenities from one Land F/X project to another, click Import.
This process copies site amenities from the site amenity palette of another Land F/X project into your current project. Looking instead to import or sync placed instances of Land F/X objects from your design in another platform, such as AutoCAD or Revit? See our Import Objects tool documentation.
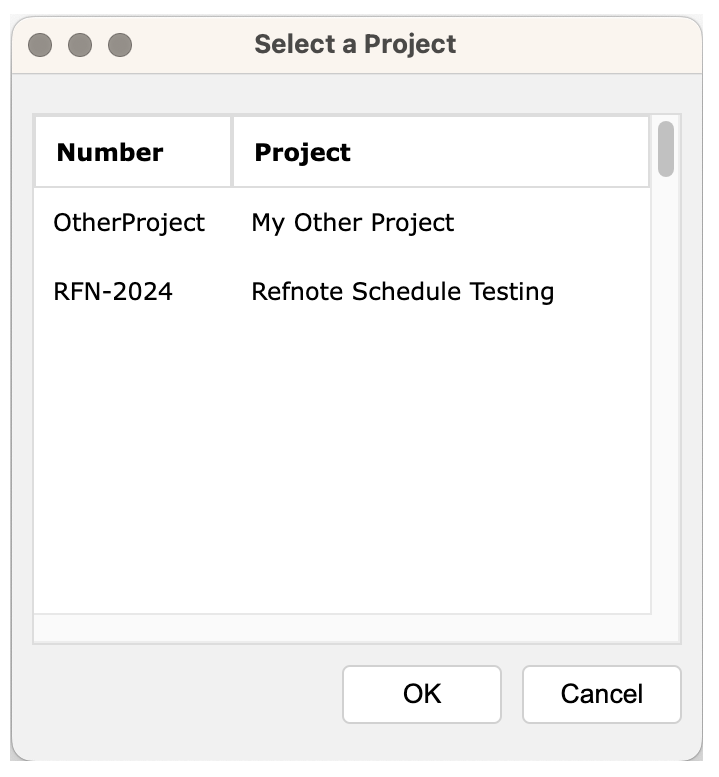
The Select a Project dialog box will open.
Select a project in the list from which you’d like to import site amenities, then click OK.
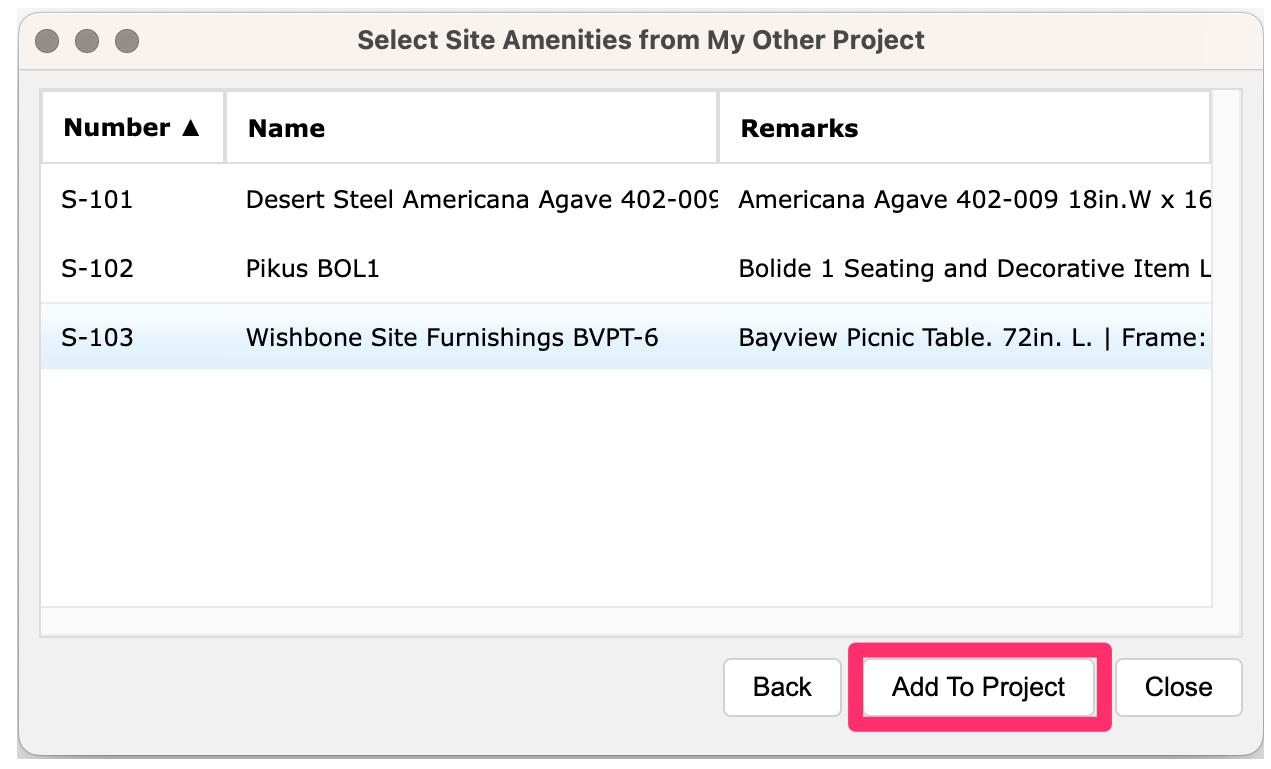
The Select Site Amenities dialog box will open. In the list of site amenities, select each amenity you'd like to import into your active project.
To select multiple consecutive site amenities, hold the Shift key while clicking. To select multiple site amenities one by one, hold the Ctrl key (Windows keyboard) or Command key (Mac keyboard) while clicking.
Click Add to Project to import the selected site amenities into your project. The dialog box will not close.
A green rectangle will pop up in the bottom left corner of the dialog box, notifying you that the site amenities have been imported to your project successfully, and the imported site amenities will appear grayed out and crossed out in the list. The Site Amenities Manager will also update automatically.
If there was an issue importing a site amenity, a red rectangle with more information will pop up instead.
When you're finished importing site amenities, close the dialog box.

Highlighting Site Amenities

To highlight placed instances of a site amenity in your model, select the amenity in the Site Amenities Manager list and click Highlight.
All placed instances of the site amenity's SketchUp component will be selected.
Mimic Tool
Our Mimic tool allows you to quickly replace placed instances of a Land F/X object (plant or site amenity) with another.
To mimic a site amenity in your project, select it in the Site Amenities Manager list and click Mimic. Then click placed instances of other Land F/X objects in your model to replace them with the site amenity you’re mimicking.
See our Mimic tool documentation for more information.

Placing a Site Amenity Schedule
To place a schedule, or legend, of all placed site amenities in your model, click Schedule.
See our Schedule tool documentation for more information.
Contact
- Land F/X


Our software tailors AutoCAD®, Revit®, SketchUp®, and Rhino® to the needs of landscape architects, irrigation designers, and other professionals. We automate your most tedious tasks and ensure accuracy, giving you more time to design.