Import Layer Tool: Planting F/X for SketchUp Plugin
Quick video
- Exporting a Layer From a CAD Drawing
- Importing Layers Into a SketchUp Model
- Related Videos
- Troubleshooting
With the Import Layer from CAD tool, you can bring linework from a CAD drawing into a SketchUp model, layer by layer.
Exporting a Layer from a CAD Drawing
Before importing a layer from a CAD drawing into a SketchUp model, you'll need to export the layer from CAD to SketchUp.
Step 1: Prepare the Drawing to Export Its Layers
Open the CAD drawing whose layers you want to export into SketchUp.

Important:
While not always necessary, we recommend creating a copy of this drawing, as you'll likely need to edit it to clean up the CAD linework first
If you plan on making a copy to clean up for exporting, do the following. Otherwise, skip these steps and continue with exporting your layers in the original drawing.
Prepare the drawing to import its layers into SketchUp:
- Delete all non-essential objects (hatches, blocks, plants, irrigation, lighting, mleaders, text, dimensions, etc.) from the drawing.
- Explode any blocks you want to import into SketchUp as linework instead of as an Amenity Reference Note (RefNote), such as stepping stones, building or structure footprints, walls, and sports field lines.
- Verify that all lines are joined or drawn accurately. Any points not actually touching, or incorrectly overlapping, will make cleanup in SketchUp difficult. If you import to SketchUp and the cleanup to make faces is too difficult, you might consider coming back to this step and trying again with the insight on the problem areas.
Save the drawing after completing these preparations.
Step 2: Export the Layers
We'll export layers from the CAD drawing pictured above into SketchUp. Once we've exported the layers, we can then import them into our SketchUp model.
Open our 3D Connection tool:

F/X Planting ribbon, 3D Connection flyout

F/X Planting menu, 3D Connection option
or type FX_SITE3DEXPORT in the Command line
The 3D Connection dialog box will open.
Click Send Layer to export your plan into SketchUp.


Some exported objects are an extremely far distance from the origin. This can be an issue in some 3D programs. Use the New UCS tool to resolve this.
Would you like to see more information?
Did you see this error message at this point? If so, here's what to do.
A pickbox will appear in place of the cursor. Click an object in your CAD drawing that is on the layer you would like to export to SketchUp. In our example, we'll be exporting the layer LP-SHAR-BRDR to SketchUp.
You'll see a message that the layer has been successfully exported. Click OK.

Your layer has been exported into SketchUp, and is now ready to be imported into your SketchUp model
Your exported layer will be hidden automatically when you close the confirmation message. The tool will remain active so you can continue to select additional layers to export, one-by-one.
When you’re finished exporting layers, simply press the Escape key to exit the tool, or press the Space bar to reopen the 3D Connection dialog box.
When you exit the tool, all exported layers will be unhidden automatically.
Importing Layers Into a SketchUp Model
Open a new or existing SketchUp model. Then use the Land F/X Projects tool to open the Land F/X Project you just exported.
Note that it's possible for multiple projects to exist with similar or even identical names. However, project numbers are always unique. Take care to open the project with the correct project number.
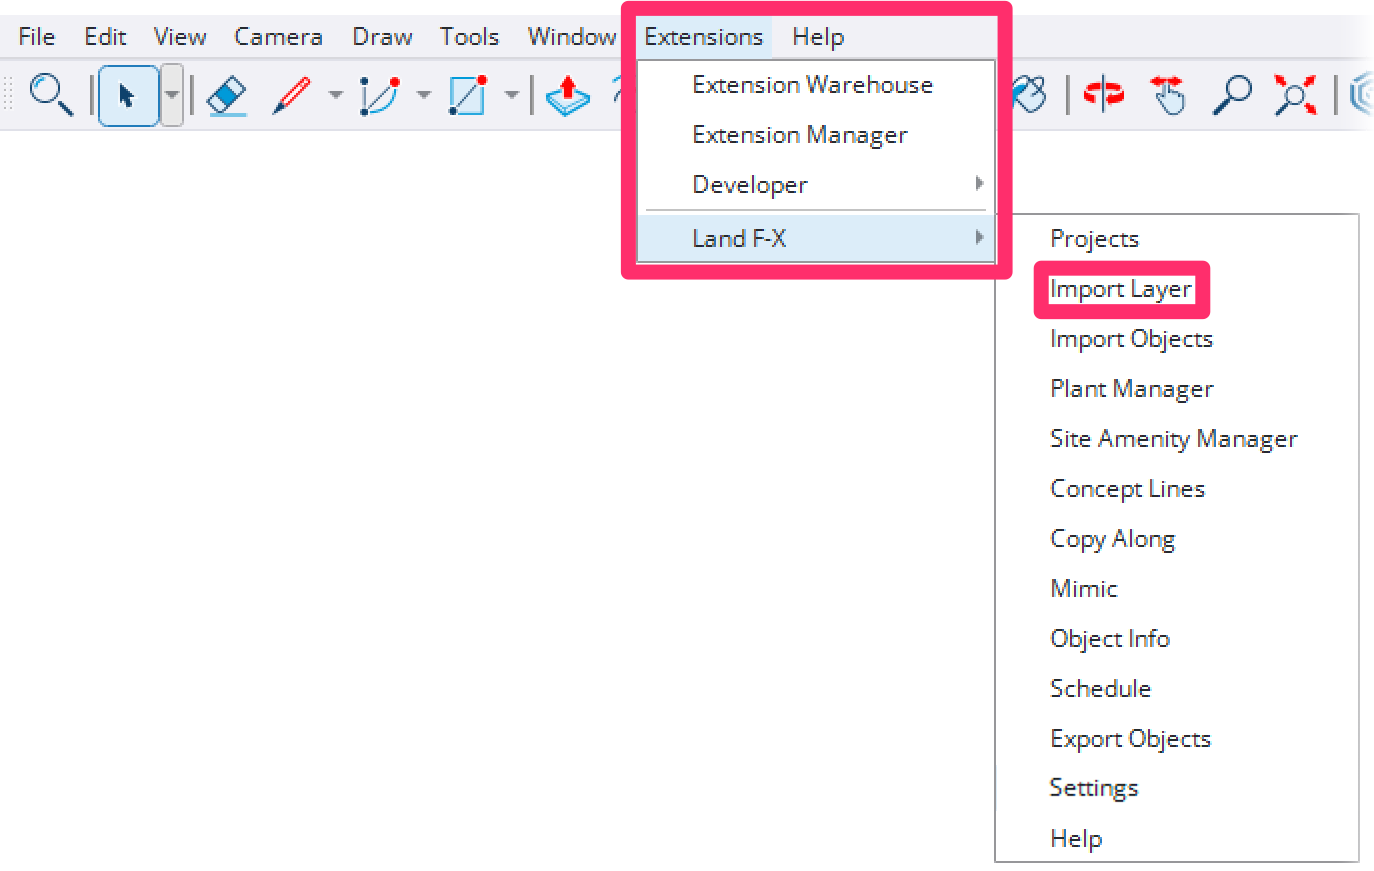
Your project will open in SketchUp, and the Land F/X Projects dialog box will close. Open the Import Layer from CAD tool:

LandFX toolbar, Import Layer button

Land-FX menu, Import Layer option
The Land F/X Import Layer dialog box will open.
Here, you'll see a list of all layers you've exported from your CAD design into SketchUp.
Click on a layer in the list to select it. You can also use the arrow keys to navigate the list, or simply begin typing the name of a layer to find it in the list.
To select multiple consecutive layers, hold the Shift key while clicking. To select multiple layers one by one, hold the Ctrl key (Windows keyboard) or Command key (Mac keyboard) while clicking.
With one or more layers selected, press the Enter key or click the Import Selected button to import the layer(s) into your SketchUp model.


Once layers have been imported, they will appear gray and crossed out in the list, and a green notification will appear.
Some layers take longer than others to import – especially if they contain a large amount of linework.
If the Import as groups option is selected when you import a layer, the linework on that layer will be imported as a group.
Importing a layer as a group prevents the imported linework from intersecting with existing geometry in your SketchUp model, which often creates undesired vertices and faces. If you would rather import the layer as loose linework that can intersect with existing geometry, simply uncheck the checkbox before importing the layer. If you’re unsure, we suggest importing as groups. You can always “explode” groups into loose linework later.
If the Make faces checkbox is checked when you import a layer, the system will do its best to create faces to fill the spaces enclosed by that layer's linework. Conversely, if the Make faces checkbox is unchecked when you import a layer, faces will not be created – only the linework itself will be imported.
You can also import all layers at once by clicking the Import All button.
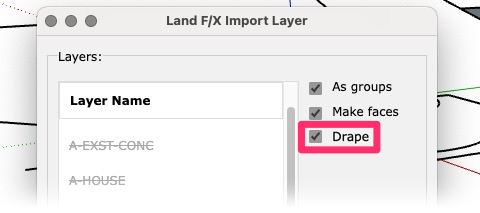
If the Drape option is selected when you import a layer, the linework on that layer will be draped upon existing geometry in your model.


If you select this option, a Drape onto... selection box will appear. By default, the menu in this dialog box will be set to Entire Model, meaning the linework will drape upon all existing geometry in your model (excluding any existing Land F/X smart components).
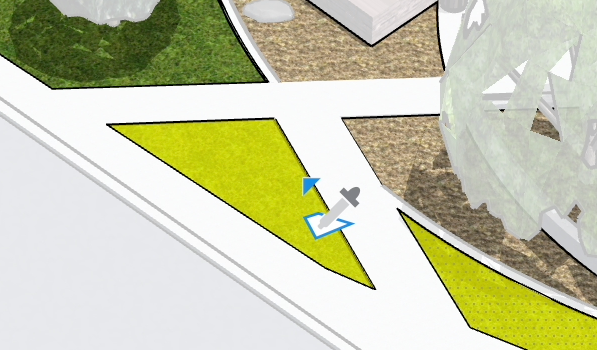
If the Drape onto... menu is instead set to Selection, imported layers will drape upon only the selected surfaces. If any surfaces in your model were already selected when you ran the Import Layer tool, they will be used as the Drape onto... selection by default. Click the Edit Selection button to activate a picker tool that allows you to add or remove surfaces from the selection.


With the picker tool active, click a group or surface in your model to add it to the selection. Double-click a face to add all connected faces to the selection. Hold the SHIFT key while clicking to remove objects from the selection. Press Enter when you're finished editing the selection to return to the Import Layer dialog box.
The geometry of each imported layer will be auto-assigned a newly created tag, with the same name as the imported layer.


If a tag with that name already exists – for example, if you're reimporting a previously imported layer – you'll be asked whether you'd like to back up the existing contents of that tag.
To keep a backup of any existing geometry on that tag, click Yes.
If you don’t want to maintain a backup of any existing geometry on that tag, click No. Any existing geometry on that Tag will be erased and replaced.
To cancel importing the layer, click Cancel.
If you click Yes to back up existing geometry on a layer, any existing geometry on that tag will be reassigned to a newly created tag with the same name as the main tag for that layer, followed by a time-stamped suffix. This backup tag will be hidden by default.

When you’re finished importing layers, simply close the Land F/X Import Layer dialog box.
Related Videos
Troubleshooting
Issue: Objects are appearing in the incorrect locations or backward in your SketchUp model
Issue: Our Planting F/X Plugin for SketchUp freezes or becomes unresponsive
Issue: Clicking one of the Land F/X tool buttons in SketchUp does nothing
SketchUp: Basic troubleshooting (adding, placing, importing plants)


