
Print Details: Some Details are Printing Too Small in the PDF
Issue
You're using the Print Details option from the Detail Explorer, and certain details are showing excessively small on the final PDF.

Cause
An issue with within the source detail is throwing off the size the system is assigning to the detail when inserting it onto a layout. The issue could have to do with:
- A unit mismatch
- An object placed out in space somewhere
- The MText setup in the detail
Solution
Step 1: Diagnose the issue.
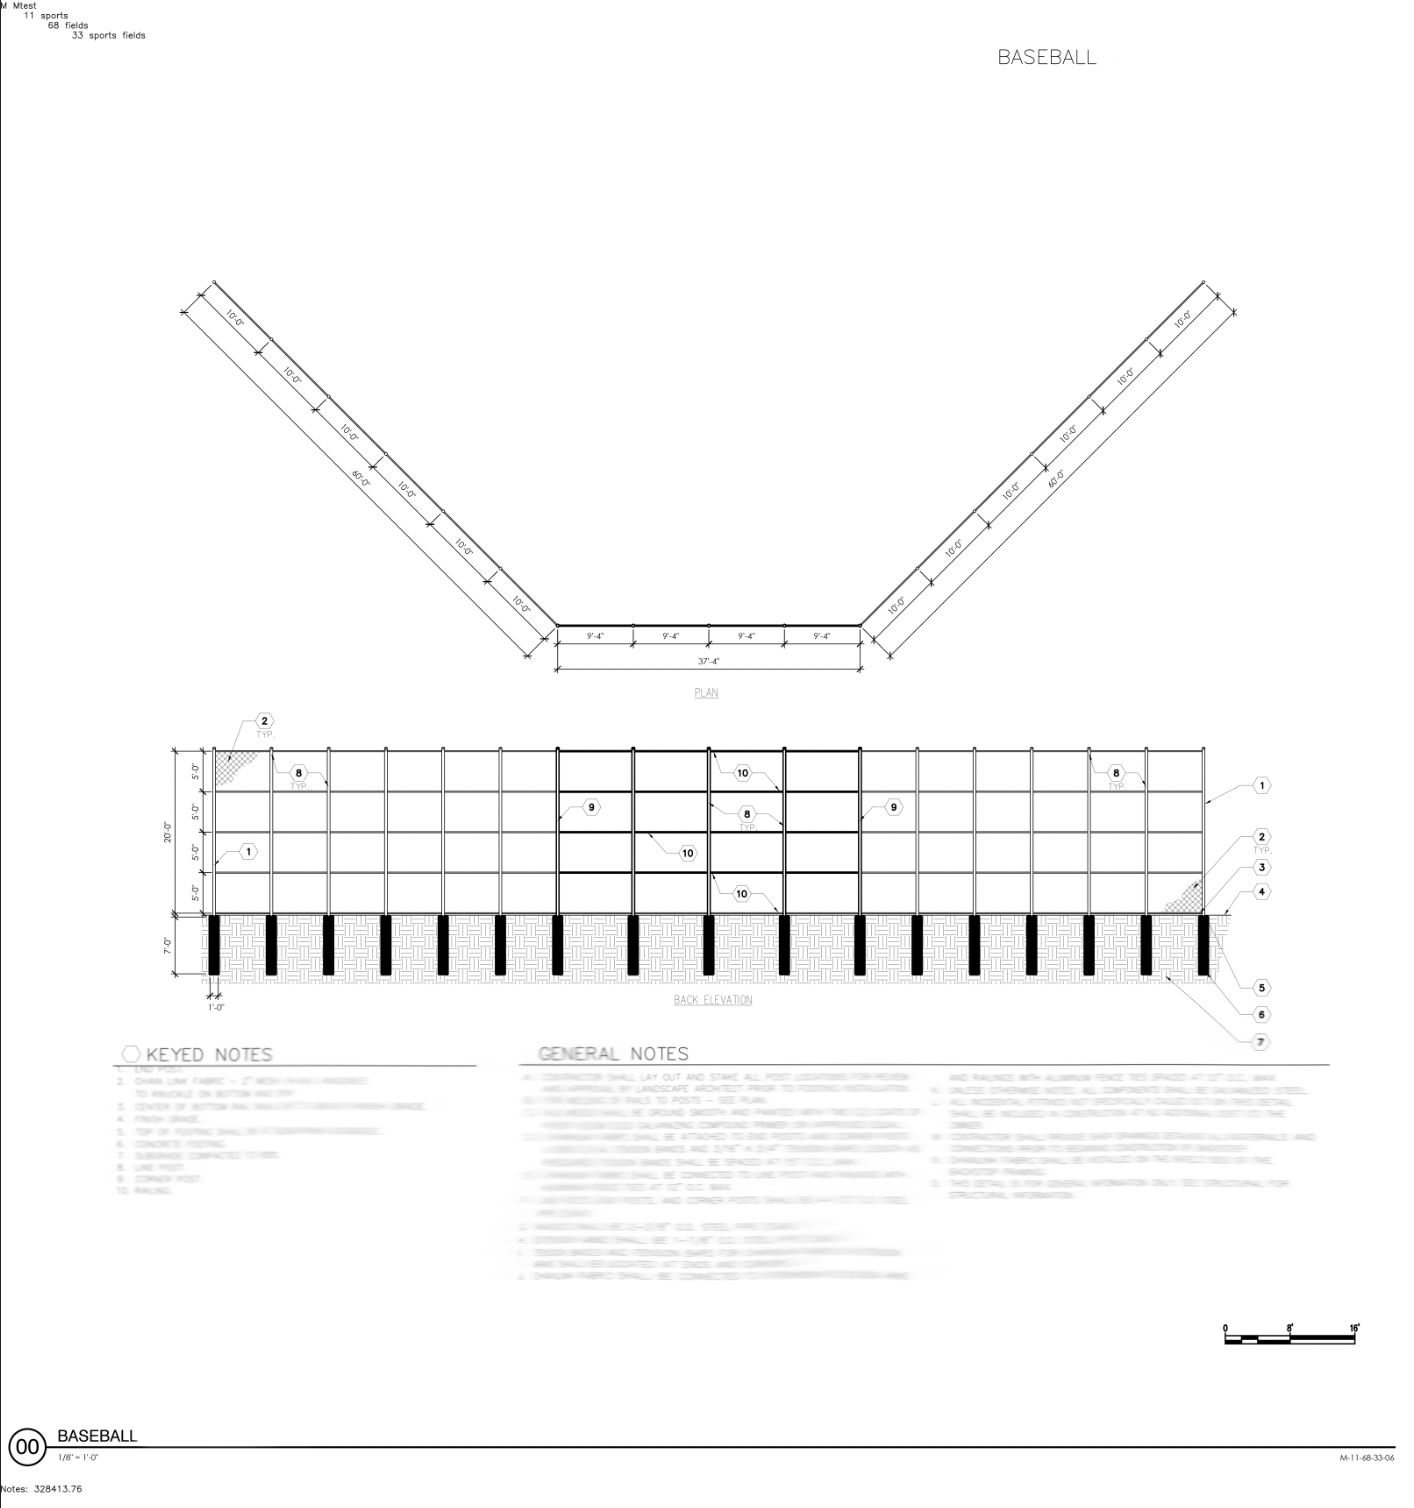
1A. Verify that each detail places well on a sheet to double-check its scale.
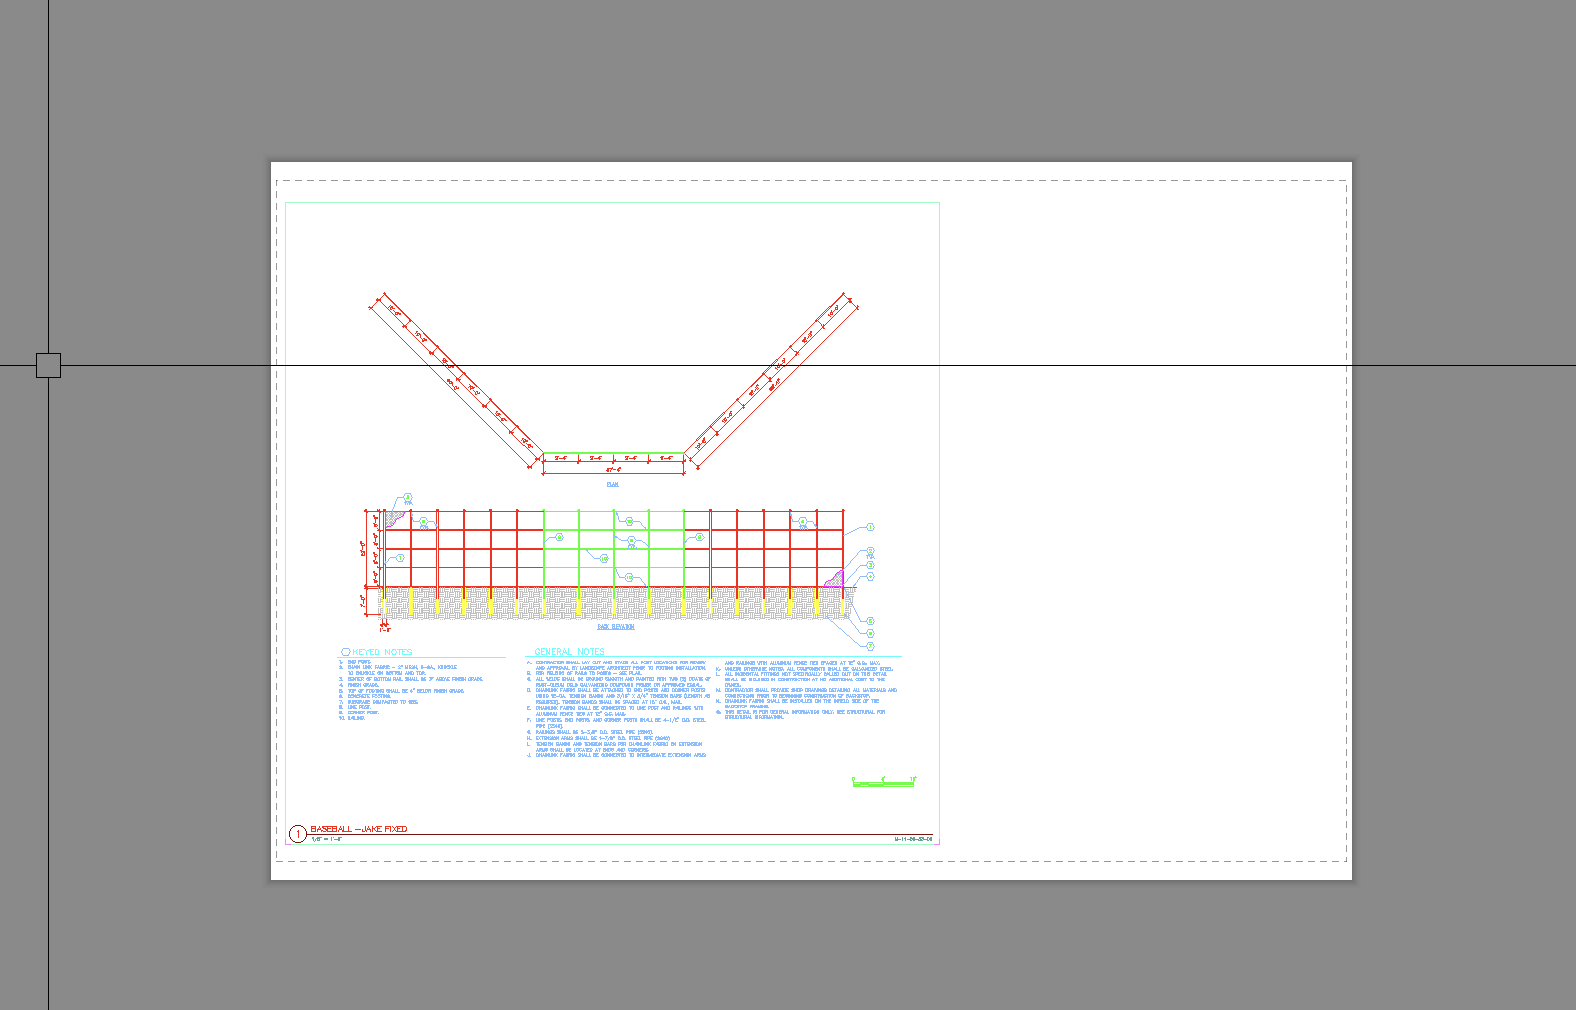
1B. Run the Zoom Extents command to ensure the drawing doesn't have errant objects out in space.
If you can place the detail onto a sheet and all looks good, your units are likely OK.
If you can run Zoom Extents and the plan doesn't disappear on you, you probably do not have any objects placed out in space.
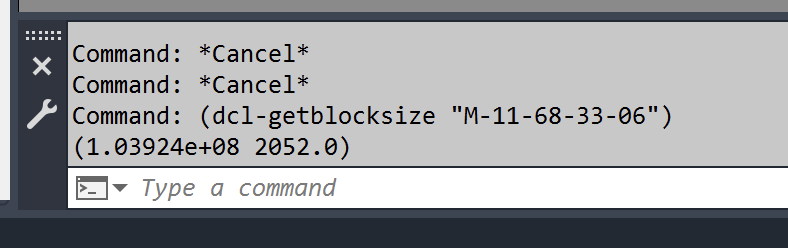
1C. With the sheet containing the placed detail open, copy and paste the following command into the CAD Command line:
(dcl-getblocksize "DETAIL FILE NAME")
Note: Replace DETAIL FILE NAME with the actual detail file name within the quotation marks. For example, for a detail whose file name is M-11-68-33-06, you'd paste the following command:
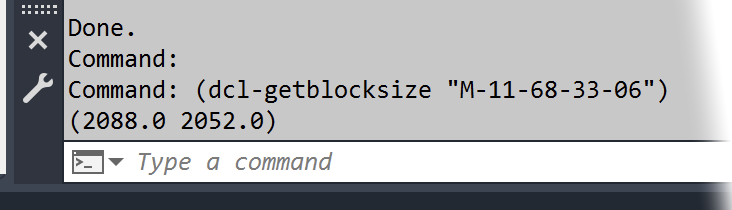
(dcl-getblocksize "M-11-68-33-06")
Press Enter after pasting the command and replacing the detail file name.
1D. Take note of the number that appears in the Command line within parentheses beneath the command. If this number is anywhere near the amount of the example numbers pictured above – (1.03924e+08 2052.0) – you're experiencing an issue that's causing the detail to be abnormally wide, which in turn is likely what is causing the detail to show so small on the sheet when printed.
Step 2: Fix the issue.
2A. Open any source files associated with details that appear to be causing the issue, and start investigating which items are in the plan. Start with MultilineText (MText) items, select each MText object, and check the Defined width value in the Properties panel. (To open the Properties panel, type PROP in the Command line and press Enter.)
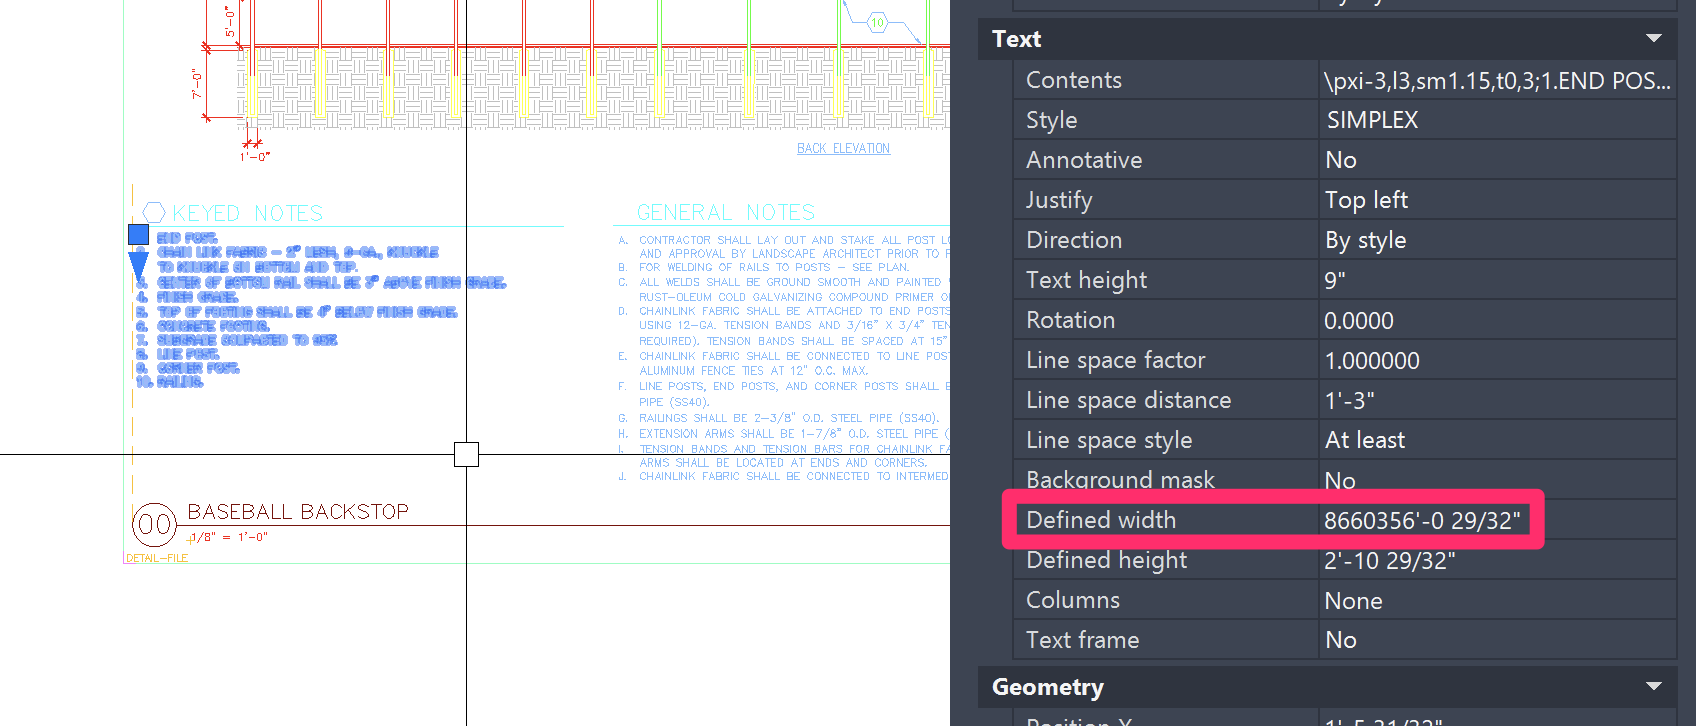
In the example above, the Defined width value shows an abnormally large width set.
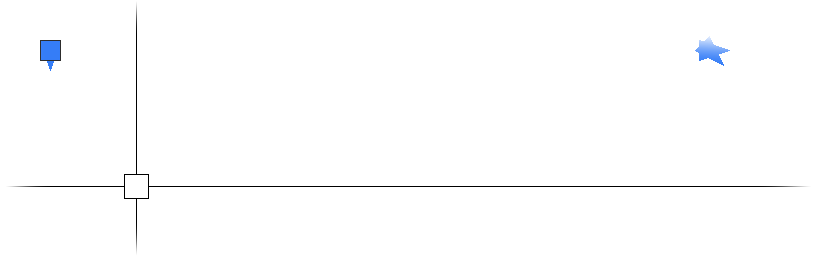
If you zoom out with the MText object selected, you can see where the width grip of the MText actually is, as in the image to the right.
2B. Set the width to something more appropriate, and save the detail.

As a crosscheck, if you update the test detail placed on the sheet and run the (dcl-getblocksize "DETAIL FILE NAME") command again, you should see a more appropriate number below the command, as pictured to the left.
2C. Repeat steps 2A. and 2B. on any other item in the detail file, or other details that are printing excessively small. Then try printing the details again. You should see all details scale appropriately on the page.
Contact
- Land F/X


Our software tailors AutoCAD®, Revit®, SketchUp®, and Rhino® to the needs of landscape architects, irrigation designers, and other professionals. We automate your most tedious tasks and ensure accuracy, giving you more time to design.