
Configure the Data Source (ODBC)
Updated on: May 08, 2026
This guide will help you configure the ODBC data source.
Multi-User Land F/X with Local Data (MySQL) is officially deprecated.
We've officially deprecated Local Data (MySQL) installs as of May 2026. For optimal Land F/X performance, we recommend switching to Cloud Data.
What are ODBC, MySQL, and the F/X Server? For information on how these three integral components work together to allow you to use our software, see our Definitions article.
Step 1: Open the ODBC Control Panel
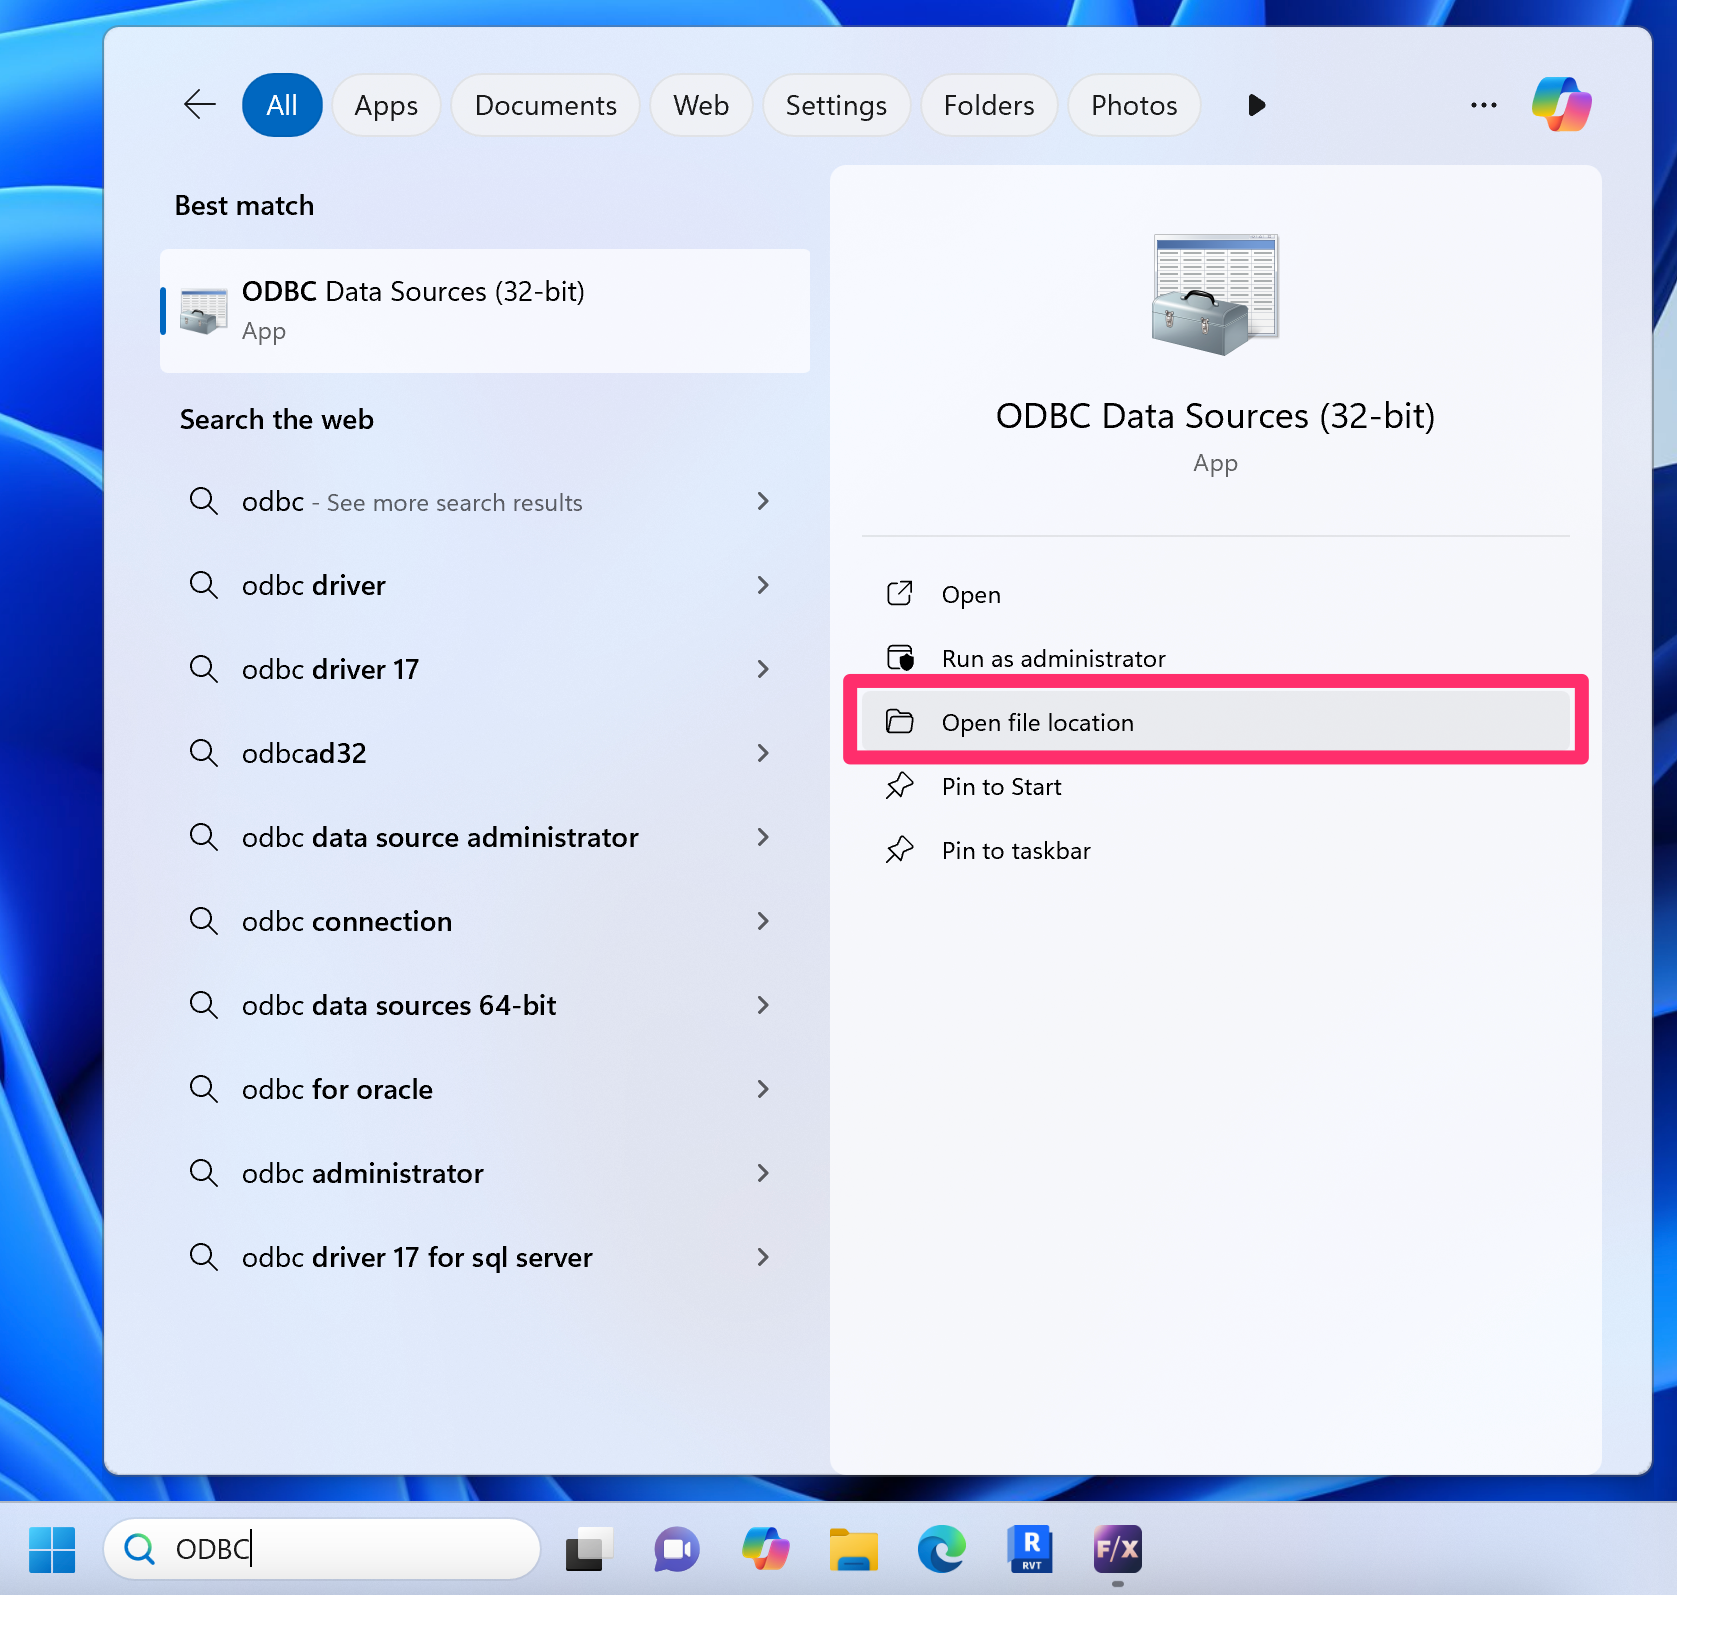
1A. Open the Windows Start menu and search for ODBC. Select the Open file location option under ODBC Data Sources.
1B. Double-click one of the following files:
- ODBC Data Sources (64-bit) if you have a 64-bit operating system, or
- ODBC Data Sources (32-bit) if you have a 32-bit operating system
Most operating systems are 64-bit. Find out which type you have

1C. In the ODBC Data Source Administrator dialog box, select the System DSN tab.
Highlight your LandFX folder, then click Continue. The ODBC control panel will open.
You can now proceed with configuring the ODBC Data Source.
Did you see a System Error 126 message when you clicked Configure? If so, follow our steps to uninstall and reinstall the MySQL Connector.

Step 2: Configure the ODBC Data Source
The following steps pertain to both Windows 10 and Windows 7 users.
You'll now see the MySQL Connector / ODBC Data Source Configuration dialog box (the ODBC control panel).
Depending on your installation, follow our troubleshooting steps below for:
- Single-User installations
- Multi-User installations (office server or Cloud Licensing)
- Cloud Data installations
Not sure which type of installation you have? Ask your IT administrator.

Here's how to troubleshoot your ODBC Connection if you have a single-user installation – your computer does not connect to an office server to use our software, and you don't have cloud licensing.
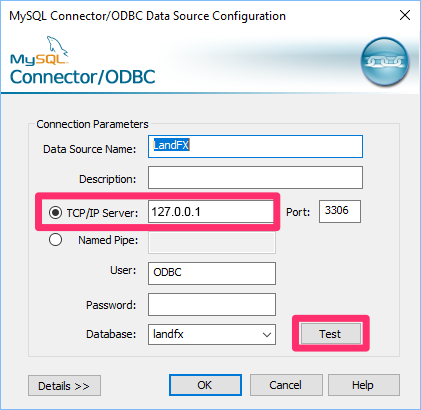
Listed in the TCP/IP Server text field is your server name.
If you have a Single-User installation, this field should read 127.0.0.1
Click Test.


If you see a Connection Failed message at this point, follow our steps to configure your MySQL connection.
Close
Here's how to troubleshoot your ODBC Connection if you have a multi-user installation, which means either:
- Your computer connects to a central office server to use our software, or
- Your office has cloud licensing
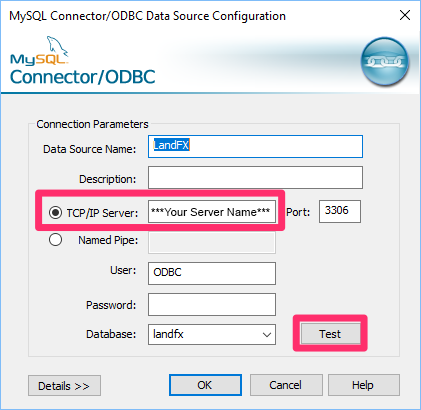
You should see your server name in the TCP/IP Server text field.
If you don't see your server name, you'll need to type it here.
If you have cloud licensing, type landfx.com
Don't know your server name or whether you have cloud licensing? Ask your IT administrator.
Once the TCP/IP Server field contains your correct server name, click Test.
If you experience lag time before the Connection Successful window pops up, you most likely have a network connection issue. Follow our steps to Ping Your Server Name.
If the test takes more than a second to show Connection Successful, follow our steps for troubleshooting a slow connection.
Close
Here's what to do if your office has a Cloud Data installation.
Cloud Data and cloud licensing are separate things. You might have Cloud Data if you have a Single-User or Multi-User installation of our software. Not sure whether you have Cloud Data? Ask your IT administrator.

If you have Cloud Data, type landfx.com in the TC/IP Server field. Then click OK.
You do not need to click Test. If you do, you'll see a Connection Failed message. If this happens, don't worry – just type landfx.com in the TCP/IP Server field and click OK.
You can close the dialog box when finished.
Close