
Placing & Editing Hatches
Updated on: May 06, 2026
Quick video
- Hatch Types
- Placing a Generic Site Hatch
- Placing a Generic Detail Hatch
- Placing Smart Hatches (Planting, Site, Irrigation)
- Placing a Hatch: Overview
- Excluding Objects From a Hatch (The "Multiple" Option)
- Editing Placed Hatches (Hint: Use Our P-Hatch Tool)
- Assigning a Real-World Scale to a Placed Hatch Pattern
- Can Non-Land F/X Users Access the Land F/X Hatch Library?
- Having a Hatch Issue? Download Our Updated Hatch Patterns Manually
- Related Webinars
- Troubleshooting
Whether you need to place a large area with data attached to it (such as a planting, hardscaping, or irrigation area), or just a generic region in your drawing represented by a specific pattern, hatches play a vital role in our software. Find out how to put our hatching system to work for you.
Want information on customizing hatch patterns? See our documentation on Hatch Patterns and Saving a Hatch.
Hatch Types
Placing a Generic Site Hatch
Our generic site hatching tool provides a quick way to place a hatch if you need to create a site area consisting of mulch, concrete, or hardscaping materials such as pavers, but don't necessarily need to assign that area with data (such as per-unit cost).
Open our Hatch tool:
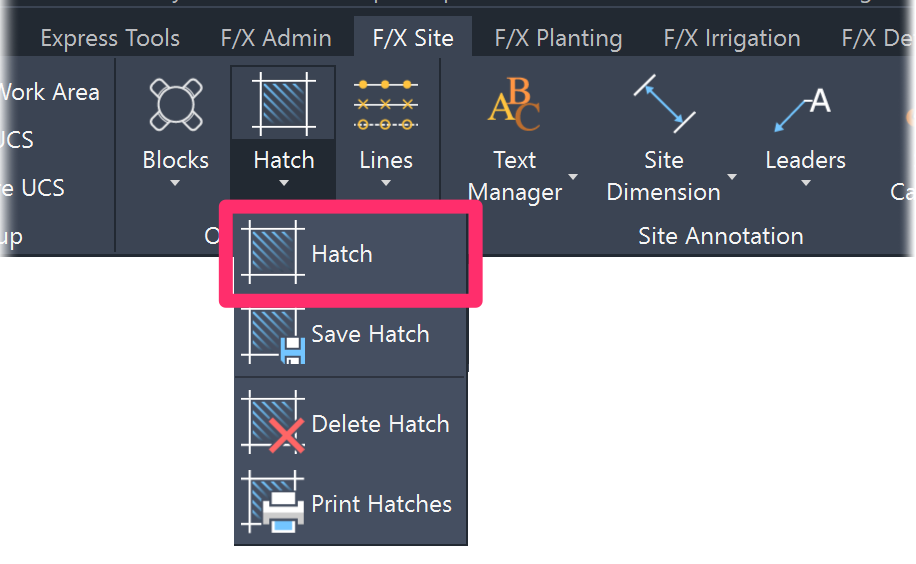
F/X Site ribbon, Hatch flyout
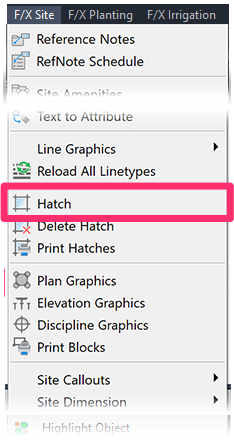
F/X Site menu, Hatch option
or type FX_SiteHatch in the Command line
The Hatch dialog box will open.
With Site selected in the list of hatch types, select a hatch subcategory, then select a hatch to place.
Click OK to begin placing the selected hatch pattern in your drawing.

Placing a Generic Detail Hatch
Our hatch library includes several hatch patterns designed specifically for building your details. More information
Placing Smart Hatches (Planting, Site, Irrigation)
Hatches are ideal for representing smart objects in your drawings that need to be placed as contiguous areas rather than individual objects – for example, groundcovers and hardscaping areas. Here are a few examples:
- Groundcovers and Shrub Areas
- Area & Volume Reference Notes (RefNotes): Use RefNotes if you want to place a hatch representing bark, gravel, mulch, or another quantifiable site object with data attached.
- Concept Groundcovers & Shrub Areas: Concept Plants provide a way to create a more generalized version of a planting plan while expressing the conceptual intent of the design and plant palette. More information
- Irrigation drip hatches:
When you place one of our smart hatch types, you may see a few extra options in the Command line specific to placing that particular smart object. However, the steps below for placing hatches apply loosely to placing any hatch within the Land F/X system.
Placing a Hatch: Overview
After you select a hatch to place, the cursor will turn into a pickbox, and the Command line will prompt you to Select polyline or interior point to hatch, [Draw Exclude shrubs Multiple].
Selecting an Existing Boundary
To select an existing polyline, use the pickbox to select a closed polyline area to hatch.
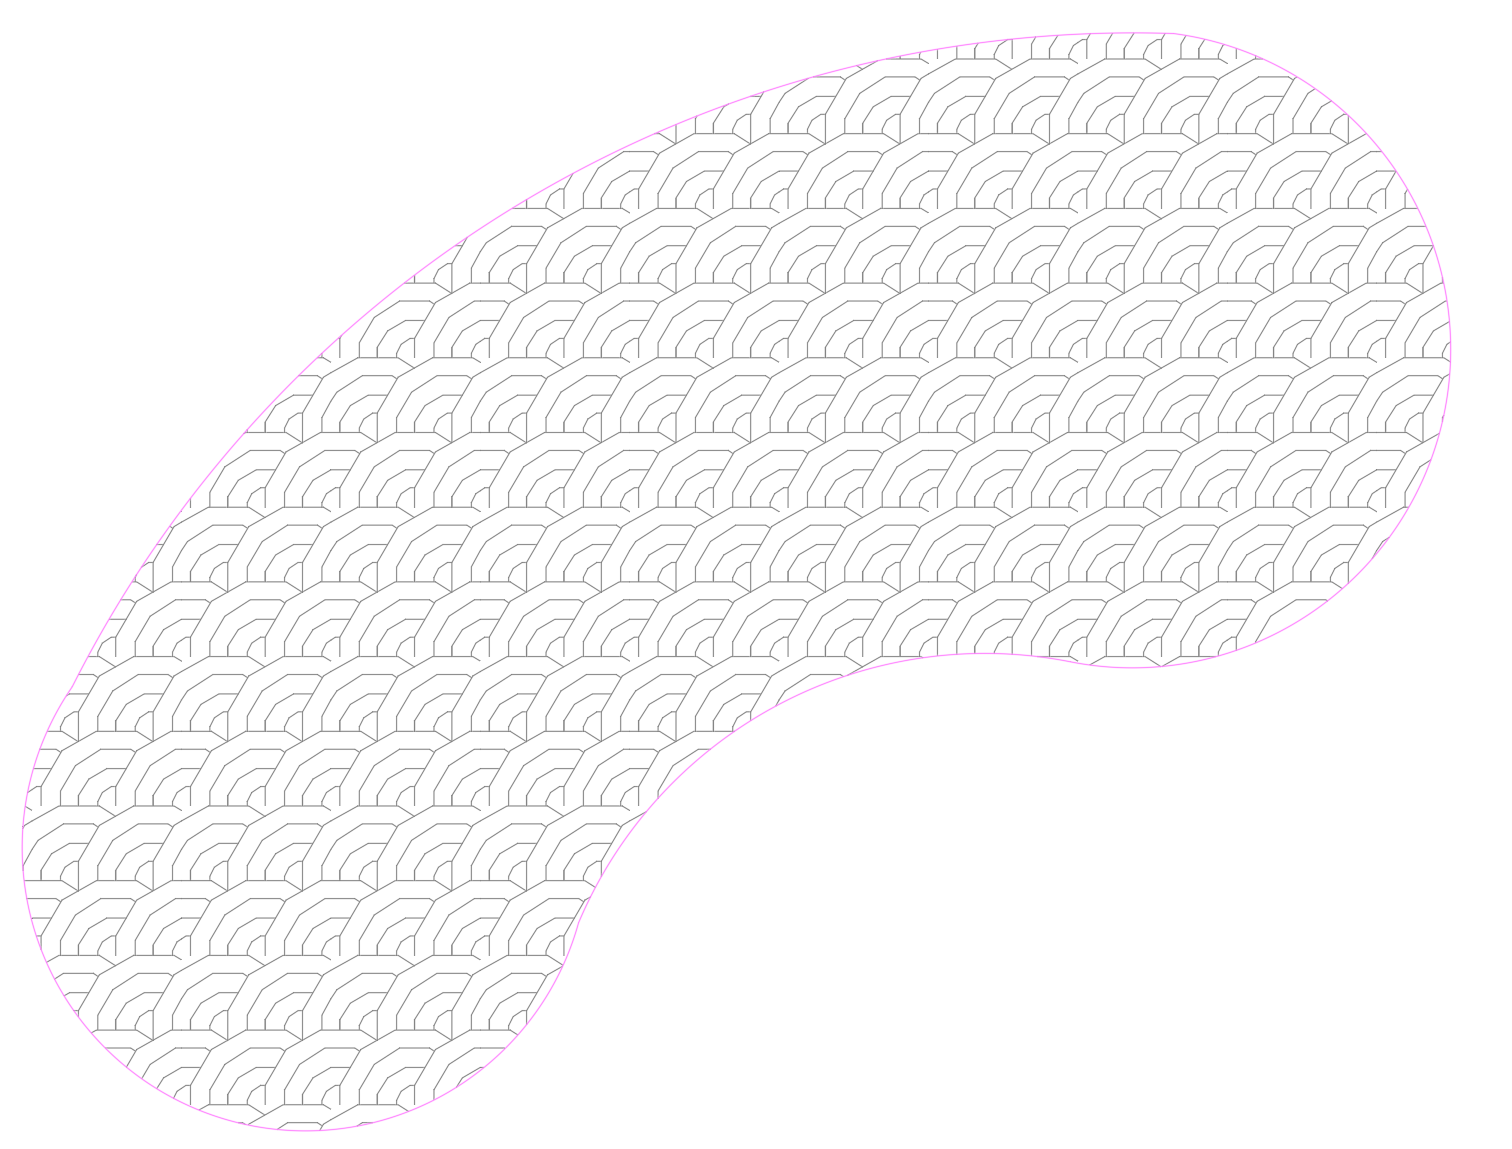
In this example, we'll hatch the kidney bean–shaped closed polyline pictured below.
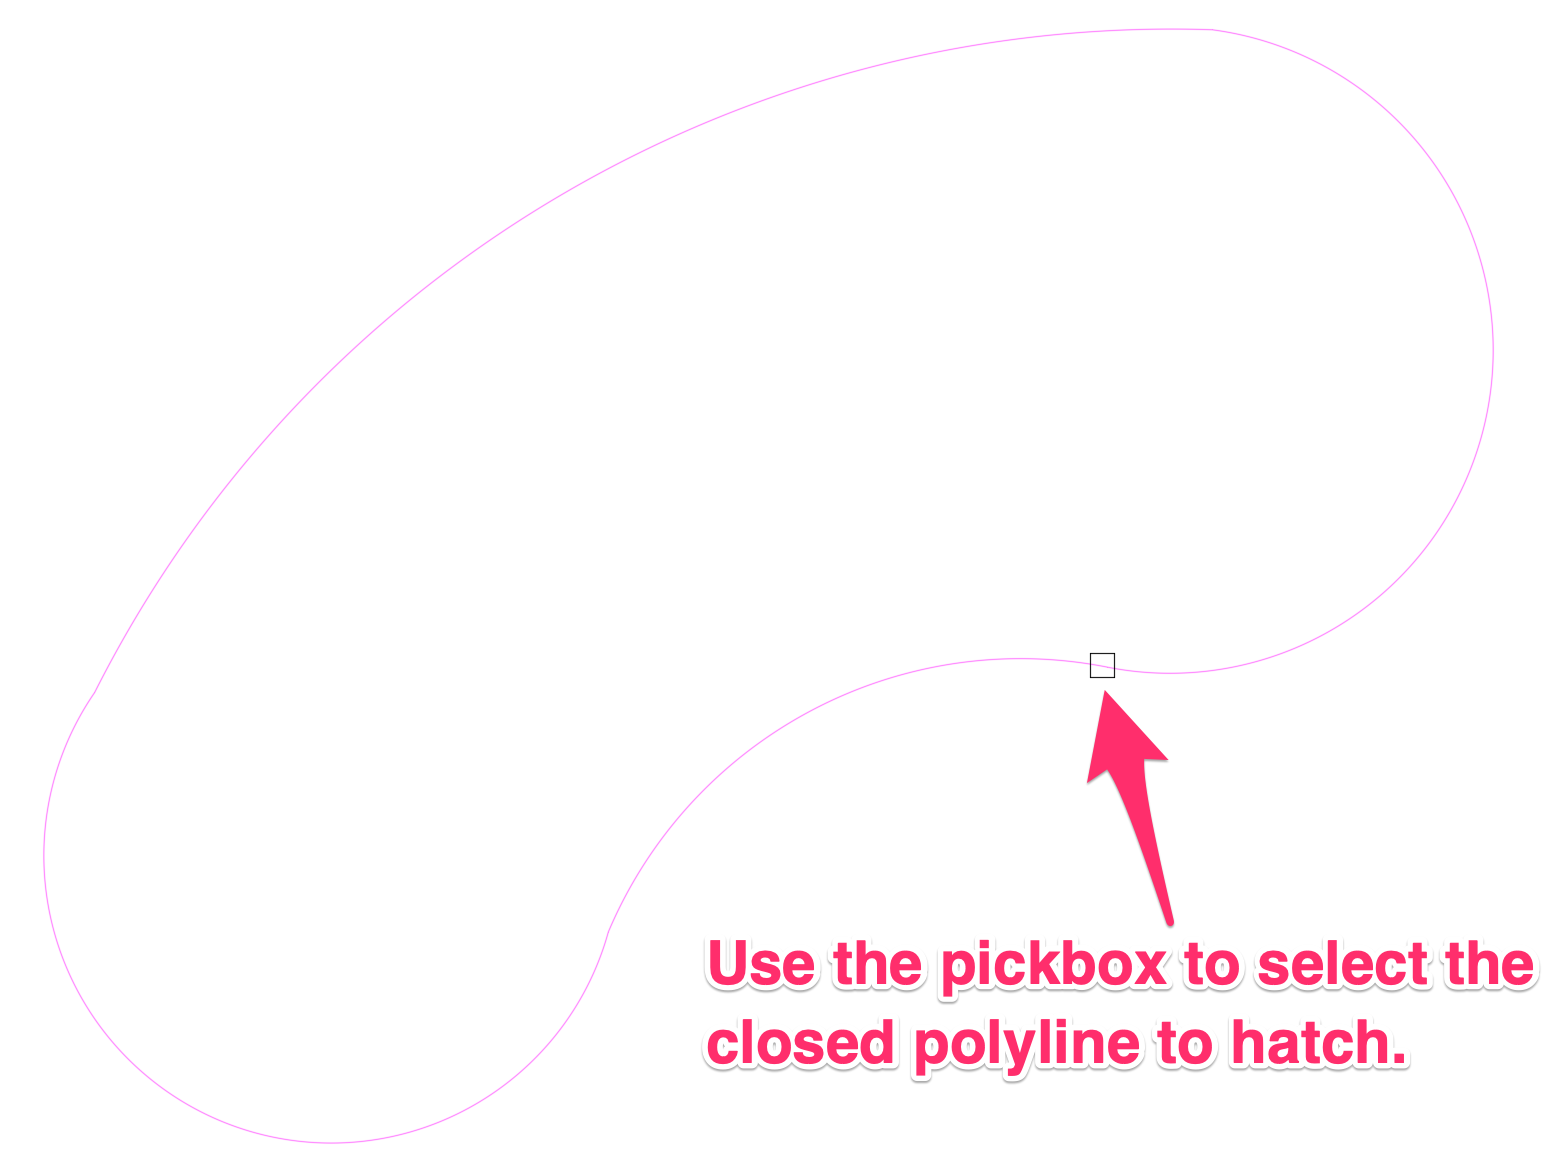
The polyline will be hatched with the pattern you selected.
Quick video
Drawing a Hatch Boundary "On the Fly"
If you haven't yet drawn a polyline boundary for your hatch, you can now do so "on the fly" after selecting your hatch pattern.
When you go to place a hatch, the Command line will prompt you to Select polyline or interior point to hatch, [Draw Exclude shrubs Multiple].
Start drawing your closed polyline. Once you close it, the hatched area will appear within the polyline boundary.
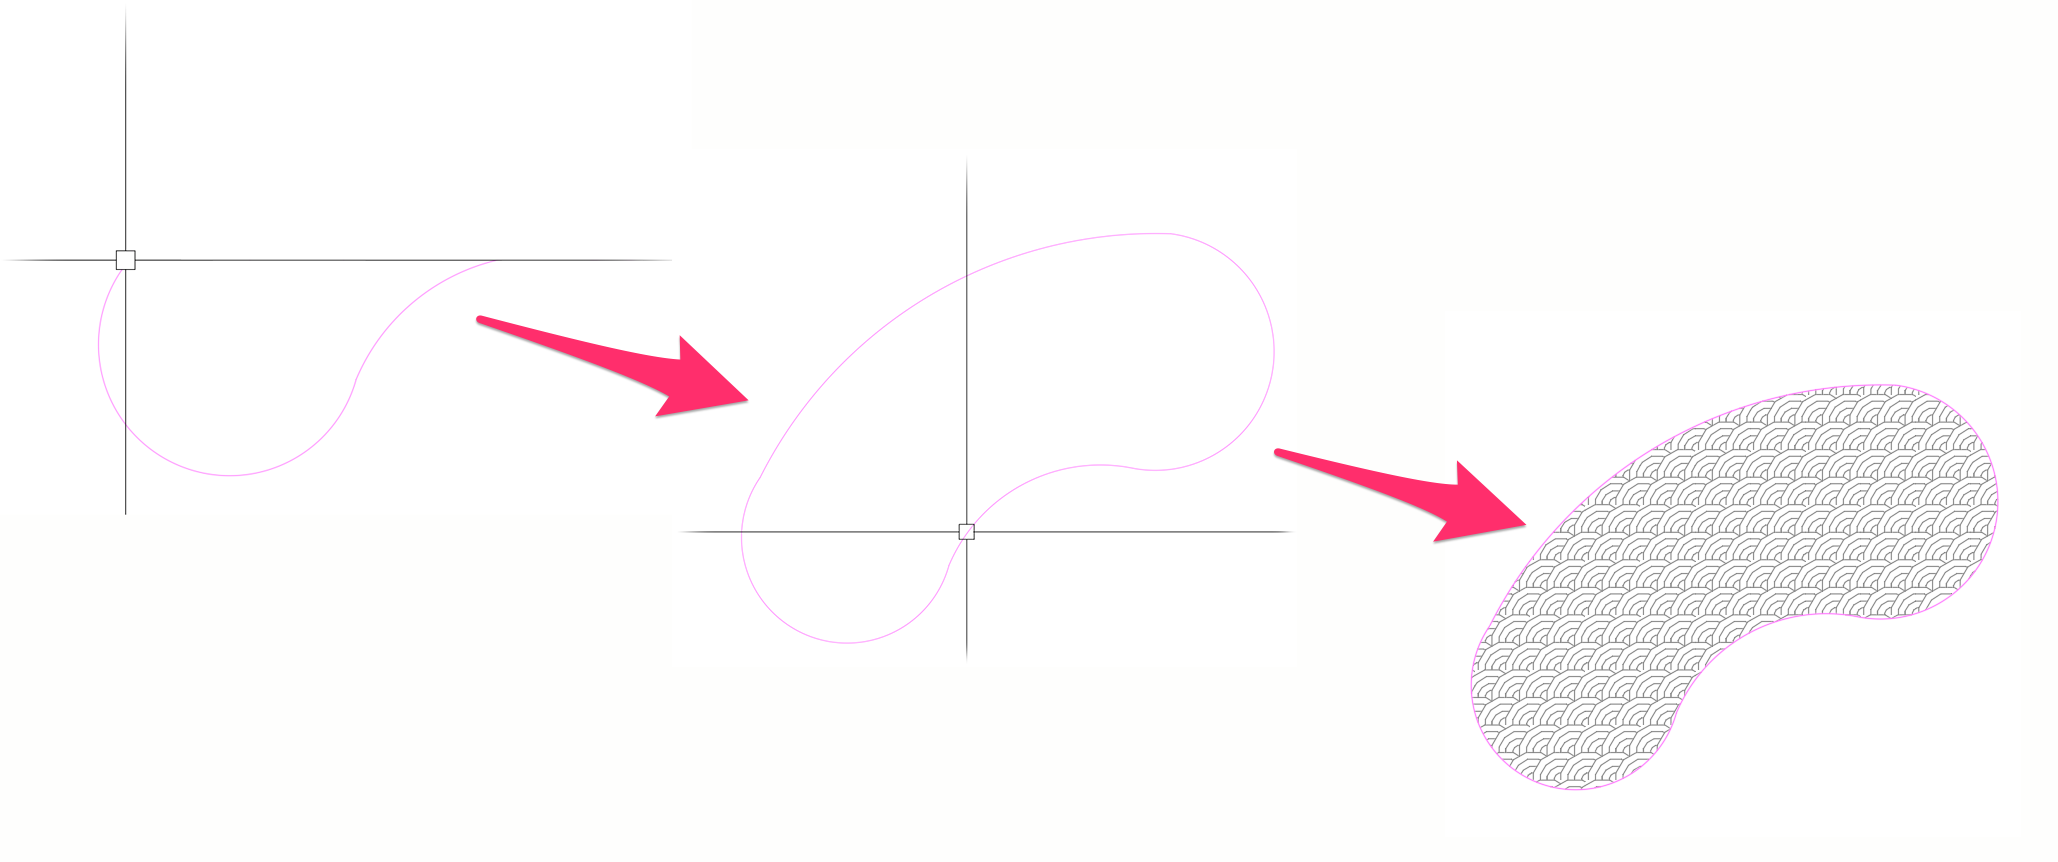
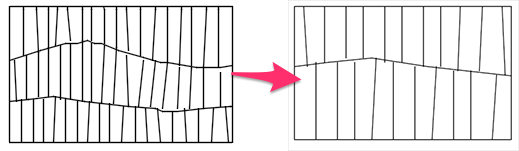
In previous versions, drawing your hatch boundary on the fly would require you to first type D for Draw. We've now built in the ability to simply start drawing your closed polyline. As long as the first point you select isn't an existing polyline, the Draw command will be fired automatically.
This feature works with all our default hatch types, including:
Scaling a Hatch Manually
Hatches not appearing at the scale you want them to be? Even though our software scales hatches automatically, you may want to adjust the scale of a hatch you've placed. You can easily do so by selecting the hatch and adjusting the scale in the Hatch Editor.
Double-click the hatch in your drawing. The Hatch Editor will open.
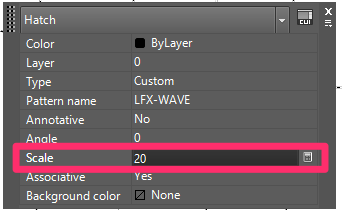
Change the Scale value to a number that will give you the scale you want.
A larger number will result in a hatch that's less dense. A smaller number will result in a denser hatch.
In this example, we'll change the scale of a hatch from 12 to 20.
As a result, the hatch in the drawing will have a scale that's less dense.
You may need to play with the scaling a bit, adding different values until the hatch has the look you want.
Excluding Objects from a Hatch (The "Multiple" Option)
Reference Note hatches are also helpful when you want to hatch an area but don't want to hatch one or more objects lying within that area. This feature works similarly to the Exclude Shrubs tool, which omits groundcover hatch from shrubs within a planting area.
This feature will not work with stipple hatches. If you want to exclude interior objects from a hatch, you'll need to make sure that hatch is something other than stipple.
To exclude objects from a site hatch, you'll need to place the hatch as an Area/Volume Reference Note.
Open the Reference Notes tool:

F/X Site ribbon, RefNotes flyout

F/X Details ribbon, RefNotes flyout

F/X Site pull-down menu
or type RefNotes in the Command line
The Reference Notes Manager will open.
To specify your hatch, click New.
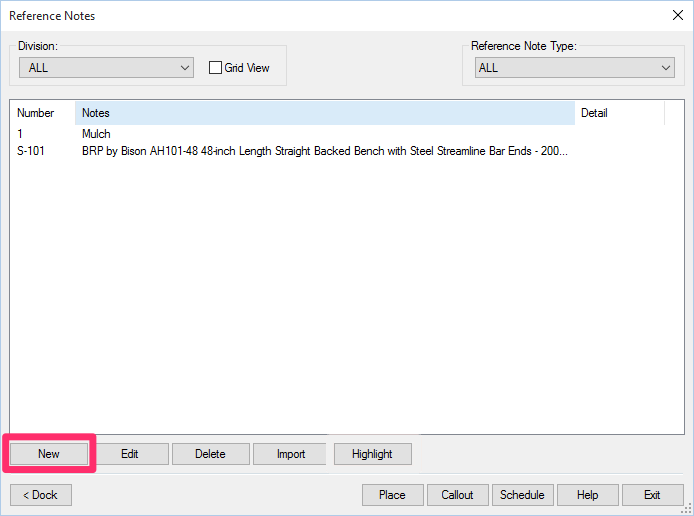

The New Reference Note dialog box will open.
Select Area/Volume.
For specific information on Area/Volume Reference notes, see our Area/Volume Reference Notes documentation.
The Hatch dialog box will open.
Select a hatch pattern subcategory, then select a hatch pattern. Then click OK.


Back in the New Reference Note dialog box, type a note for your hatch.
Then click OK.
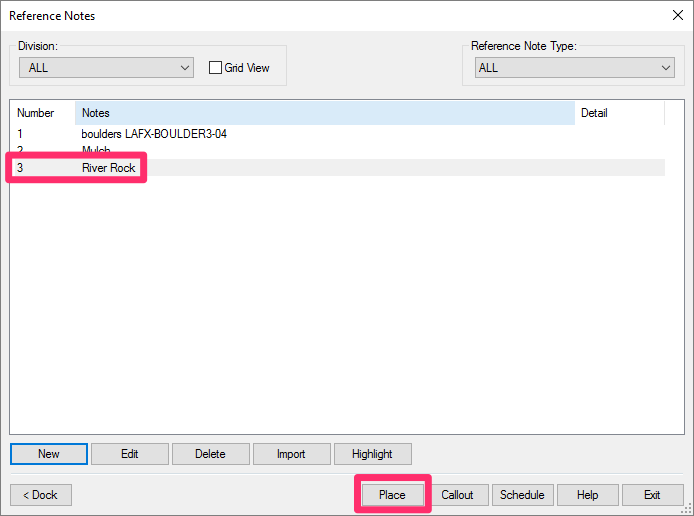
Back in the Reference Notes Manager, select the Area or Volume Reference Note you just created (or any existing Area or Volume Reference Note you want to place).
Click Place to place the hatch in your drawing.
The cursor will turn into a pickbox, and the Command line will prompt you to Select Polyline to hatch, [Multiple].
Don't see the Multiple option at this point? You might be using the Stipple hatch pattern. Stipple hatches don't recognize interior objects, which will prevent you from selecting them. To be able to select and exclude interior objects, you'll need to select a new hatch pattern that isn't Stipple.
Type M for Multiple.
Do not press Enter or the spacebar at this point. Just type M
The Command line will prompt you to Select outer boundary. Select the polyline surrounding the area you would like to hatch.

The Command line will now prompt you to Select interior boundary, <done>. Use the pickbox to select the boundary of any object you'd like to exclude from the hatch.

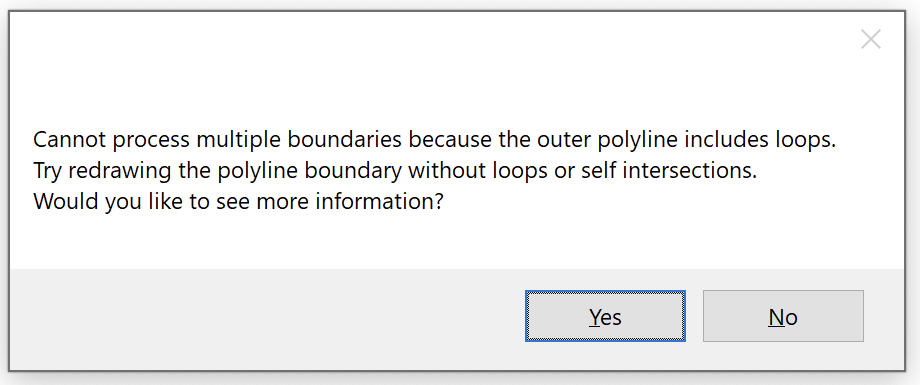
Cannot process multiple boundaries because the outer polyline includes loops.
Seeing this error message when trying to use the Multiple option while placing a hatch?
Not seeing an error message but still unable to select interior objects? Here's what to do.
Continue selecting the boundaries of objects you'd like to exclude from the hatch.

When you've selected all objects you'd like to exclude from the hatch, press Enter or the spacebar. The area will be hatched, excluding the objects you selected.

Editing Placed Hatches (Hint: Use Our P-Hatch Tool)
Quick video

Do you need to add to or subtract from an existing placed hatch in your drawing? If so, we recommend using our P-Hatch tool rather than the native CAD Hatch Edit command.
P-Hatch makes it easy to add to or subtract from hatches by "painting" the hatch pattern into your drawing using one of several possible "brush" patterns. It's also a safe way to edit placed hatches without compromising the hatch boundary.
It's especially important to use P-Hatch to edit hatched areas that contain individual blocks such as shrubs, site amenities, or generic blocks. We've seen some major issues result from the use of Hatch Edit for this purpose – especially when selecting individual shrubs or other blocks to trim the hatch beneath them.
The problem often arises when a user chooses the Add Boundary option within the Hatch Edit command and then clicks individual blocks that lie within the hatch in an attempt to remove the hatch beneath those blocks, commonly with Shrub Area hatches, which lack the options to exclude individual shrubs or other internal objects when placed. This practice can result in hundreds of small boundaries within the hatch boundary (a major cause of poor drawing performance), while also negating the overall Area property for the hatch.
In these cases, we strongly recommend using P-Hatch, which makes instant edits to the hatch pattern while protecting the hatch's boundary and area total.
Assigning a Real-World Scale to a Placed Hatch Pattern
You might want a hatch that shows pavers, wood planks, or other objects to appear at a scale where the hatch components show at the same measurements in your drawing as they would on the site itself. For example, you might have a hatch depicting 8-inch pavers, and you want the pavers to actually measure 8 inches in your drawing. If so, here's what to do.
Can Non-Land F/X Users Access the Land F/X Hatch Library?
No, only Land F/X users can access the Land F/X hatch library to place and edit hatches. Non-Land F/X users can only modify Land F/X hatches that have already been placed in a drawing.
Having a Hatch Issue? Download Our Updated Hatch Patterns Manually
Are you experiencing any of the following issues with your hatches?
- Hatches looking fragmented or broken apart
- Hatches with scales that are too large or too dense
- Hatches that place blank or empty
- Hatches that are not appearing in schedules
- File size bloating
If so, follow our steps to download our updated hatch patterns manually.
Related Webinars
- Hatches We dive into the Land F/X hatch libraries, take a look at how Land F/X manages hatches, and show you how to integrate your own custom hatches and develop a better understanding of the inner workings of the Land F/X hatch system as a whole. (58 min)
Troubleshooting
Issue: Hatches are appearing as solid rather than patterns
Issue: Unable to see hatches or colorized plants in a 3D model (AutoCAD or Civil 3D)
Issue: When placing a hatch, you received the following error message: Unable to locate target hatch
Issue: AutoCAD crashes when you place a hatch – but only when the Land F/X menus are loaded
Issue: Bad DXF group (10) error when placing hatches
Issue: Colors are displaying incorrectly in Model Space
Issue: You tried to place a Stipple hatch pattern, but the hatch is placing incorrectly outside the polyline area
Issue: Your hatches are showing up incorrectly, or as random lines or solid colors
Issue: Your hatch library is blank, or all the thumbnail previews are missing in the Hatch dialog box
Issue: You are unable to change the rotation of a hatch pattern
Issue: A placed Land F/X hatch looks fragmented or isn't joined like it should be
Issue: A placed Land F/X hatch looks different from its thumbnail preview slide in the Hatch dialog box