
Create a New Land F/X Project
Updated on: July 08, 2025
Quick video

- Step 1: Create a New Project
- Step 2: Choose a Preference Set
- Step 3 (Optional): Base Your Project on an Existing Template
- Step 4: Set the Scale & Units
- Working with Existing Land F/X Projects
- Disassociating a Drawing from a Project
- Related Webinars
- Troubleshooting
The first step in working with our software is creating a new Land F/X project. Each project is essentially a database that you associate with an AutoCAD drawing. The project is where you store your plant palette, your irrigation equipment inventory, and all other items and data you need to use in your drawings.
A project is not the same thing as a CAD drawing (DWG file). You'll build your palette by adding plants, site amenities, and/or irrigation components to the project. You'll then place those items in your drawing.
Step 1: Create a New Project
Before you can create a project, you'll need to open a CAD drawing. Open our Projects tool:

F/X Admin ribbon, Project List button
or type FX_ProjectFiles in the Command line

F/X Admin pull-down menu
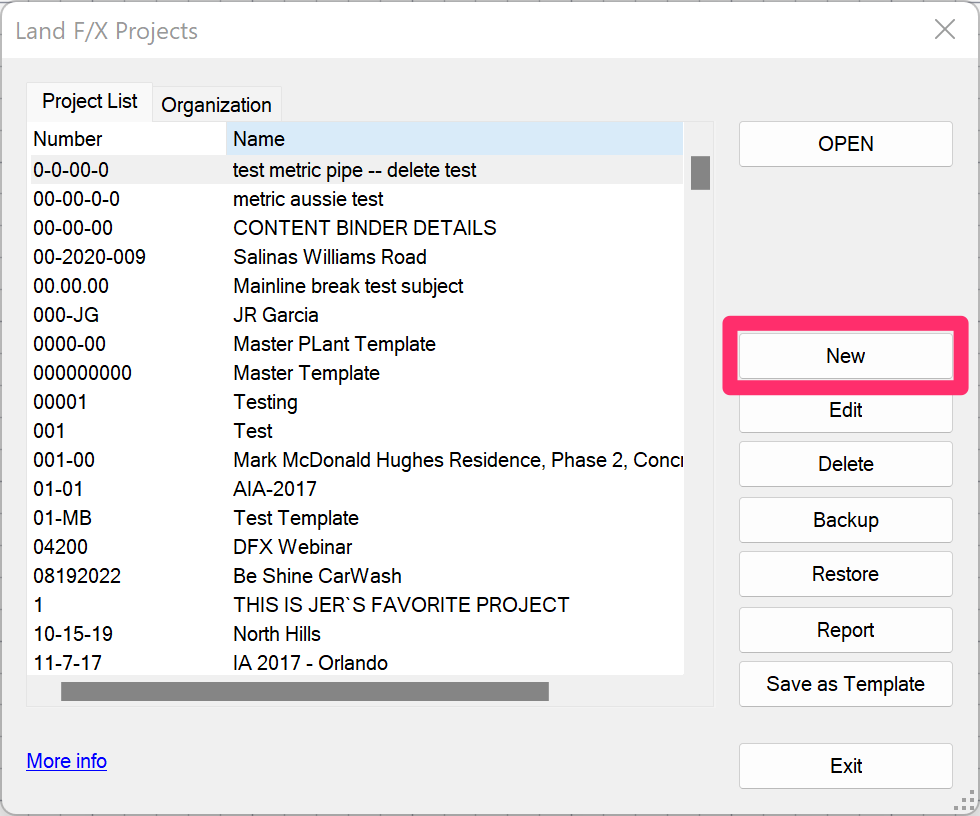
The Land F/X Projects dialog box will open.
Click New to start a new project.
Quick video

The New Project dialog box will open.
Set up your project by entering accurate information in the required data fields. You can edit these fields at any time throughout the project.
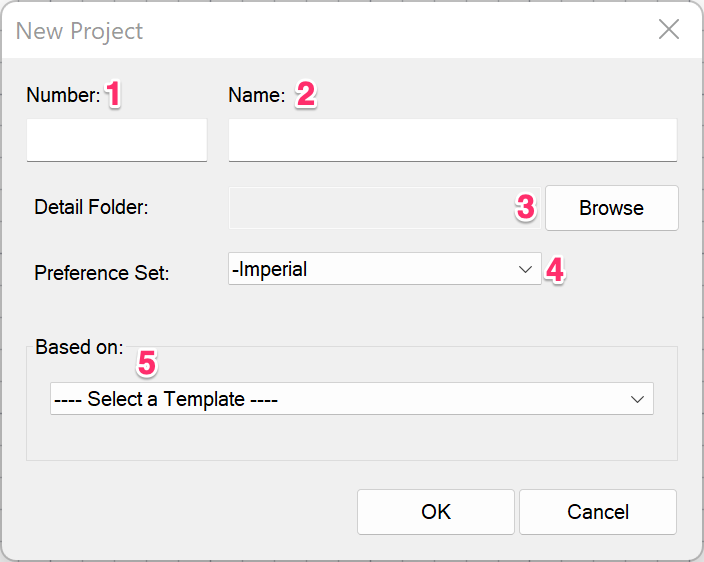
1. Number: Enter a project number in this field. You can base the project number on your office's numbering standards. The project number has to be a unique number in relation to the other projects in the office. It can have up to eight characters, and be any combination of letters, numbers, or symbols (other than an apostrophe).
2. Name: Enter a project name in this field. This will come in handy for identifying the project in the future as business picks up and your project list grows. The project name is simply your office name for the project, and does not necessarily need to be unique from one project to another. For example, you may have several "Smith Residence" projects.
3. Detail Folder If you want, click Browse select a folder of details to associate with your project.
4. Select a Preference Set from this pull-down menu. This will determine the type of units you would like to set as your default for this specific project.
5. Based On: If you want, you can base the new project on an existing Template. If you select one of your templates from this menu, the dialog box will expand to provide additional options. More information
Click OK once you've entered all the necessary information for your new project.
The Project Manager will open.
The Project Manager is essentially your control panel for the project you currently have open. Here, you can change the project number, name, and description, as well as define a detail folder. See our Project Manager documentation for more information.
You may feel tempted to open an existing project and rename it, rather than simply opening a new project. DO NOT DO THIS. Renaming existing projects with the intention of retaining their properties for a new project can cause a number of file issues. If you want to create a new project with similar properties to an existing project, save the existing project as a template. Then open a new project based on that template. For more information, see our Templates documentation.

Step 2: Choose a Preference Set
Our six Preferences screens provide a centralized way to customize everything from fonts and label styles to layer colors. Once you've congifured your Preferences the way you want them, you can save those settings in what's known as a Preference Set. You can create as many Preference Sets as you need – one for each client, each type of project, each consultant you work with, etc.
For more information about Preference Sets, see our Preference Sets documentation.
When you create or open a project, you should get into the habit of making sure you have the correct Preference Set assigned to that project, or set as active. When you start working in a drawing with a project active, the active Preference Set will govern the appearance of fonts, layer colors, label styles, and any other settings that are configured and saved within that Preference Set. That's why it's extremely important to have the correct Preference Set active.
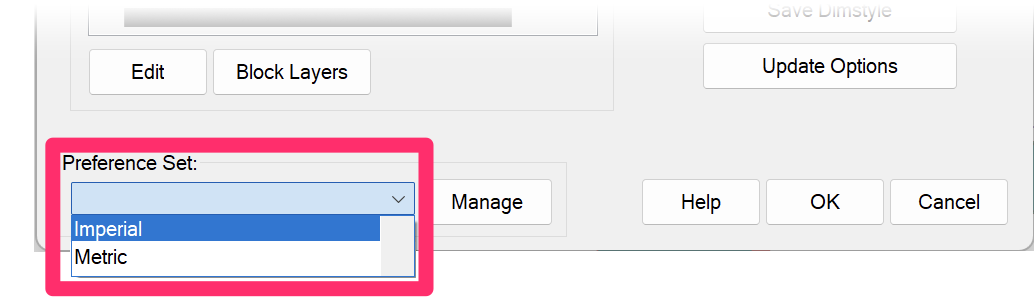
To set a Preference Set as active, just open any of the six Preferences screens and select it from the menu pictured to the right. You can then close the Preferences and start working on your project.
Note that your installation comes with our two default Preference Sets – Imperial and Metric (one for each measurement system you're likely to use).
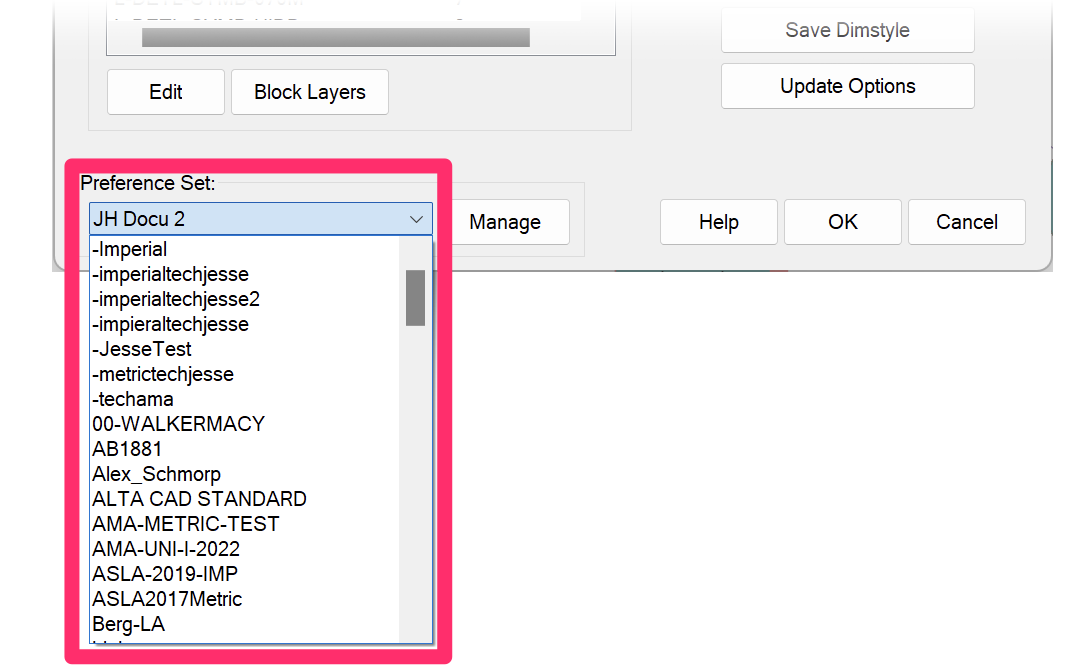
However, if your office creates a large number of Preference Sets, you'll have a longer list of Preference Sets to choose from.
Important: When you open or create a project, the first Preference Set in alphabetical order will be set active by default. If you have one Preference Set that you anticipate using most often, you might think about giving it a name that puts it first alphabetically. That way, that Preference Set will always be set active by default and you won't have to worry about selecting one each time you open or create a project.
Step 3 (Optional): Base Your Project on an Existing Template
A Land F/X project template is nothing more than a previous project that, when completed, you believe would apply to many other projects, and have therefore saved it as a template in the Land F/X Projects dialog box. If you find yourself using the same plants, details, notes, etc. for a specific client, you may find project templates useful. See our Project Templates documentation for more information.
To base your new project on one of your existing templates, select that template from the Based on menu.
You'll then be presented with several checkboxes for items you want to import from the template:
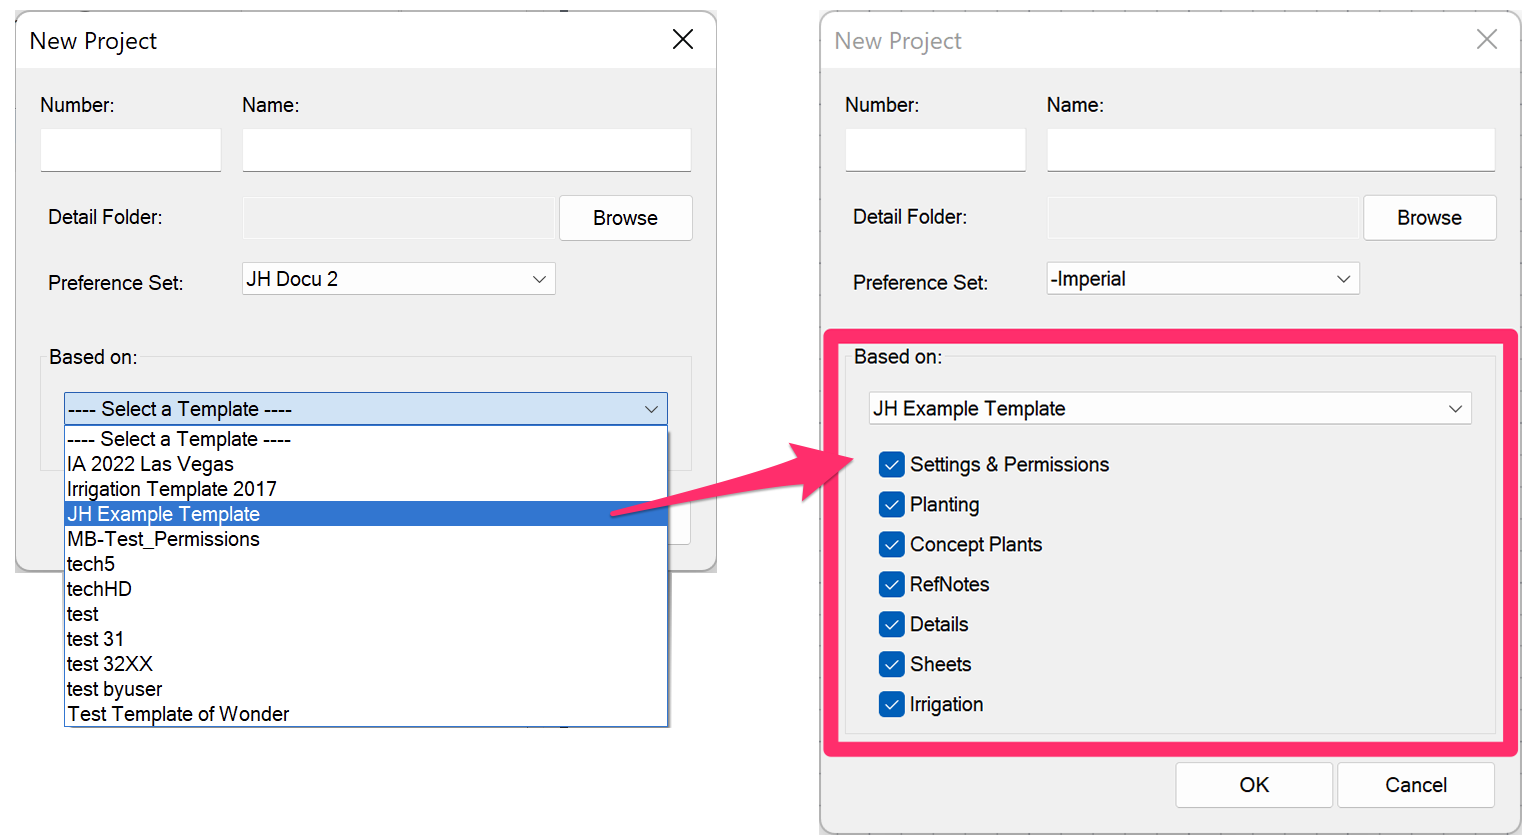
Select the item types you want to import to your project from the template. Deselect the items you don't want to import.
Step 4: Set the Scale & Units
Quick video

Once you've set up your project, it's a good idea to use our Scale tool to set up your plot scale and drawing units.
You'll want these important settings dialed in before you start drawing.
You can find our Scale tool on most of our ribbons:

F/X Admin ribbon

F/X Irrigation ribbon
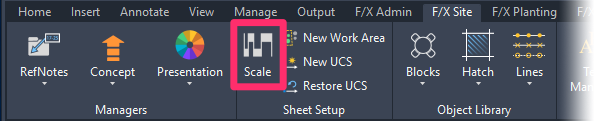
F/X Site ribbon

F/X Planting ribbon

You can set your scale and units in the Plot Scale dialog box.
See our documentation on setting the scale and units for more information.
Working with Existing Land F/X Projects
For information on working with your projects after creating them, see our documentation on opening and working with existing projects.
Disassociating a Drawing from a Project
In some cases, a drawing may become locked into a project, so to speak. To free a project from a drawing, follow our steps to disassociate a drawing from a project.
Related Webinars
- Setting Your Land F/X Up for Success: etting Your Land F/X Up for Success means making the software work for you. We'll explore best practices for project templates, Preference Sets, detail folders, and other key tools for optimizing your workflow that will help make your design experience more efficient – and more fun. (1 hr 1 min)
- Land F/X Admin & Setup: This webinar will show you what you need to know about Land F/X admin processes and project setup. (1 hr 1 min)
- All About Templates: The word "template" can refer to several components in the AutoCAD and Land F/X systems. We break down the different types of templates available to you, including drawing templates (DWTs) and Land F/X project templates, and provide some helpful tips on using them to your advantage. (1 hr 4 min)
- 101: First Steps with Land F/X: You'll learn what Land F/X is, how it works, and how to navigate through your first steps. We'll even offer an example plan you can download and follow along with. These tips are perfect for new firms or new hires, but please note that some basic knowledge of AutoCAD is recommended. (1 hr 5 min)
Troubleshooting
Issue: you used the same project on multiple DWG files. What to do?