
Plant Color Render: Planting F/X for Revit® Plugin
Quick video
- Color Render Overview
- Change Color in Tree and Shrub Families
- Change Color in Groundcover Floor Types
- Example of a Colorized Plan
- Turning Color Render On and Off
- Including Colorized Plant Symbols in the Plant Schedule
- Customizing the Color Wheel for Planting Areas
- Get the Latest Plant Color Symbols
- Related Webinars
- Troubleshooting
Our Color Render tool inside our Planting F/X for Revit Plugin creates a colorized plan of your design by enabling view-specific settings for our plant families and groundcover floor types.
This article provides instructions on how to colorize plants using the Color Render tool. For information on placing your color-rendered plants in your drawing, see our Place Plants in Revit documentation.
Color Render Overview
Open the Color Render tool:

Planting F/X ribbon, Color Render flyout
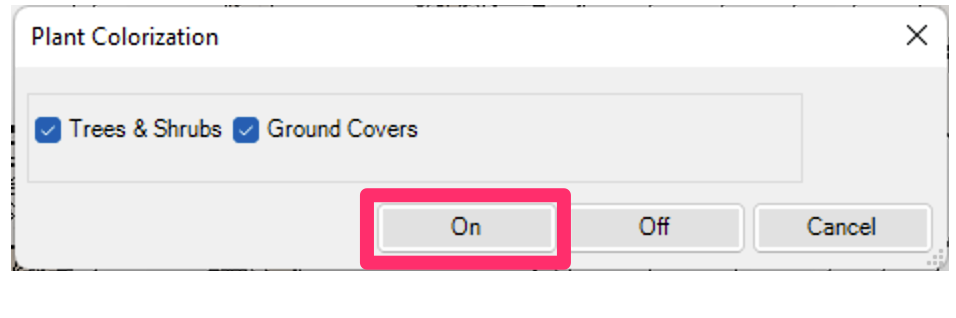
When you select Color Render, a window will open, allowing you to choose whether both trees/shrubs and groundcovers will be colored, or just one or the other.
Click On to turn Color Render on.
The chosen color will turn on in the current view only.

Groundcover color can currently only be turned on in one view at a time. Turning groundcover Color Render on in a second view will automatically turn it off in the first view.
Change Color in Tree and Shrub Families
Quick video
Our default Planting F/X tree and shrub families come with a Color Render solid fill already available. If yours are missing this fill, you can download the latest updated families by clearing your library.
To edit the color of a tree or shrub symbol, add a filter to your project for the LAFX plant code.
You can use this method in any way you like, with any parameter – not just with plant codes. For example, you can:
- Use the plant group name to color all trees in the plant group Palms one color
- Use the Symbol group to color all trees one color and all shrubs another
- Color code plants by their size and container
We'll go through the plant code as an example below.
1. Make sure you know the plant code of the plant you want to re-color. If you're not sure, you can either:
- Label it, or
- Note the plant code parameter
To see the plant code parameter, select the plant, click Edit Type in the Properties palette, and scroll down to check the LAFX plant code.

2. In the view where Color Render is turned on, type VG to open the Visibility Graphics override window.
3. Open the Filters tab, then click Add to add a new filter.

4. In the Add Filters dialog box, click Edit/New.
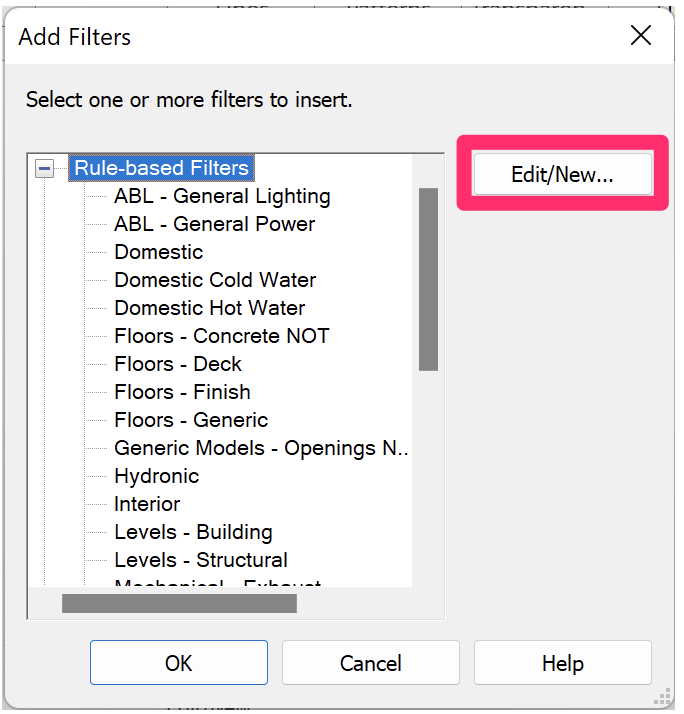
5. Select Rule-based Filters and click the icon for a new filter. In the Filter Name dialog box, name the filter LAFX Color Render - GEN SPE (where GEN SPE is the plant code you got from Step 1 above).

6. Under Categories, select Planting.
Under Filter rules, set the LAFX Plant Code to equal your GEN SPE plant code. If you like, you can drop down the list to find it. Click OK when finished.

7. Back in the Add Filters dialog box, select your LAFX Color Render filter from the list and click OK.
8. With that filter added, click the cell for patterns in the row for it to override and choose a new color. Click Apply.
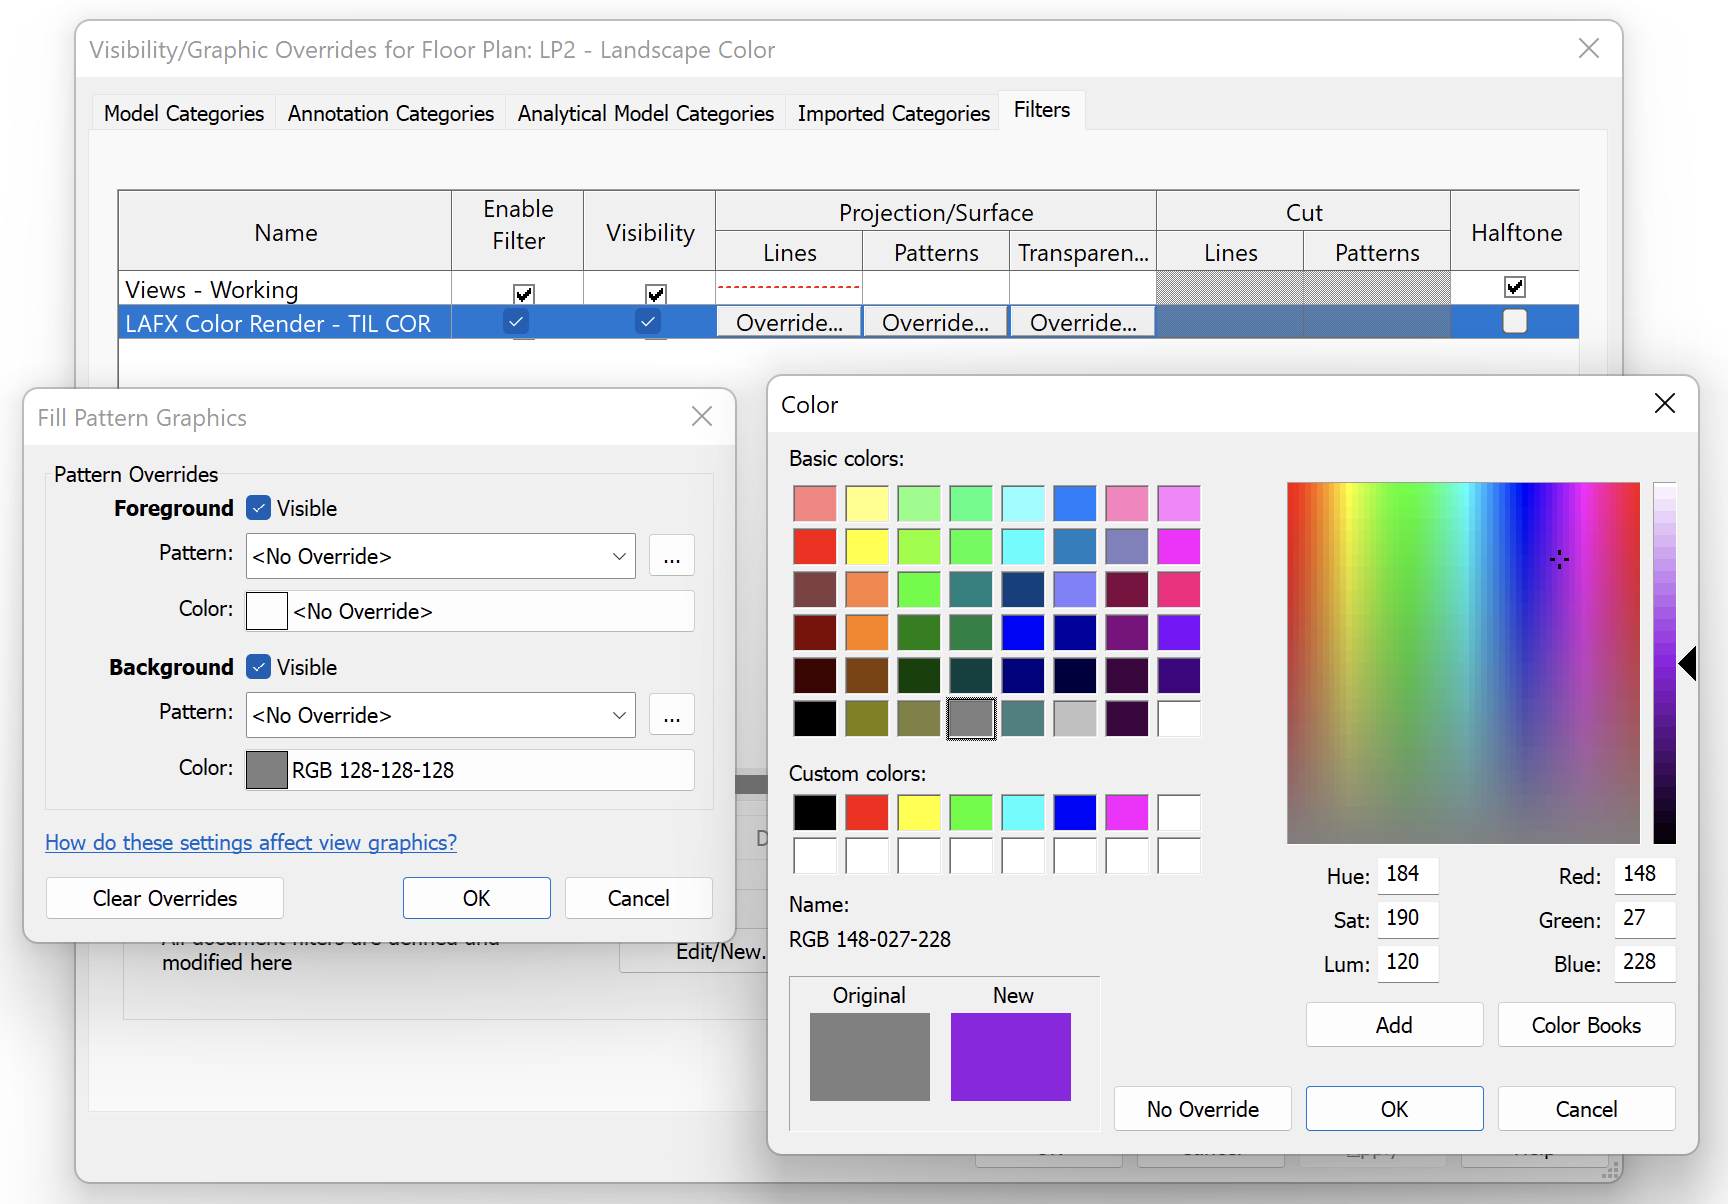
Your color will now be applied to all solid fills in that symbol family.
9. Repeat these steps for all plant codes in your plan.
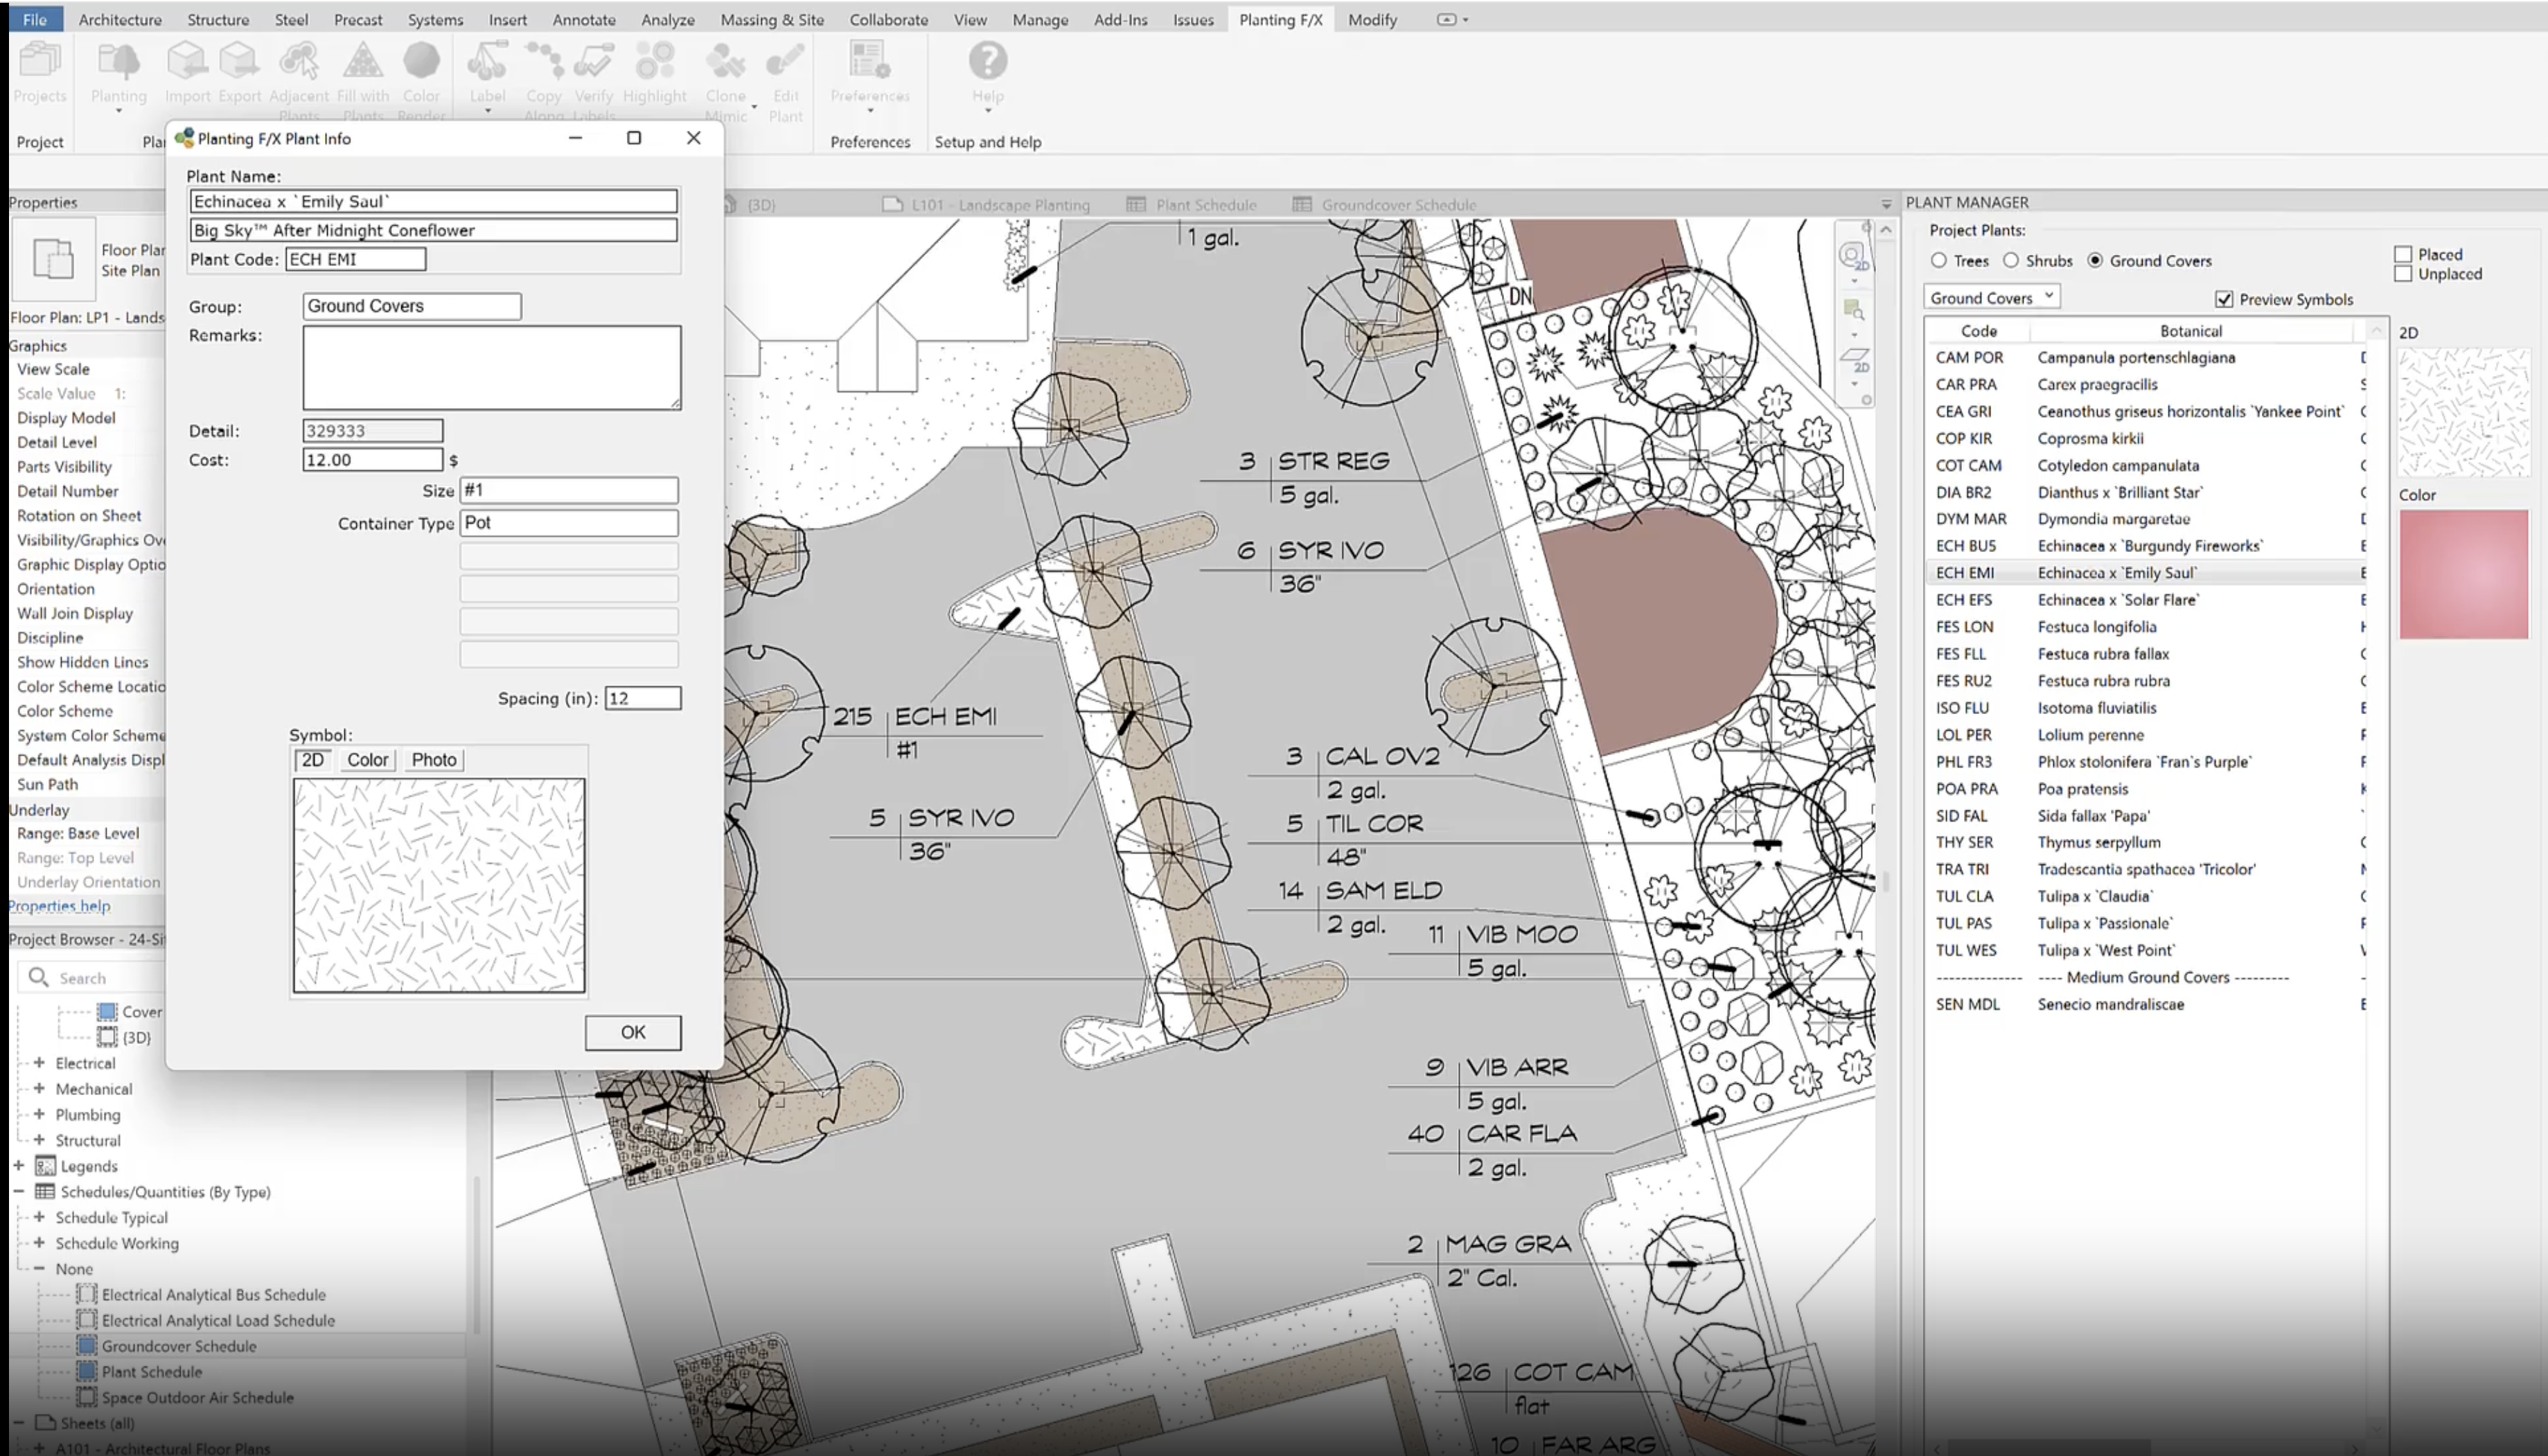
Change Color in Groundcover Floor Types
Changing the color for groundcovers is extremely simple and doesn't require you to edit the floor type yourself.
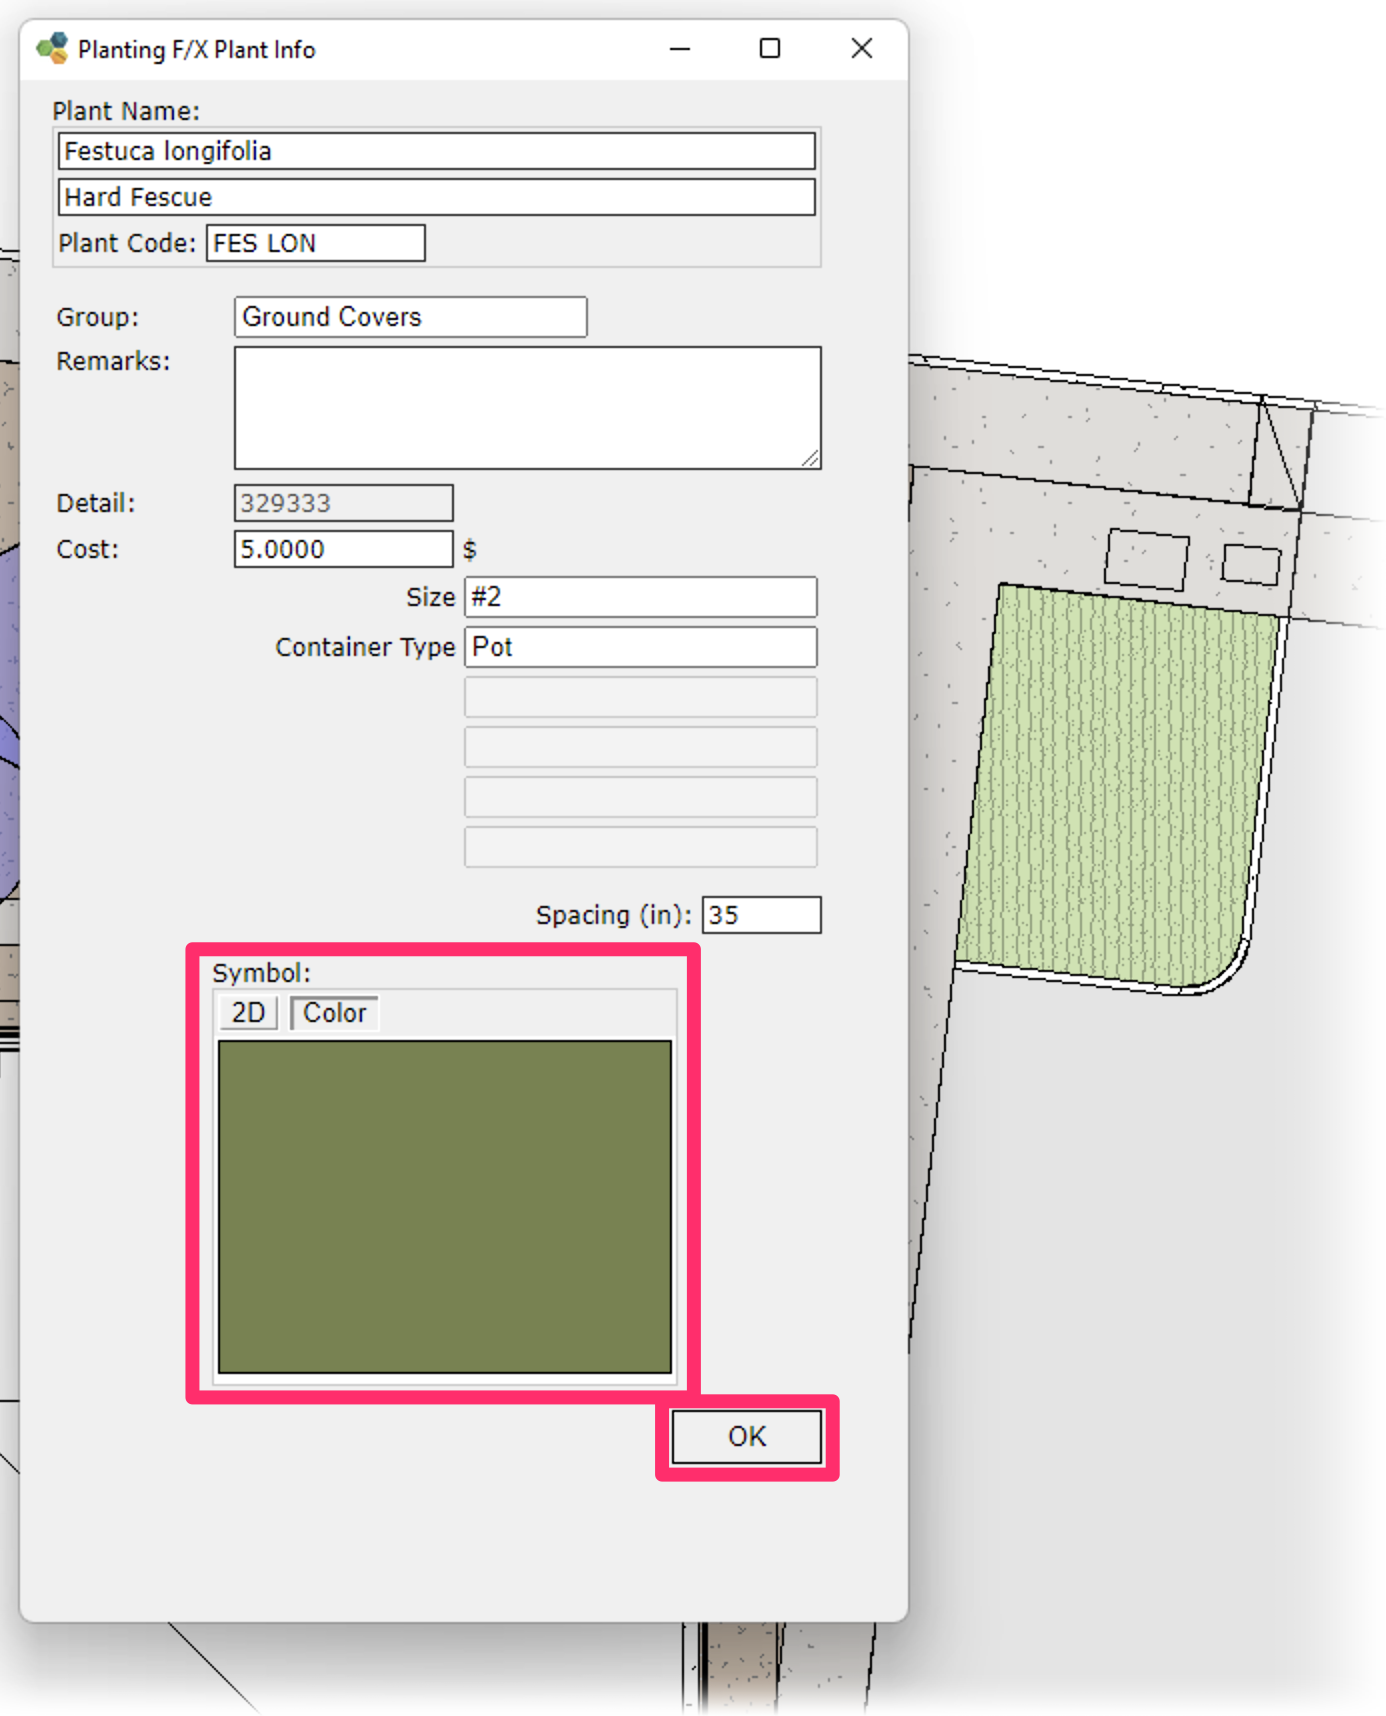
Edit the plant in the Plant Manager or by using the Edit Plant tool in the ribbon on a placed floor.
Click the Color tab under Symbol.
Click the square for the color itself (either blank white, or the currently selected color).
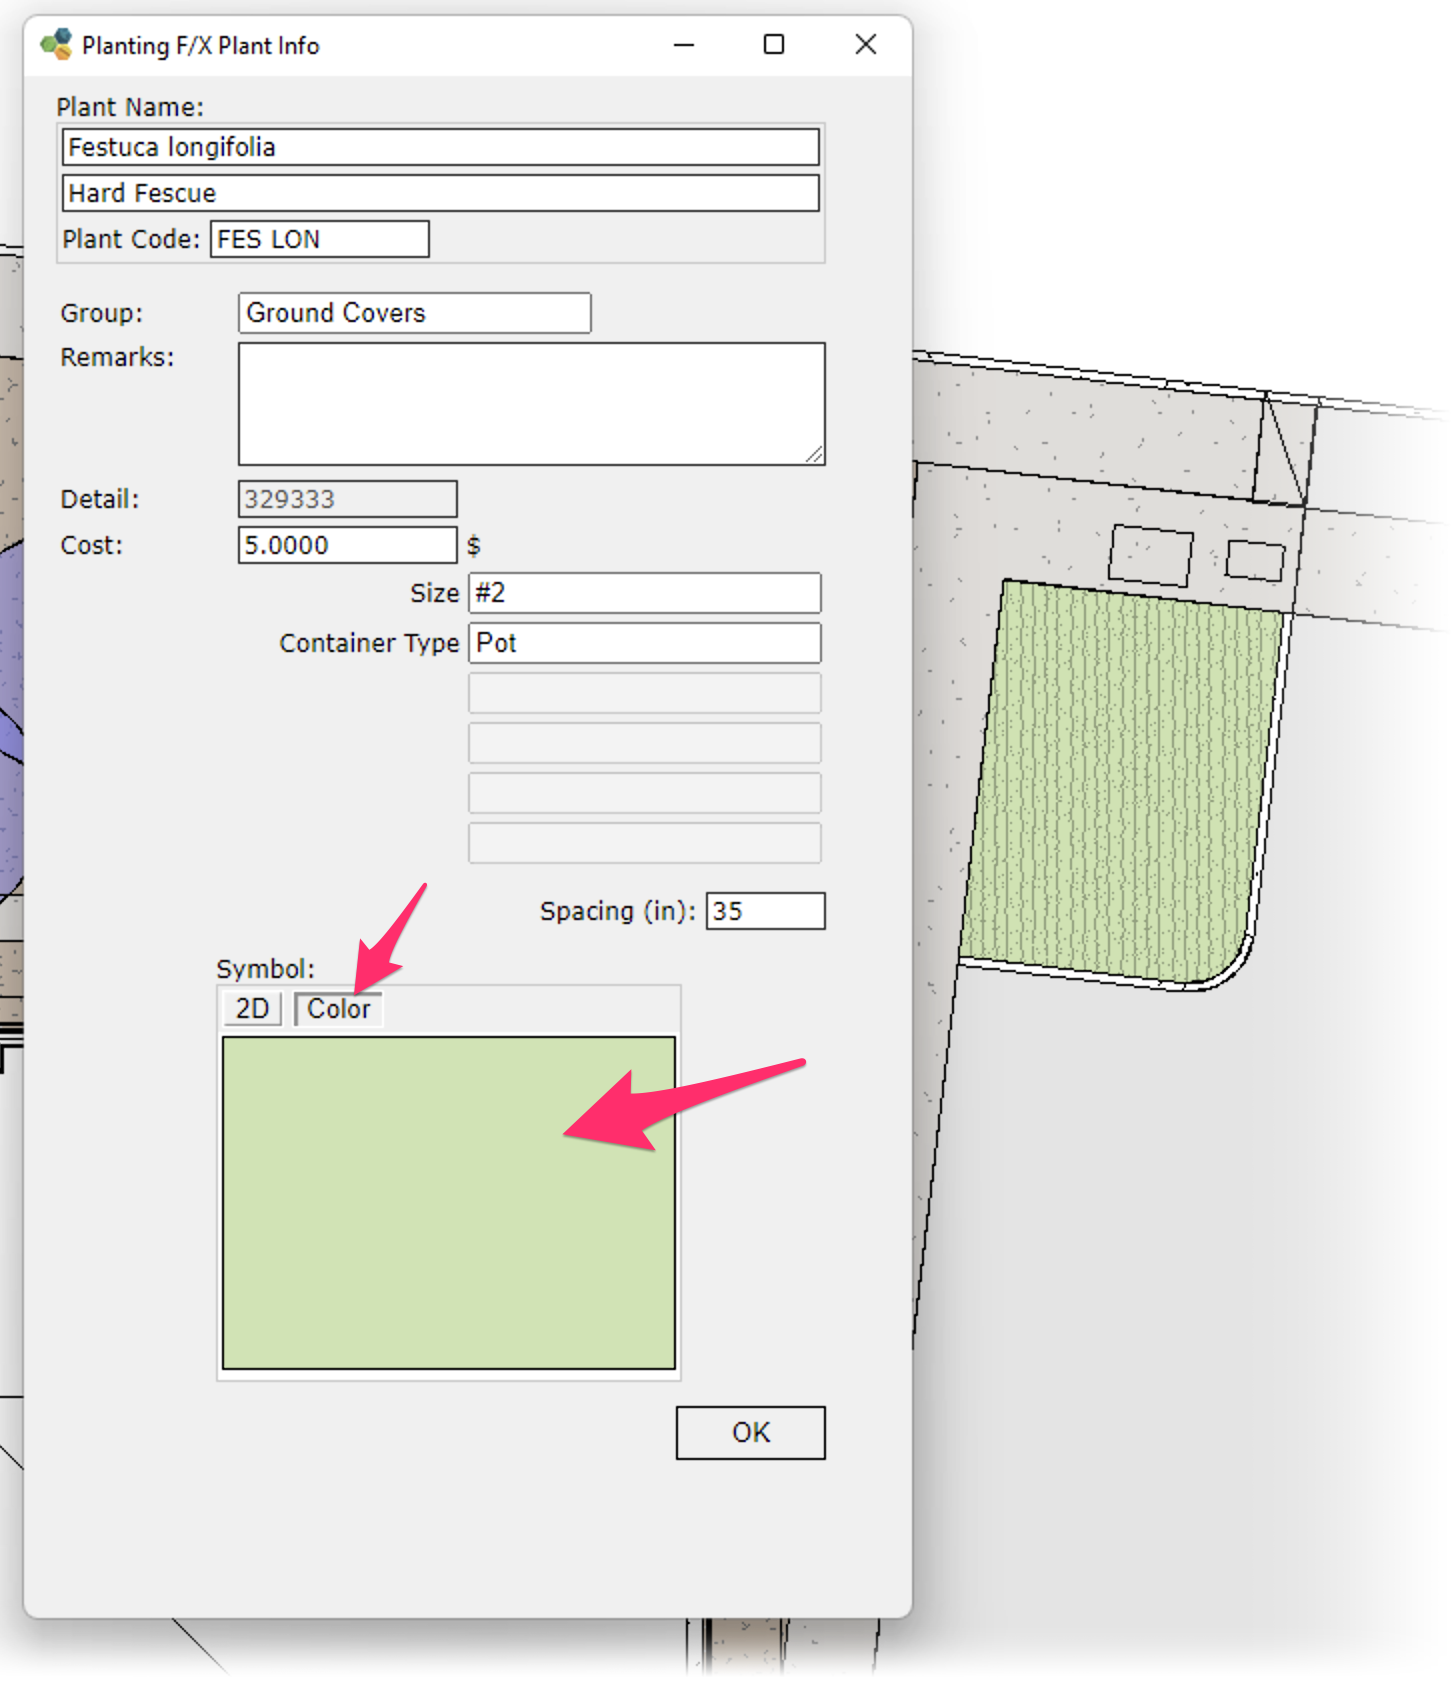
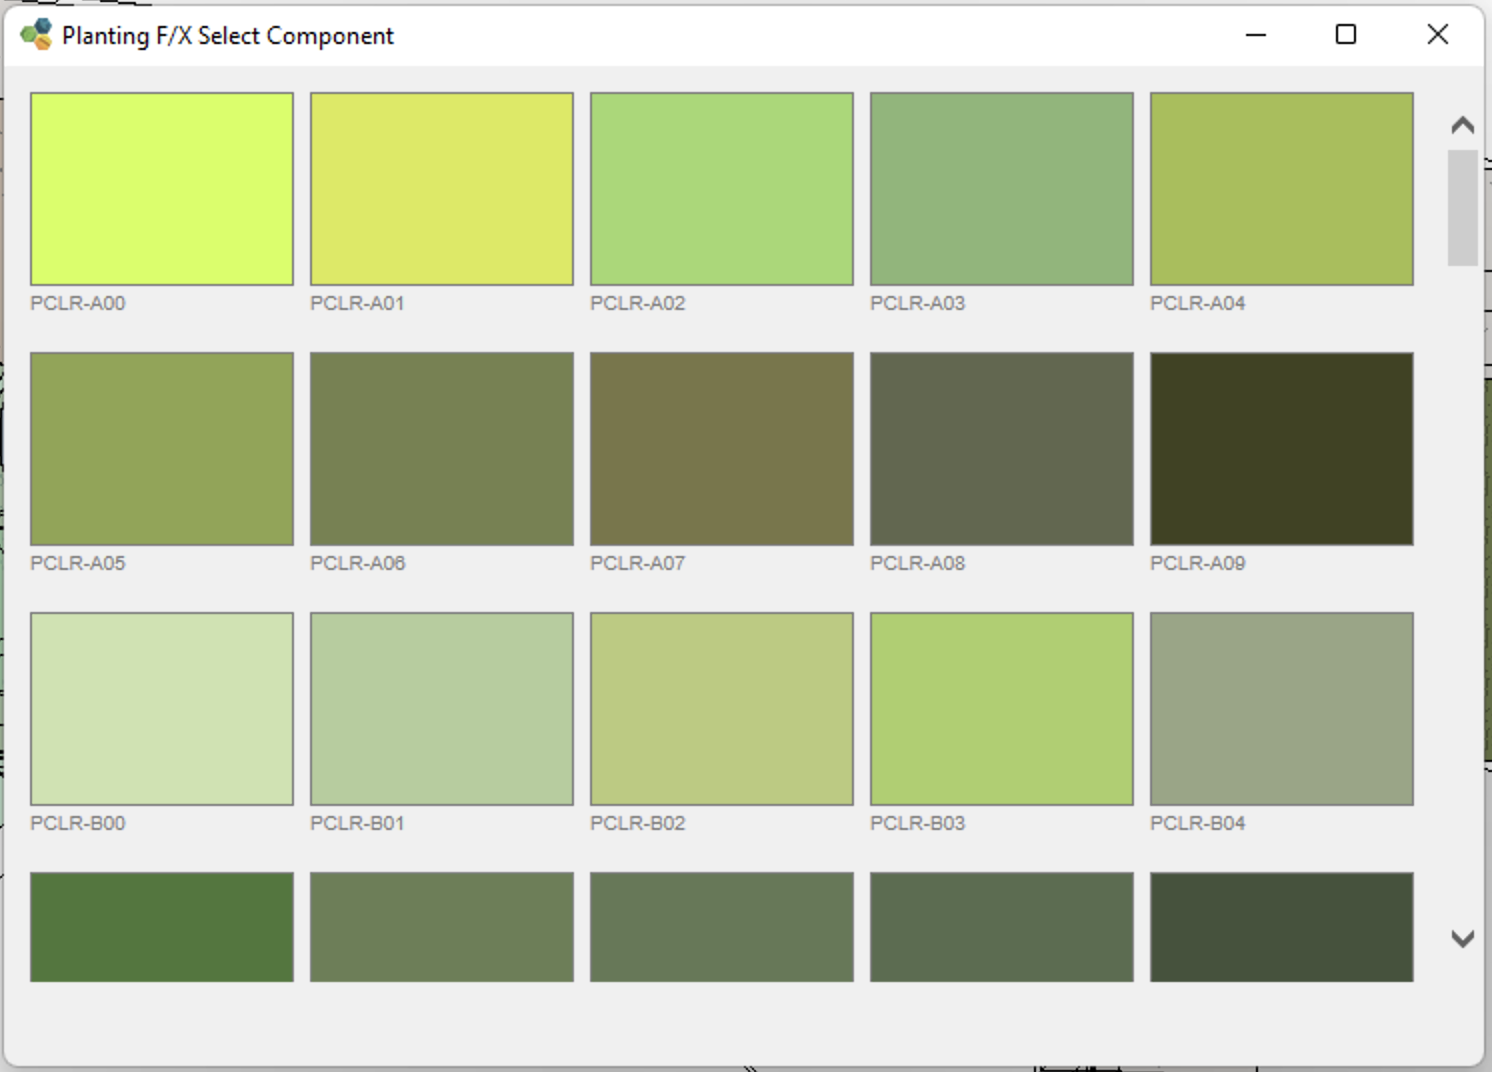
You'll see the available colors to choose from.
Click the color you'd like to change to.
These colors are currently set in Site Color on the AutoCAD side. An equivalent color editor will be arriving in our Revit Planting F/X plugin soon.
Click OK. The color on your floor type will change for you.
You may need to go back to the Color Render tool and turn it on again.
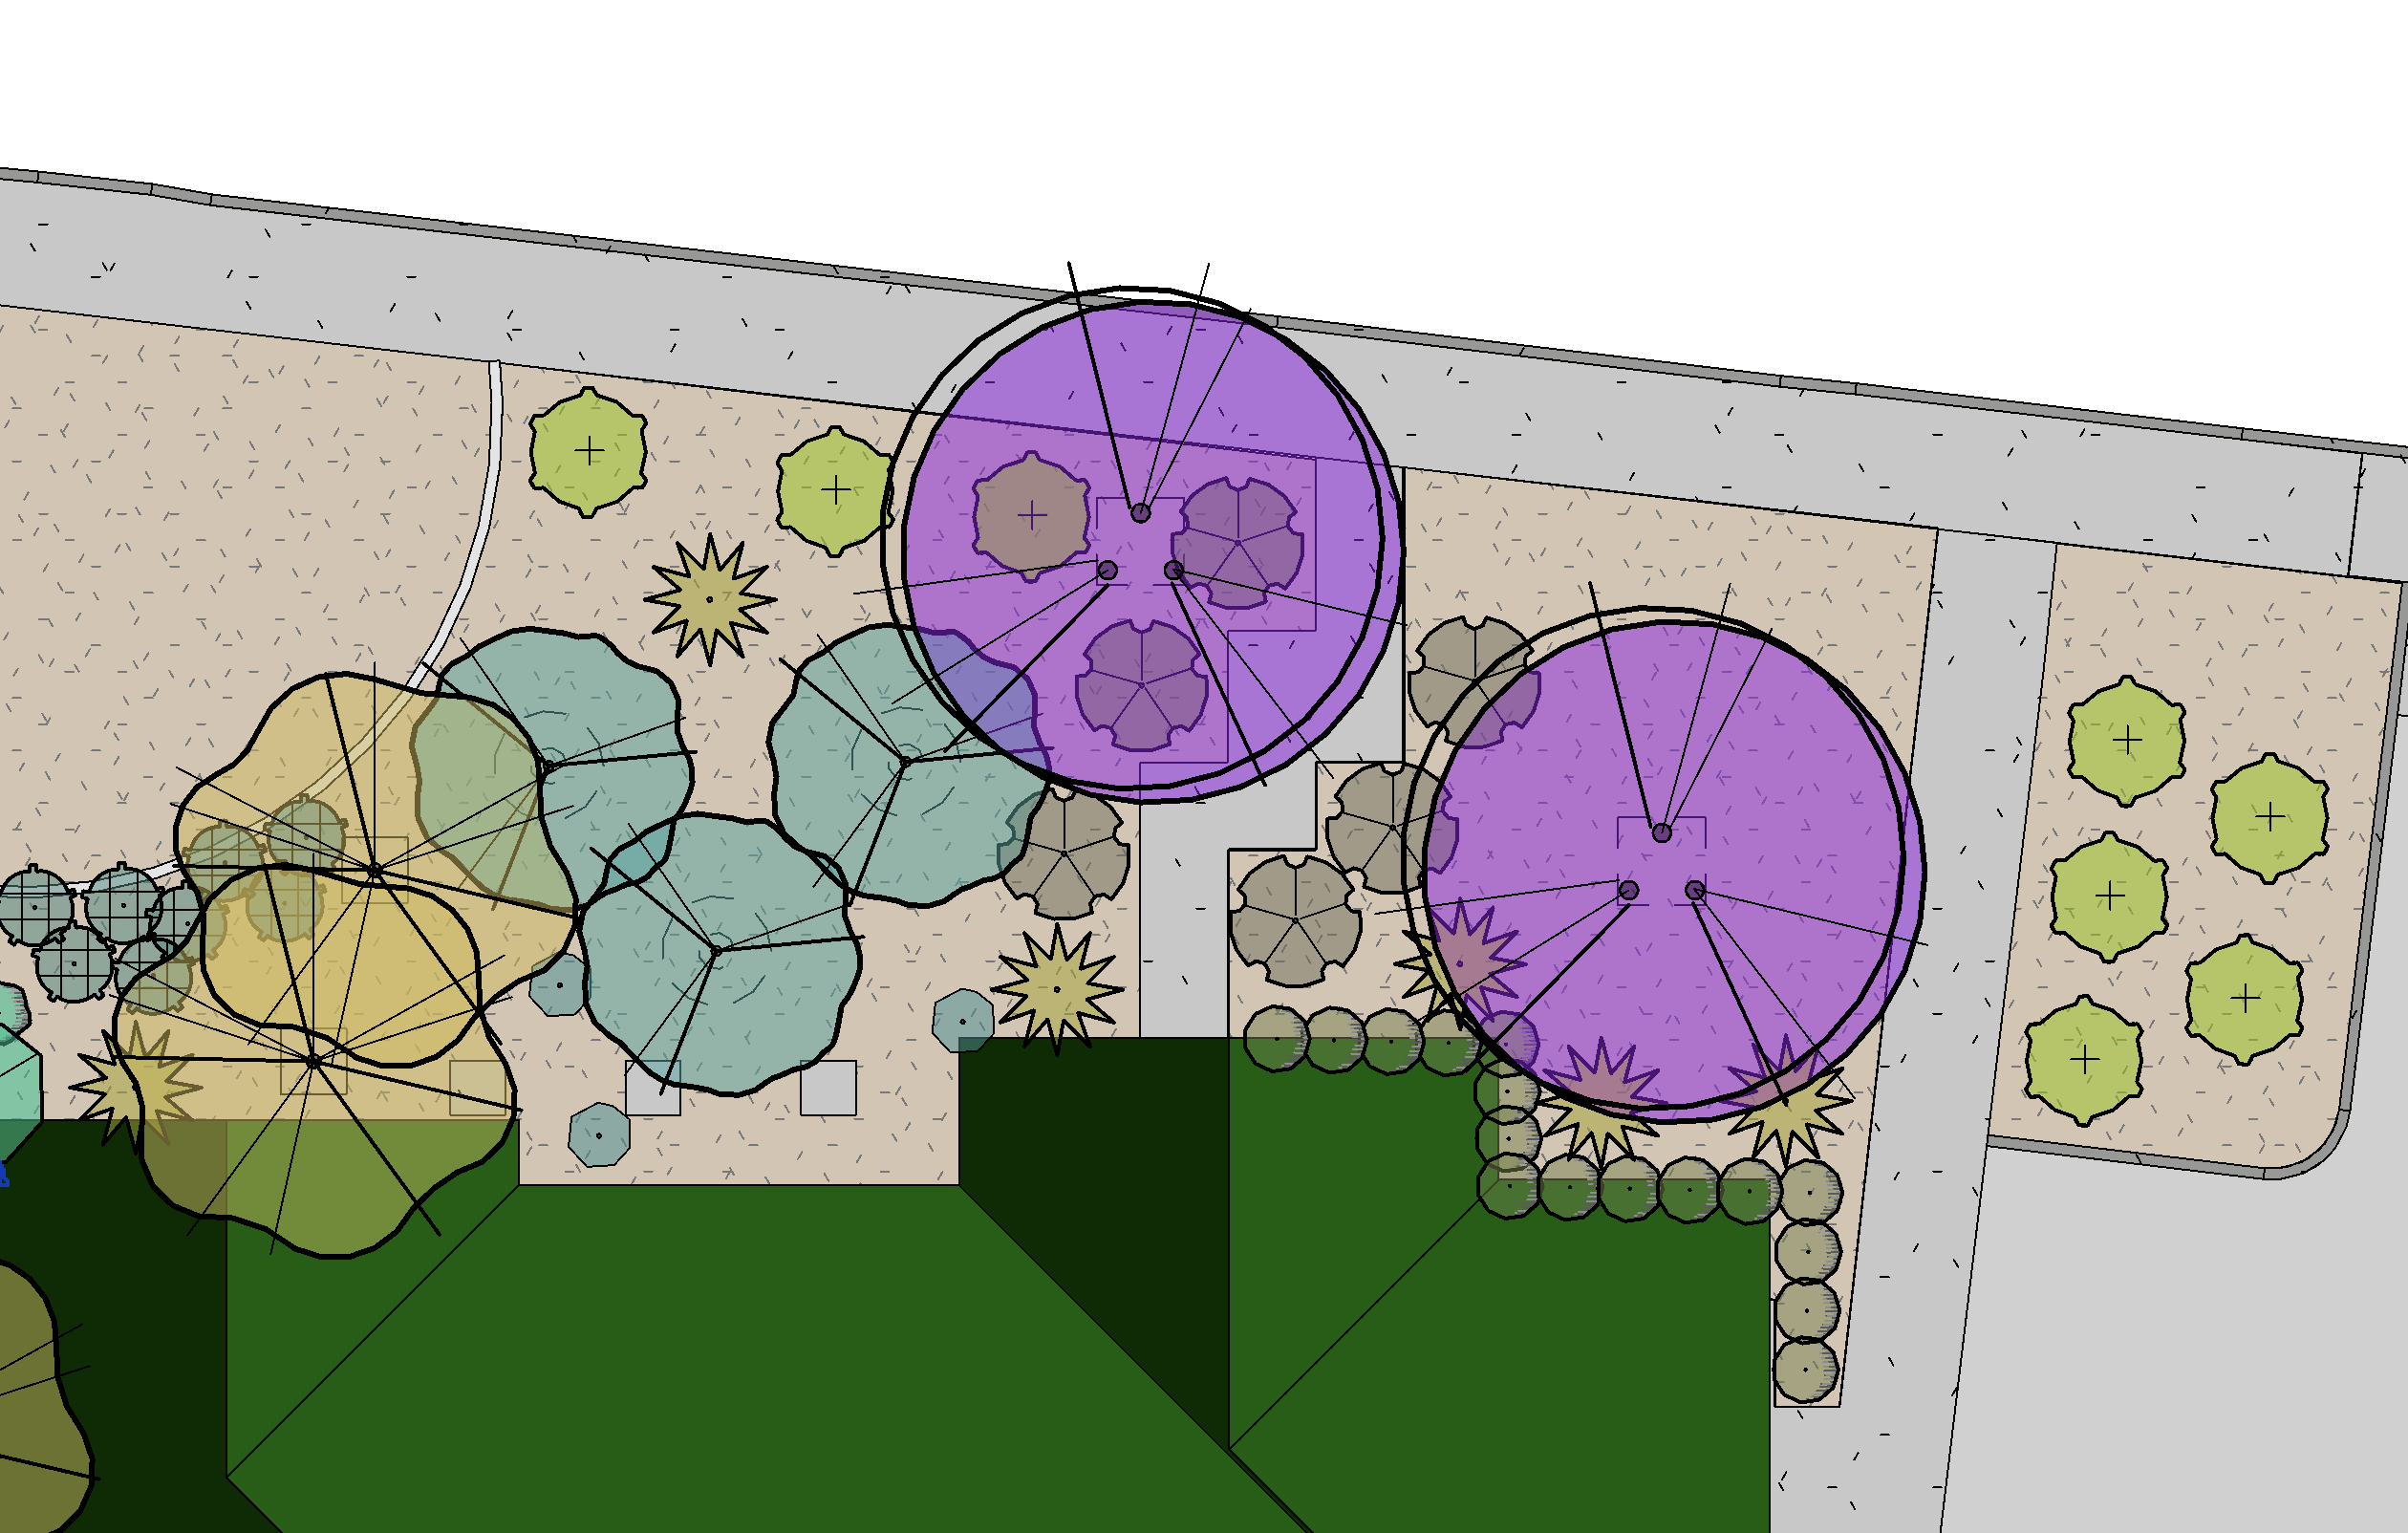
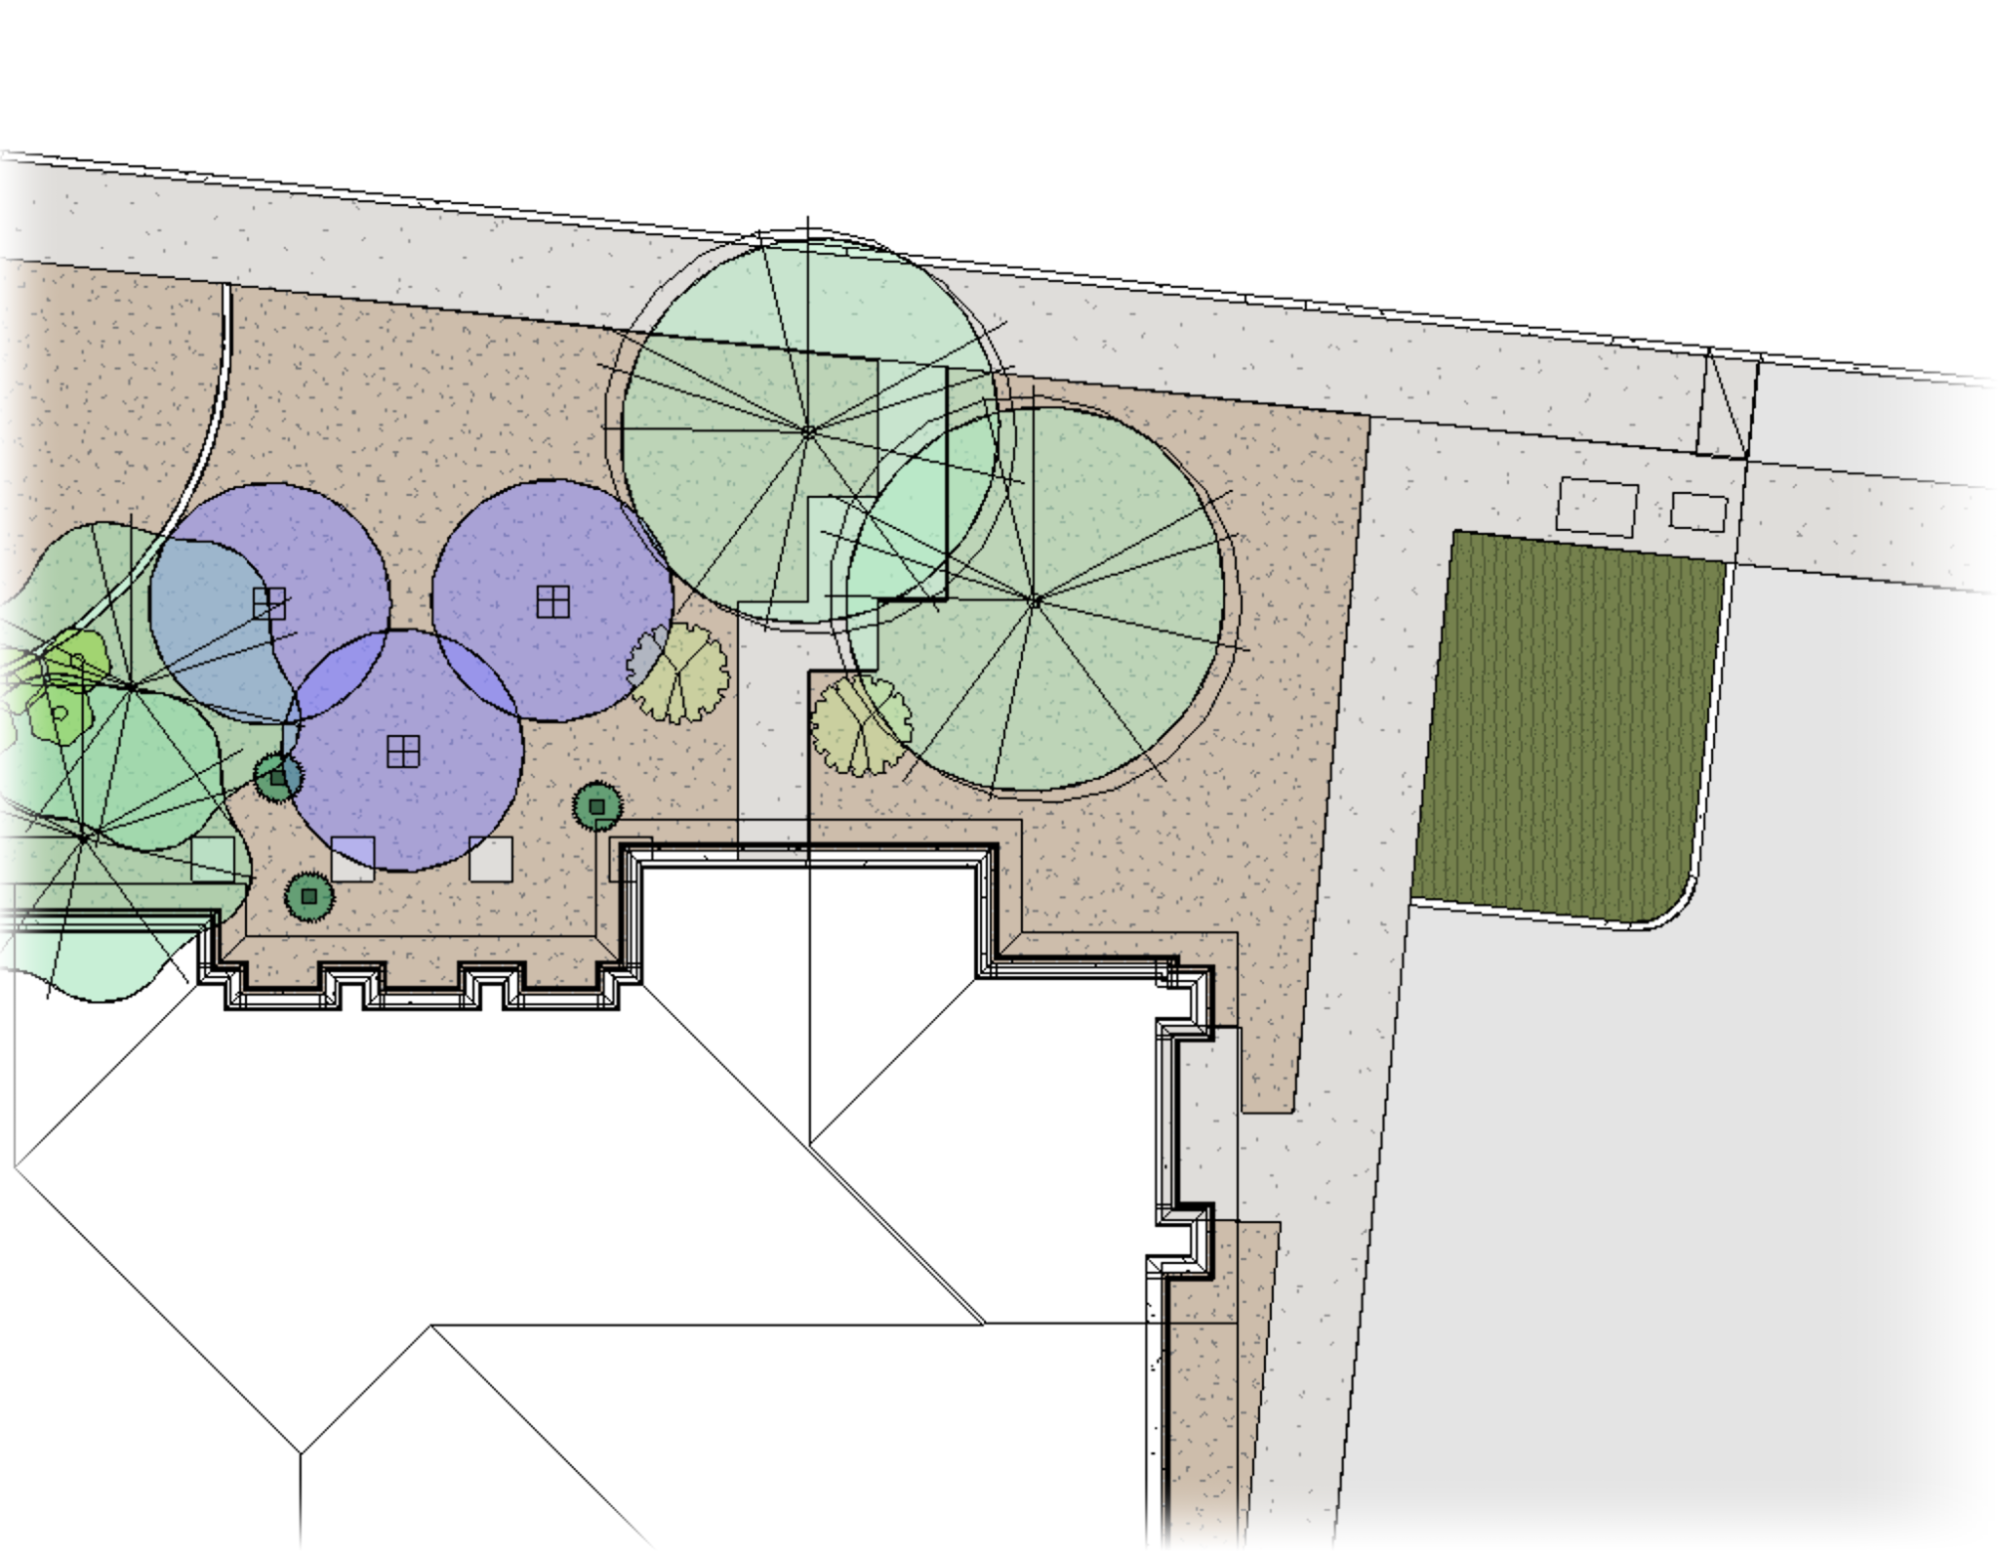
Example of a Colorized Plan
Here is an example of a colorized planting plan in Revit created with our Planting F/X plugin.
Turning Color Render On and Off

To turn Color Render on or off, turn the tool on again and click the On or Off button.
Including Colorized Plant Symbols in the Plant Schedule
(coming soon)
Customizing the Color Wheel for Planting Areas
You can currently only edit the color wheel assigned to planting areas within our Site Color tool in our AutoCAD plugin, which will update the Color Books in the Preference Set on the Revit side that Color Render relies on.
We have plans to create an edit method on the Revit side soon!
For more information and instructions, see our documentation on editing a color on an existing wheel , taking care to make your customizations to the Planting Areas wheel.
Get the Latest Plant Color Symbols
Having issues with your colorized plan? You might be working with outdated color symbols. If so, use our steps to get the latest plant color symbols:
Locate the block in the Revit library and delete that block. Place the block in a blank drawing to download again, edit the family, and close/load into open project to update the family in this plan.
Related Webinars
- Planting F/X Revit Tools: Take a refreshed look at how the tools in this plugin work! We'll cover the latest changes such as type parameters, current roadmap, and the basics of how Planting F/X streamlines the process of starting and finishing a planting plan. (1 hr 1 min)
- Getting Started with Planting F/X for Revit: Start your journey with Revit and our Planting F/X plugin. We also present our roadmap for future development and show off some new features such as automatic rootball placement and some recent additions to our collections of families and label styles. (1 hr 22 min)
- Intro to Planting F/X for Revit Plugin: As always, our goal with this plugin is to bring the planting design learning curve as low as possible. We cover installation, Planting F/X projects, the Plant Manager, plant placement as families or floors, group labels, Verify Labels, instant schedules, and rendering options with our default family library. (1 hr 12 min)
- Revit for Planting Design: We focus on more tools and show how to tackle more complex workflows in Revit with Planting F/X. We go over customizing the defaults, implementing some labeling strategies, editing floor types, and working with multiple views. We also showcase some new tools and review our most recent development progress. (1 hr 3 min)
Troubleshooting
Issue: Your plants are rendered in color while working in Revit, and they should not be
Issue: A placed groundcover is no longer rendering in color
Revit® is a restricted trademark of Autodesk®.
Contact
- Land F/X


Our software tailors AutoCAD®, Revit®, SketchUp®, and Rhino® to the needs of landscape architects, irrigation designers, and other professionals. We automate your most tedious tasks and ensure accuracy, giving you more time to design.