
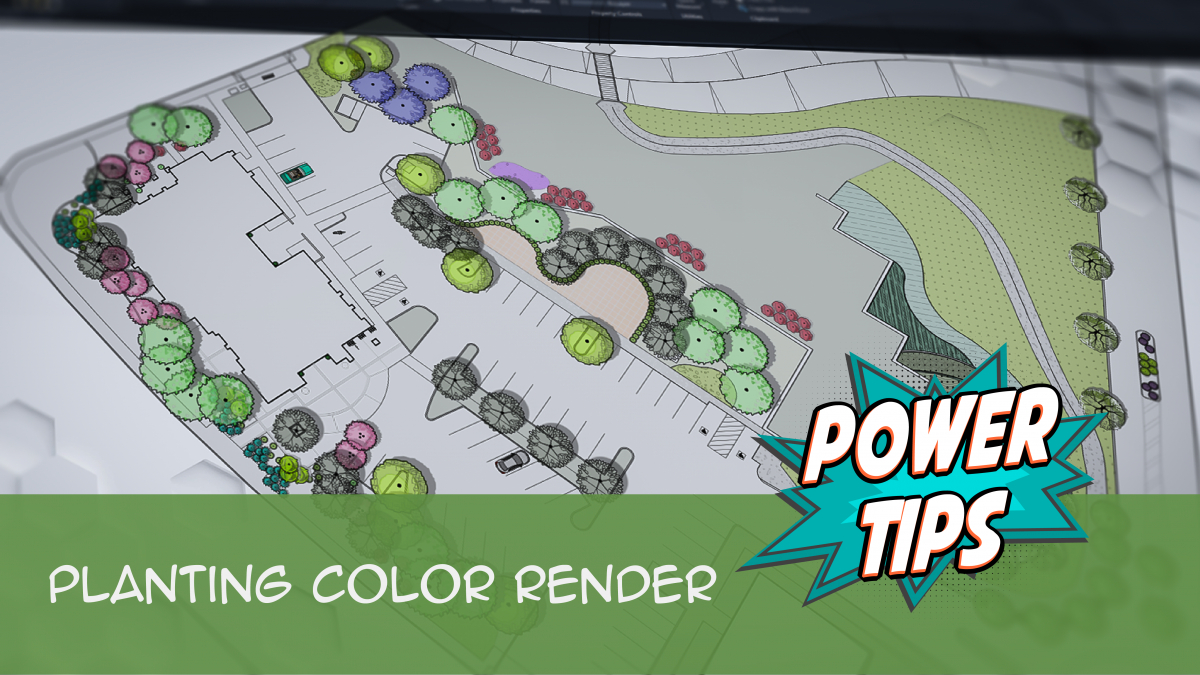
Plant Color Render
Updated on: July 10, 2025
Quick video
- Important: Color Render and Drawing Performance
- Color Render Overview
- Assigning and Changing Color Symbols with the Edit Plant Tool
- Tree Symbols
- Shrub Symbols
- Shrub Area & Groundcover Symbols
- Color Render and Plant Outlines
- Colorizing Only Part of a Plan
- Save The Drawing
- Example of a Colorized Plan
- Turning Color Render On and Off
- Unassigning Color Symbols from Plants
- Including Colorized Plant Symbols in the Plant Schedule
- Customizing the Color Wheel for Planting Areas
- Plotting Your Colorized Planting Plan
- Get the Latest Plant Color Symbols
- Adding Color to Site & Hardscape Blocks
- Adding Color to Reference Note (RefNote) Hatches
- Related Webinars
- Troubleshooting
Quick video

Our Color Render tool swaps out the existing plant symbols in your planting plan for colorized symbols. It also colorizes your Shrub Areas and groundcovers.
This article provides instructions on how to colorize plants using the Color Render tool. For information on placing your color-rendered plants in your drawing, visit our Placing Color Rendered Plants documentation.
For important tips on setting up your printer or plotter to provide best results for a colorized planting plan, see our Plotting the Colorized Plan documentation.
Color Render is also available for Shrub Areas and Reference Note (RefNote) hatches.
New to Planting F/X? Request a trial.
Our Planting F/X plugin streamlines the landscape design process in AutoCAD by automating the most tedious tasks and running automatic calculations. Ready to find out how? Request a 30-day trial.
Important: Color Render and Drawing Performance
Color plant symbols can definitely have an impact on drawing size and performance – particularly if the color chosen for groundcovers or Shrub Areas includes a gradient.
Dealing with this issue can be as easy as freezing the color layers, or simply switching to the normal plant symbols by turning Color Render off when a drawing is performing slowly. We also recommend taking one of these measures prior to sending the drawing to others who will be working on it but don't need to see the color symbols. If you've already sent your colorized drawing to another professional, such as an engineer, who is having trouble with slow performance, you can advise him or her to either freeze or turn off the color layers.
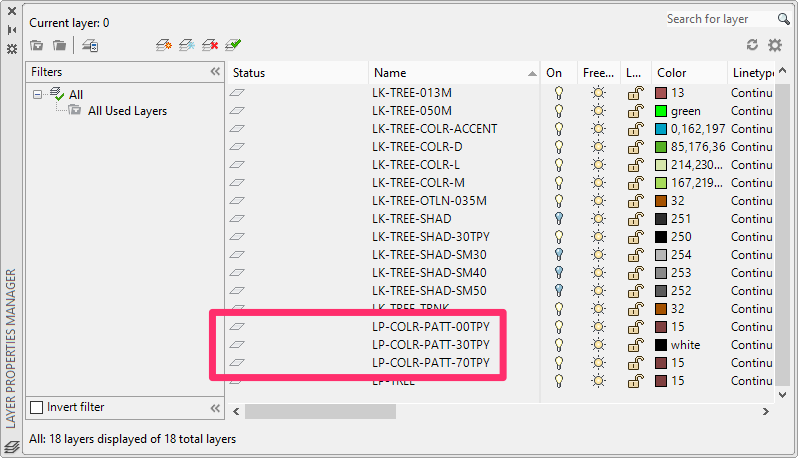
Need help figuring out which layers to freeze or turn off? Color layers will always contain the letters COLR. For example, the plant color layers will start with the characters LP-COLR.
Color will always be more intensive for AutoCAD, as we will continue to push the bounds on the quality of product to be produced. As such, we never intended for a color plan to be routinely opened and worked on. We always intended it as a separate color rendering process for presentations.
Color Render Overview
Open the Color Render tool:

F/X Planting ribbon, Color Render flyout

F/X Planting menu, Color Render option
or type PlantColor in the Command line
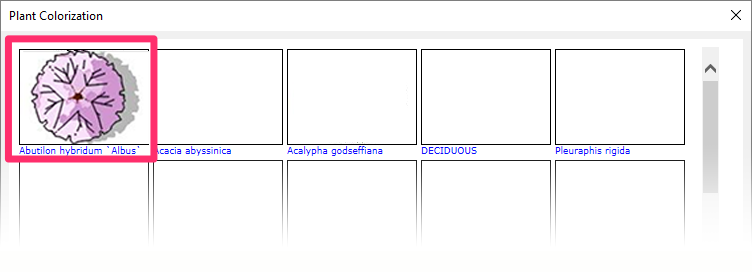
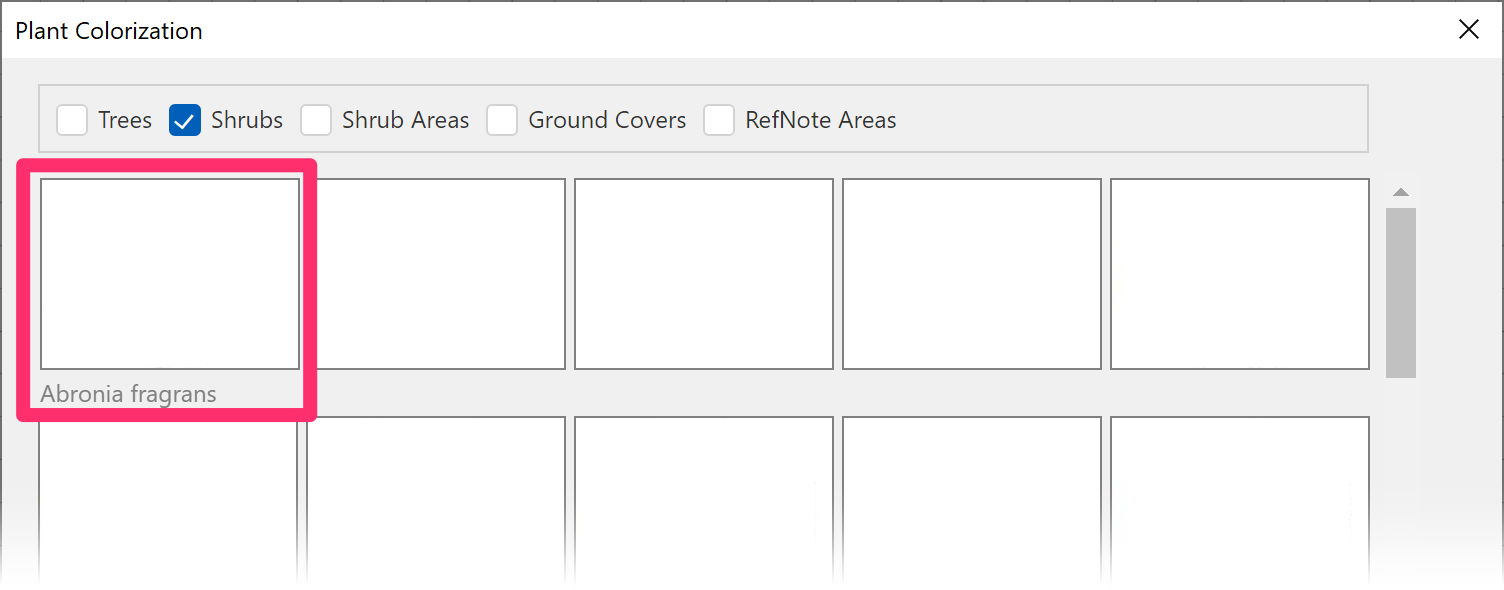
When you select Color Render, the Plant Colorization dialog box will open. When first opened, this dialog box will contain a blank thumbnail area for each plant you've added to your project.
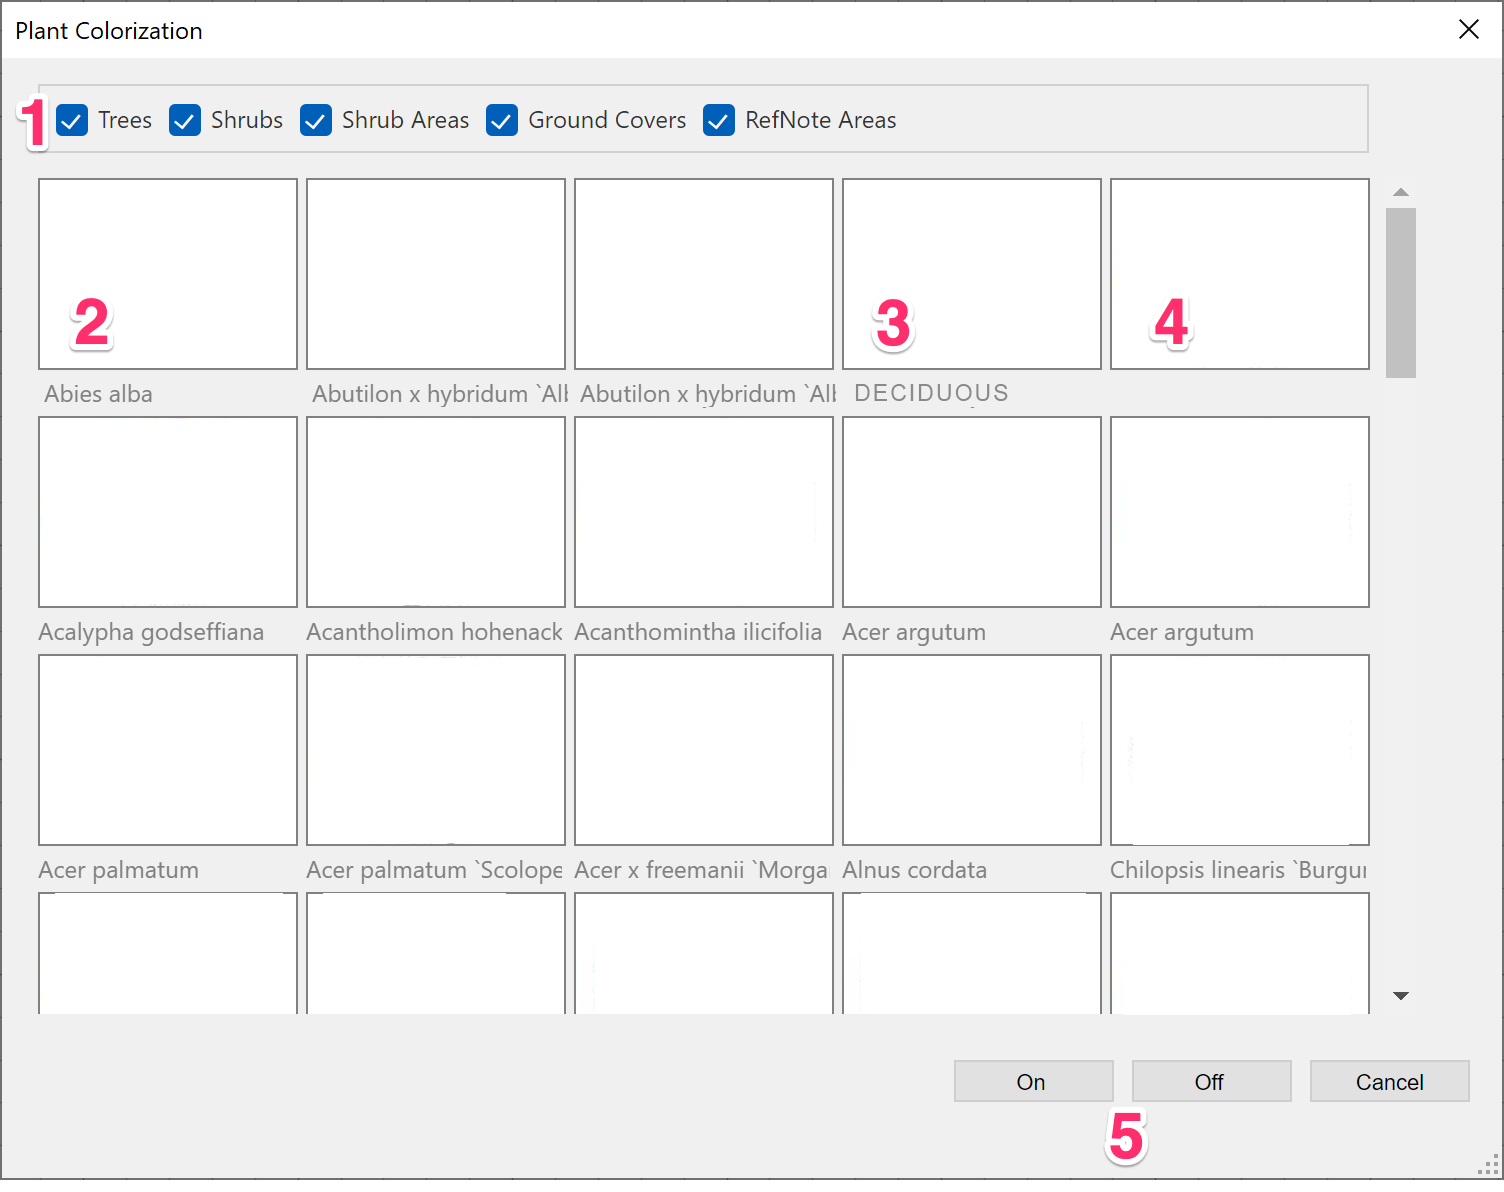
1. Use these checkboxes to include or exclude certain plant types. For example, if you only want to see your color symbols for trees, leave the Trees option checked and uncheck the rest of the options.
2. Plants you've placed in the drawing appear first in the list of thumbnails. Note that these thumbnail areas are blank until you select a color symbol for each plant.
3. You can also choose color symbols for Concept Design Group plants you've placed using the Concept Manager (example: DECIDUOUS).
4. An empty space separates the plants you've placed and those you've added but haven't placed. Note that the plants you haven't placed begin after this empty space.
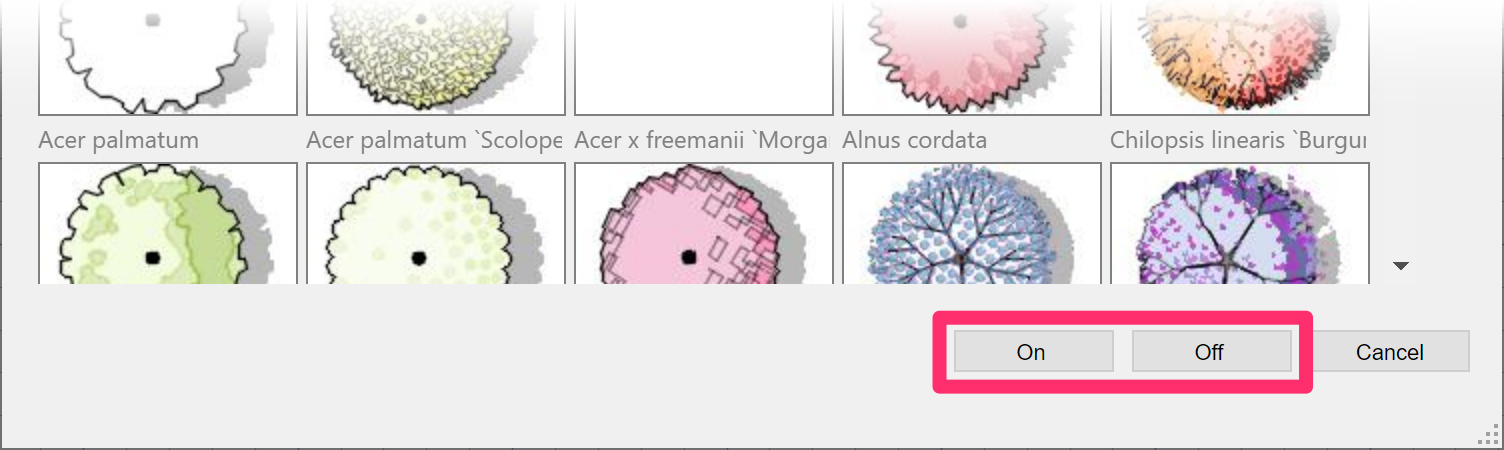
5. Turn Color Render on or off.
After selecting all your color symbols, close the dialog box to apply Color Render to your plants.
Don't see any plant symbols in this dialog box, and you know you've added plants to your project? Solution >
Assigning and Changing Color Symbols with the Edit Plant Tool
As an alternative to using the Color Render tool to assign and change a plant's color symbol, you can accomplish both of these tasks using our Edit Plant tool. See our documentation on selecting a color plant symbol for more information and instructions.
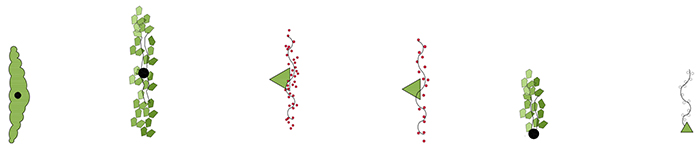
Tree Symbols
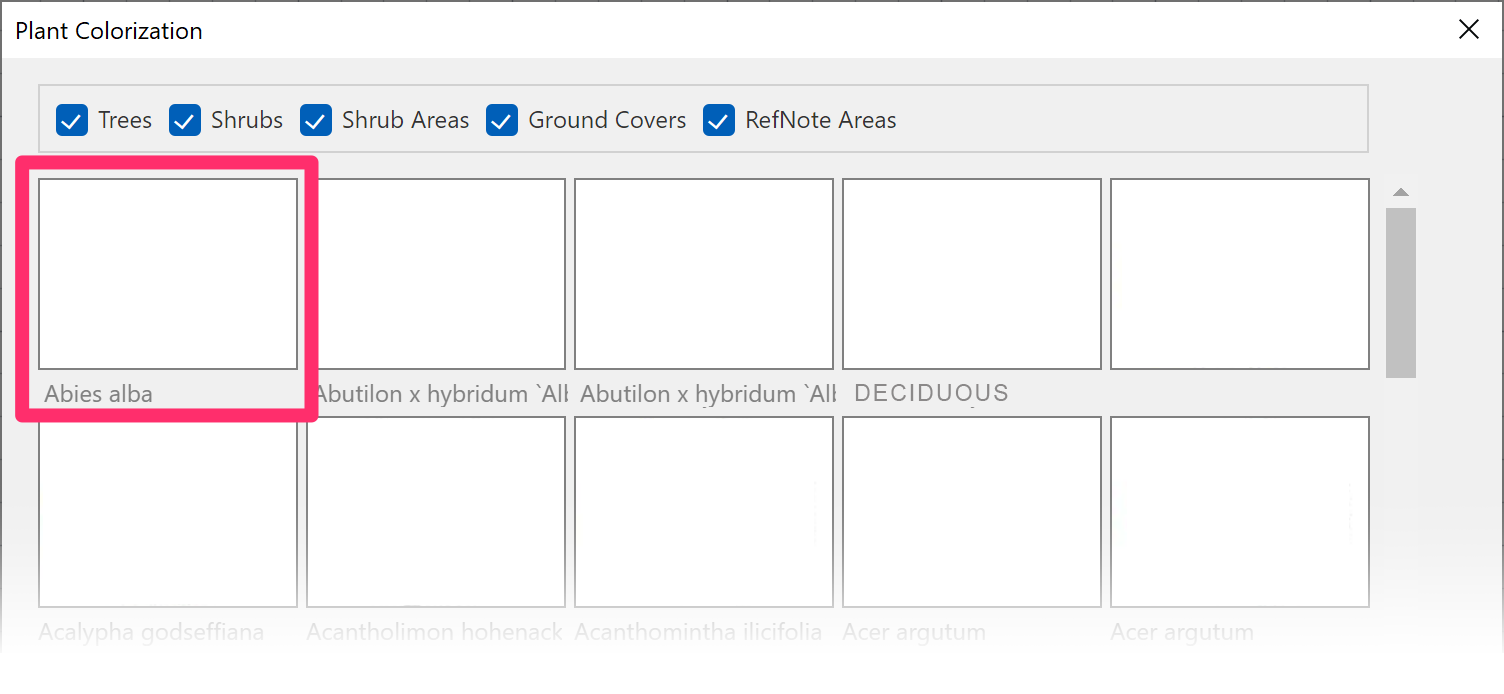
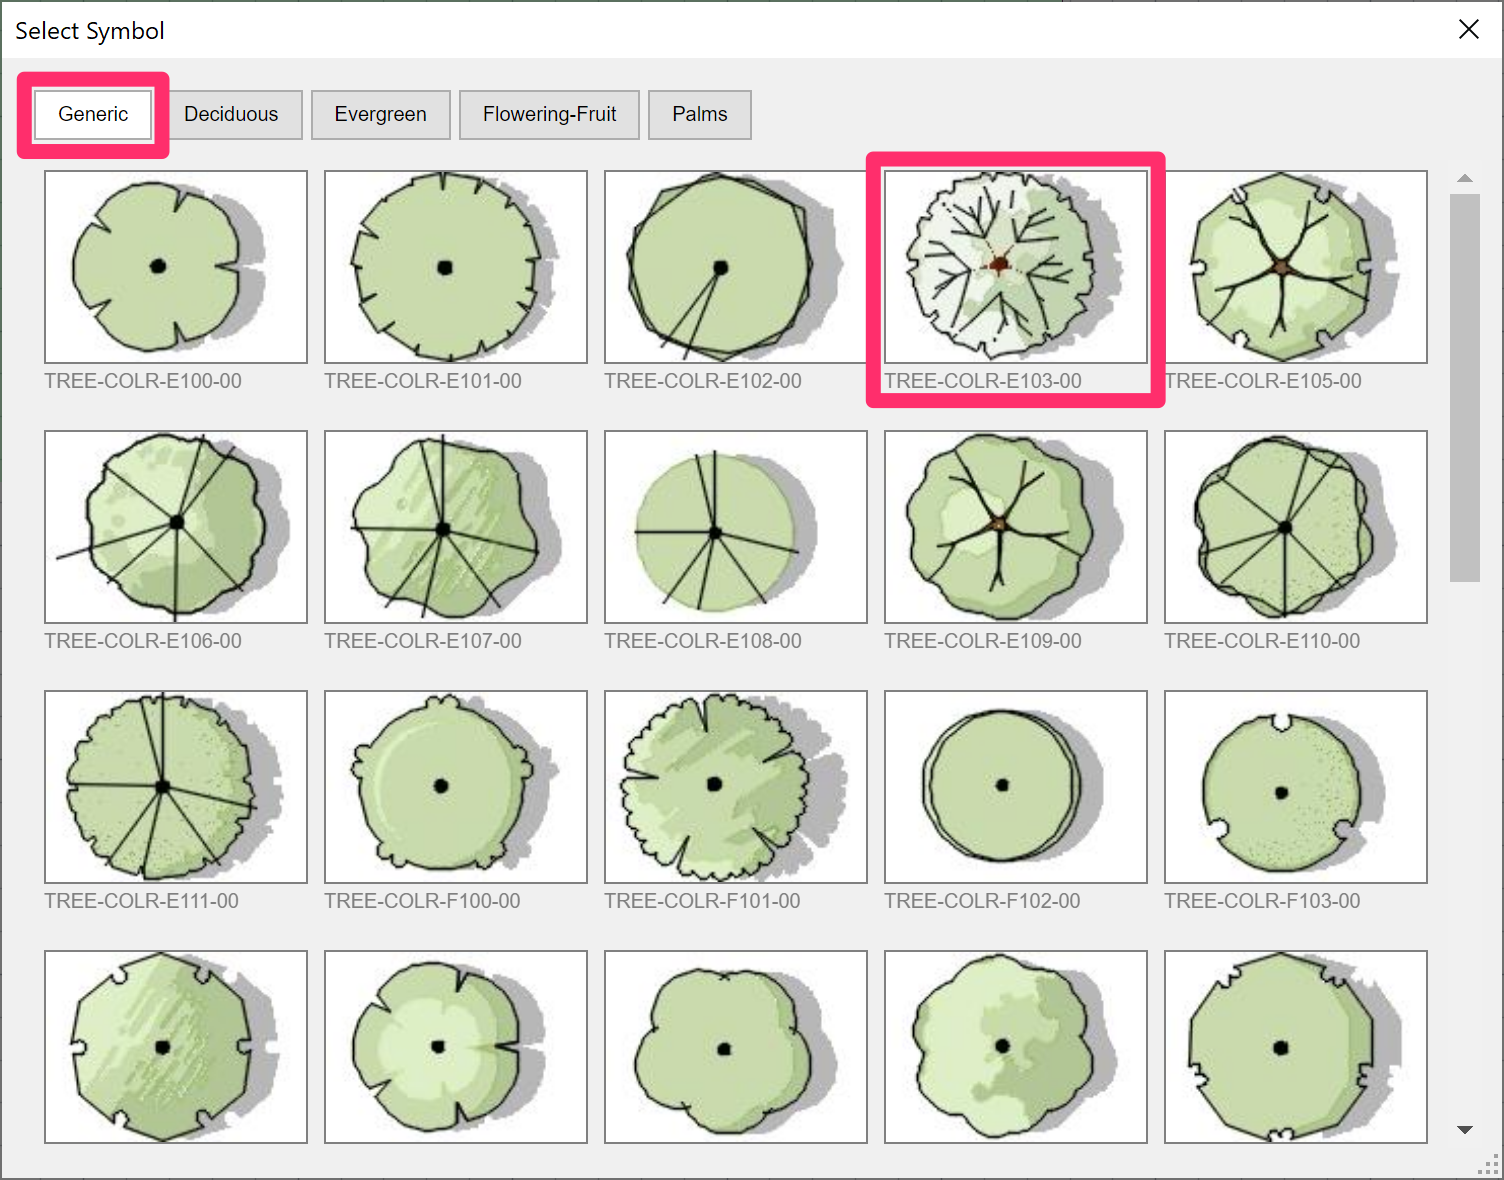
Click a tree name in the Plant Colorization dialog box (example: Abutilon hybridum 'Albus').

The Select Symbol dialog box will open.
You can now choose from several symbol categories to find the tree symbol you want.
Scroll down through the symbol library within the category you selected using the scroll bar on the right side of the dialog box.
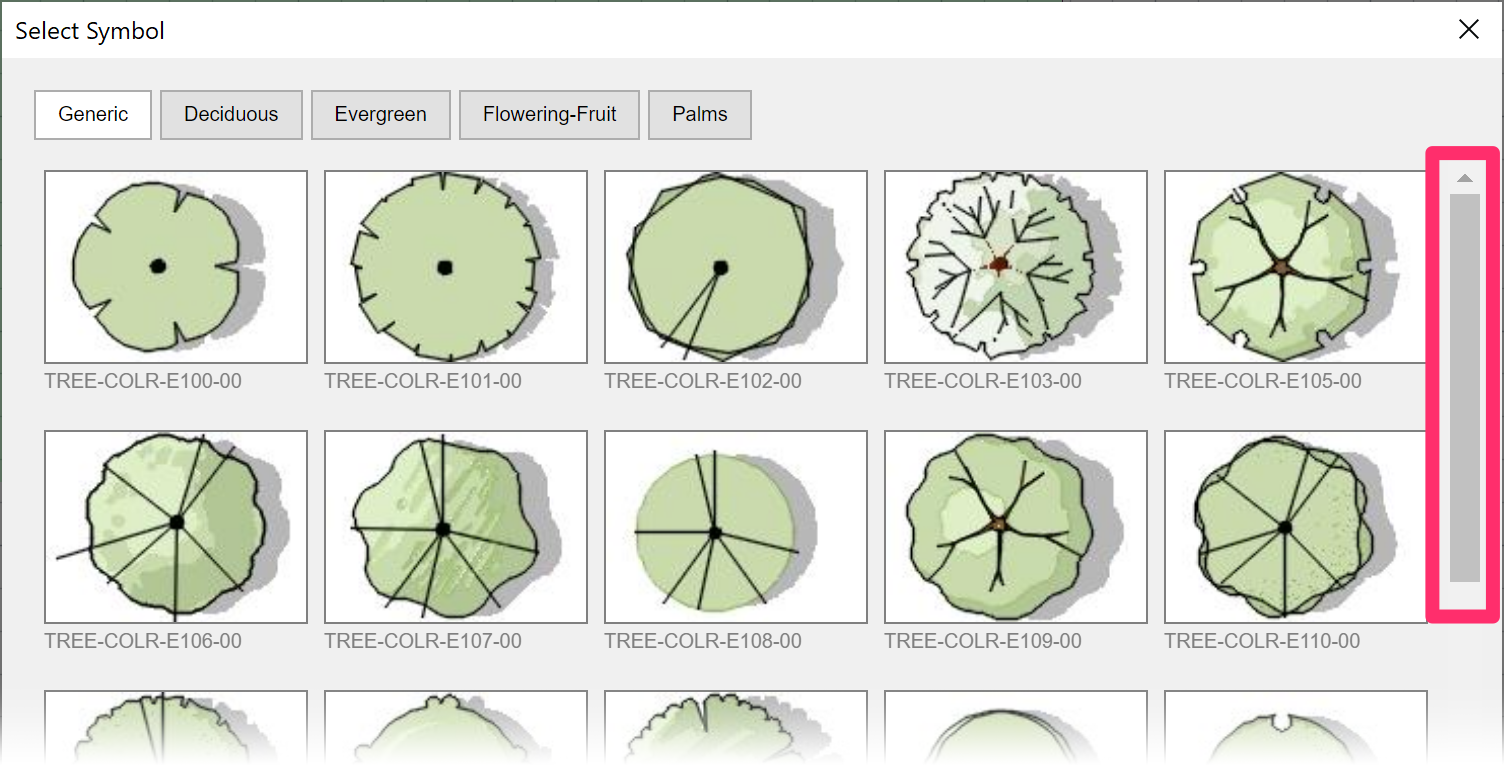
Tree Symbol Organization
Notice that the tree symbols are organized into groups of forms named with grouping numbers. These names start with TREE-COLR-, followed by a letter, a grouping number, and a final number. The symbol types are grouped by the letter that follows "TREE-COLR" in the following manner:

TREE-COLR-A: Graphical

TREE-COLR-B: Multi-color
TREE-COLR-C: Interior foliage
TREE-COLR-D: Interior linework (detailed)
TREE-COLR-E: Interior linework (simple)

TREE-COLR-F: Simple

TREE-COLR-G: Simple multi-trunk
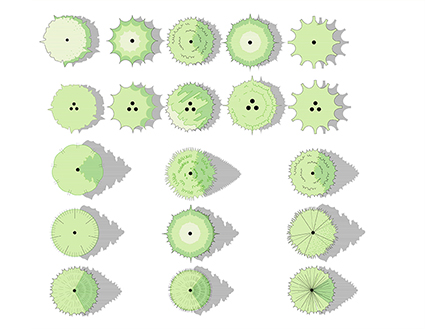
TREE-COLR-H: Evergreen/conifer

TREE-COLR-J: Palms
Selecting a Tree Symbol
After selecting a symbol category, select a color symbol within that category for the tree.
In our example, we'll select the TREE-COLR-E103-00 within the Generic category.
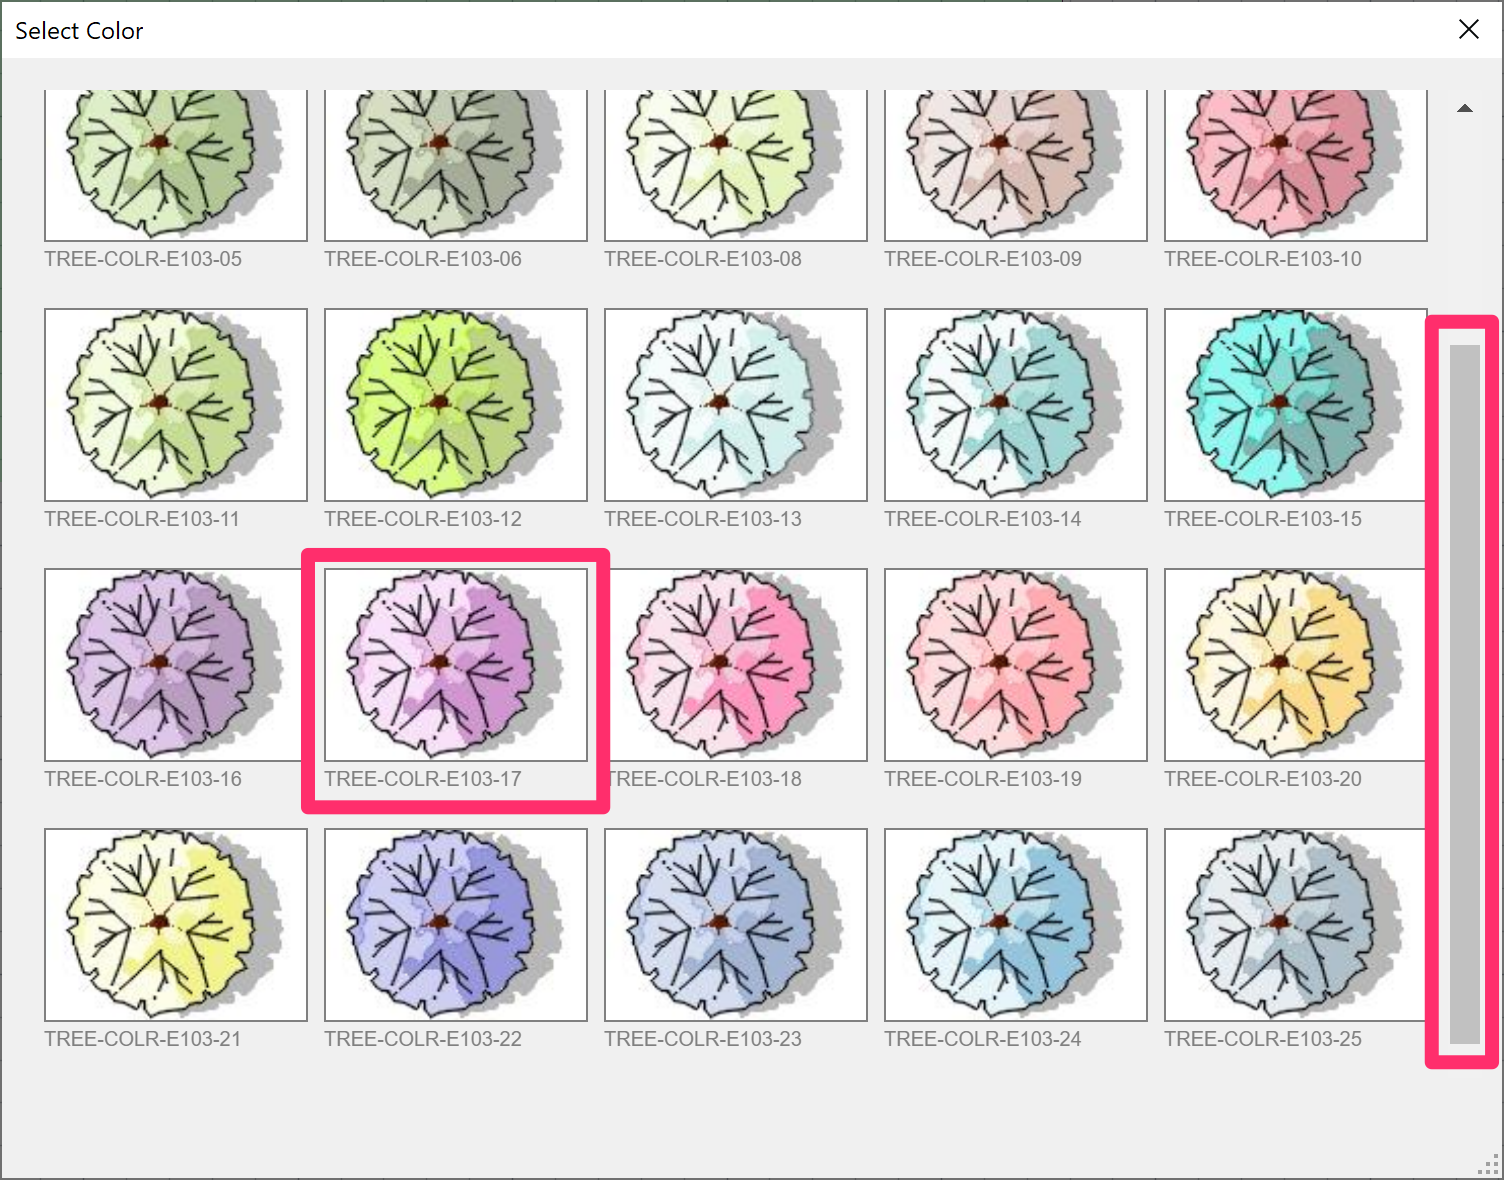
The Select Color dialog box will open.
Select a color for your tree symbol.
Several (but not all) tree symbols allow you to scroll down in the dialog box, using the scroll bar scroll bar shown to the left, to reveal even more options.
In our example, we'll select a light purple symbol – just because!
The tree form and color you selected will be added to your project to represent this tree, and you'll see it in the thumbnail images in the colorization listing of plants.
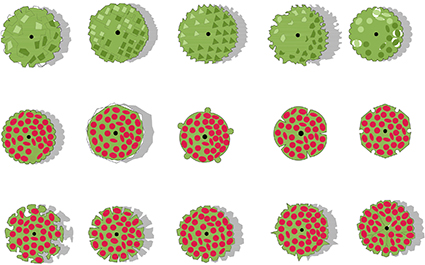
Shrub Symbols
Color Render works similarly for shrubs as it does for trees, but you'll choose from a library of shrub symbols.
Shrub Symbol Organization
As with the tree symbols, the shrub symbols are organized into groups of forms named with grouping numbers. These names start with SHRB-COLR-, followed by a letter, a grouping number, and a final number. The symbol types are grouped by the letter that follows "SHRB-COLR" in the following manner:

SHRB-COLR-A: Simple

SHRB-COLR-E: Simple (detailed)

SHRB-COLR-J: Evergreen
SHRB-COLR-N: Interior foliage
SHRB-COLR-S: Flower

SHRB-COLR-W: Tropical
SHRB-COLR-Z: Vines
Selecting a Shrub Symbol
As with trees, you'll select a shrub form and then its foliage color.
Click a shrub name in the Plant Colorization dialog box (example: Abronia fragrans).

The Select Symbol dialog box will open. As with trees, you can now select a symbol category for shrub symbols.
Select a symbol category, then scroll down through the symbol library using the scroll bar on the right side of the dialog box and select a form.
We'll select the Shrub-Flowering category, then the shrub form LAFX-SHRB-COLR-S105-00.
Then select a color.


The shrub will now have a color symbol assigned to it in the Plant Colorization dialog box.
Shrub Area & Groundcover Symbols
When using the Color Render tool on Shrub Areas and groundcovers, you'll select a color rather than a form. The system now applies the 2D or black-and-white hatch pattern as a texture.
We offer a variety of default color options for any groundcover, including tones ranging from greens to yellows, oranges, blues, and purples. Colors are now customizable through the use of our Site Color tool.
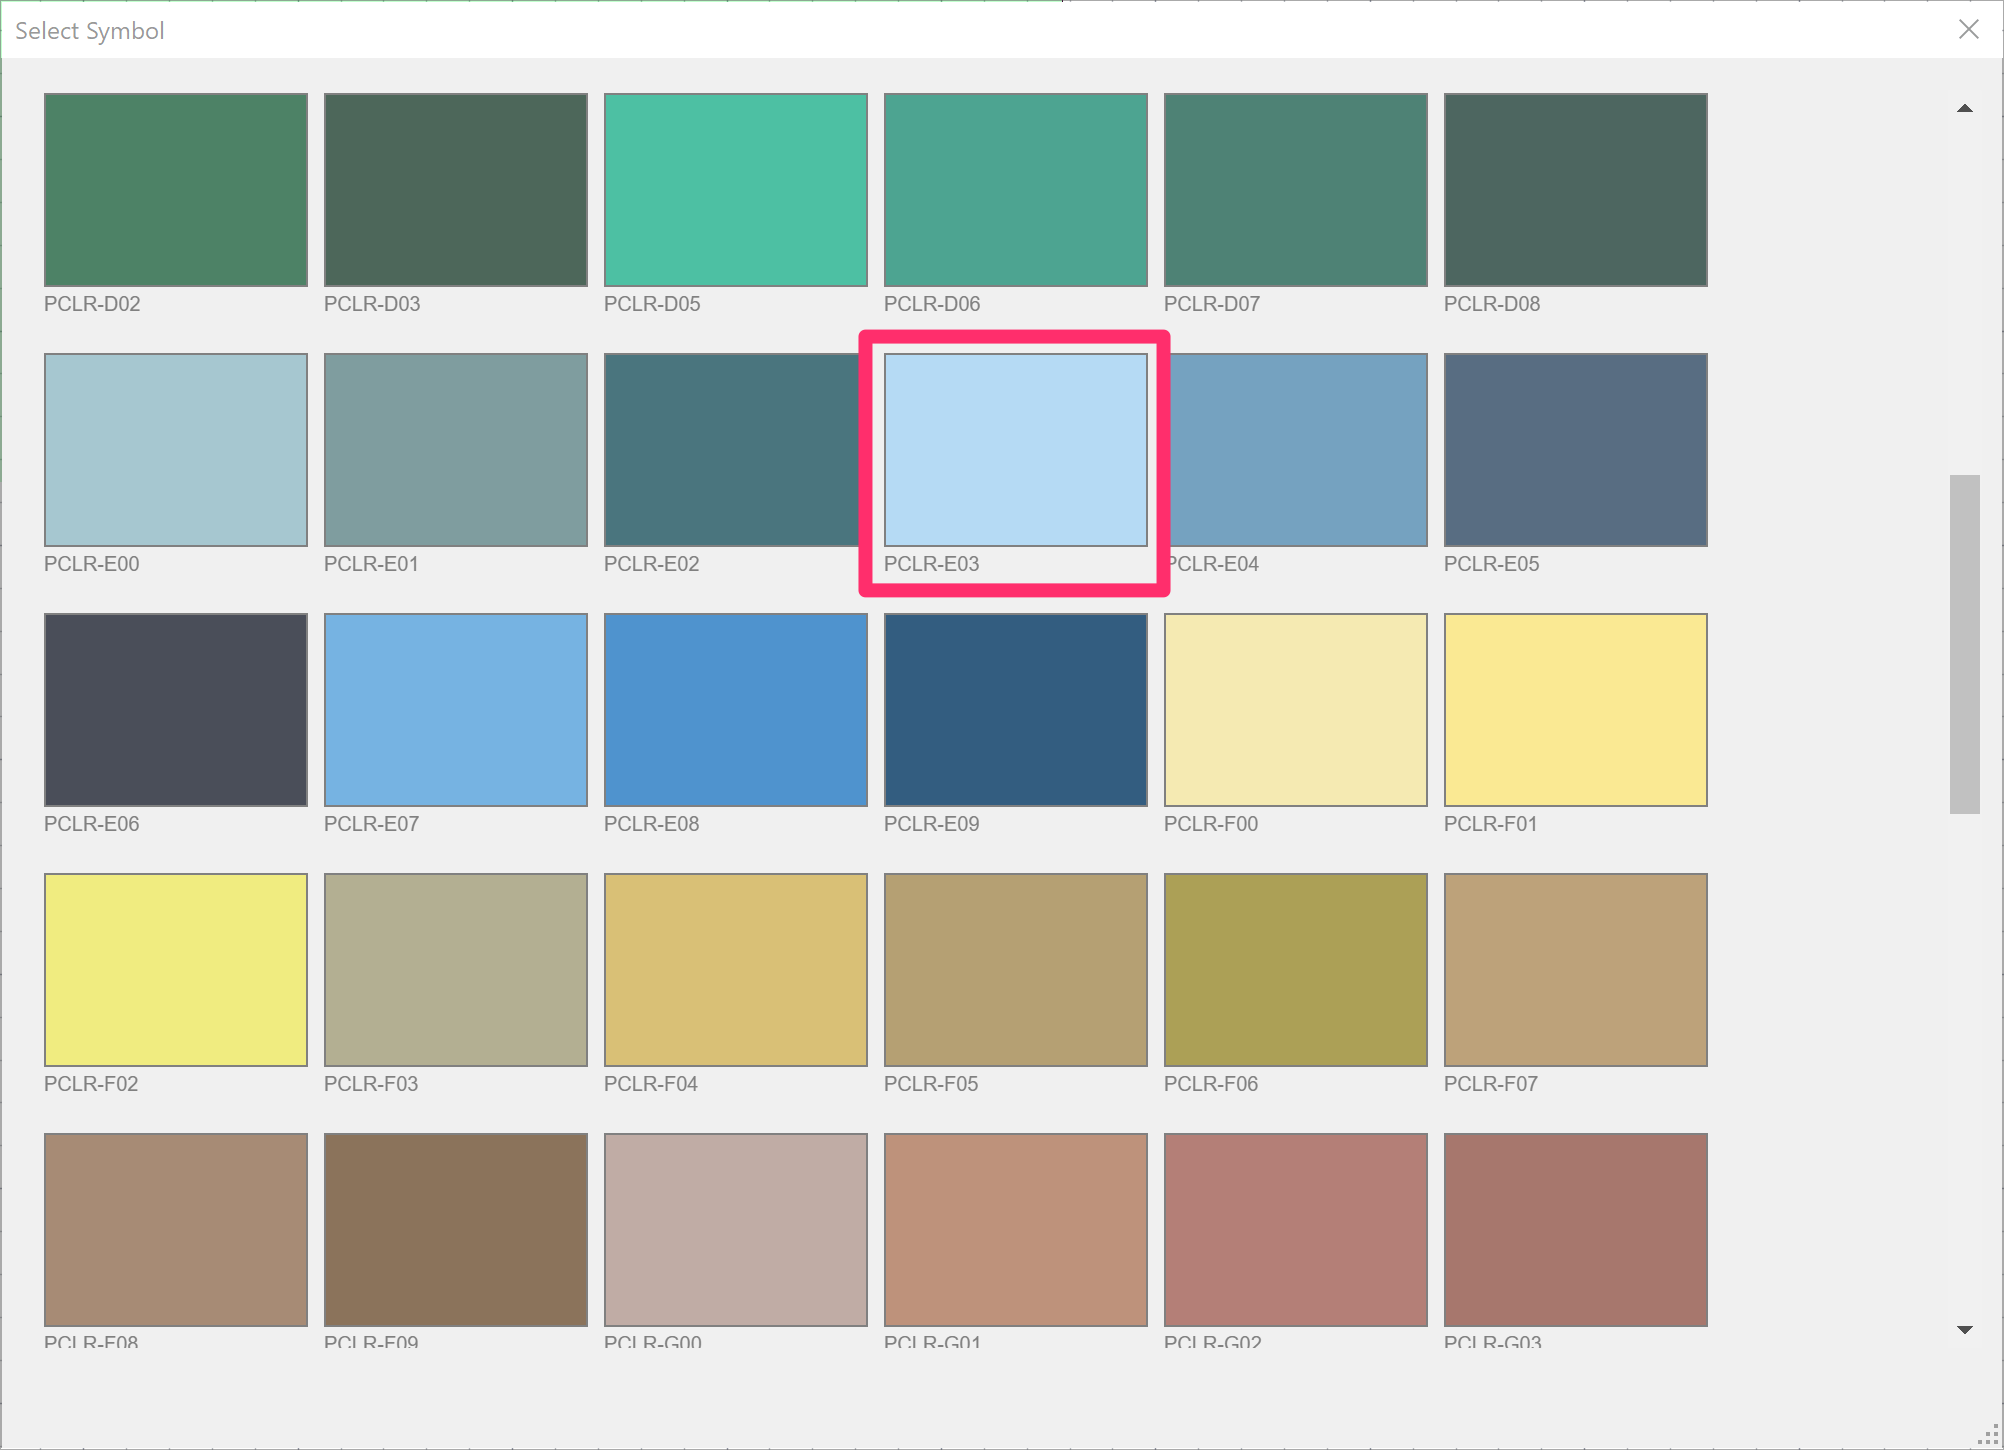
Select a Shrub Area or groundcover in the Plant Colorization dialog box (example: Eriogonum arborescens).

The Select Symbol dialog box will open. Click a color to assign it to the selected groundcover or Shrub Area. We'll select the color PCLR-E03, a lightish blue.
Don't see a color here that you want? You can add your own using our Site Color tool.

The color you selected will now fill the thumbnail preview pane above the groundcover or Shrub Area in the Plant Colorization dialog box.
Not seeing the step to select a texture or hatch pattern?
Note that groundcovers and Shrub Areas now use the 2D hatch pattern already assigned to the plant, and you no longer need to pick a texture when selecting a color.
Want to know why we made this choice? Or do you prefer to assign a different hatch pattern for a color groundcover or Shrub Area symbol? See our explanation and solution.
Color Render and Plant Outlines
Want to outline your colorized plants for more definition? Our Plant Outlines tool also works with color plant symbols!
Colorizing Only Part of a Plan
At times, you might find yourself wanting to keep your plant symbols colorized in one portion of your drawing but only show the plan symbols in another. You can turn off the color for selected symbols by completing the following steps.
Note that this process will not work with plants that are on frozen layers.
1. Turn Color Render OFF for the plan.
2. Create a layer named something like COLOR-EXCLUDE.
3. Using our Highlight Plant tool, select any plants you want to exclude from color (that is, just show as a normal plant symbol). Type S in the Command line to add the selected plant(s) to a Selection.
4. With the plant(s) still selected, type Prop in the Command line and press Enter to open the Properties panel.

5. In the Properties panel, use the Layer menu to select the COLOR-EXCLUDE layer you created.
The selected plant(s) will be moved to that layer.
6. Follow our instructions to freeze a layer, and freeze the Color-Exclude layer.
7. Run Color Render again. The plant(s) you moved to the new layer will not be colorized.
Save the Drawing
You should now save this colorized drawing with a different name from that of the planting plan.
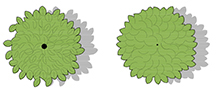
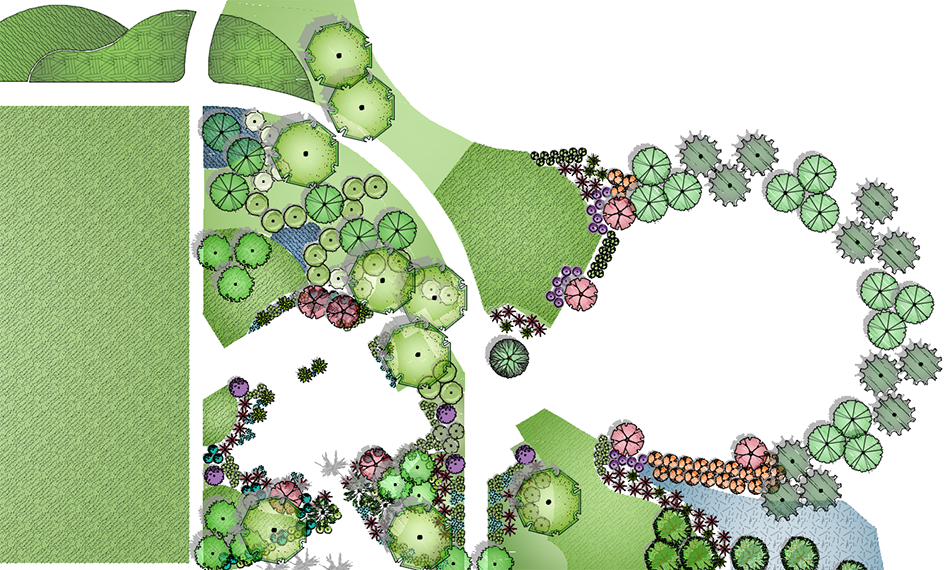
Example of a Colorized Plan
Here's an example of what a planting plan might look like before and after you colorize it:
Before Colorization:

After Colorization:
Turning Color Render On and Off
Color Render is a great presentation tool, but you probably won't want to have colorization turned on all the time – not only because the color symbols can cause drawing performance to drag during production work, but because it can also result in some errors when left on.
To turn Color Render off, click the Turn Off Color button in the Plant Colorization dialog box.
Then, when you're ready to present, you can open the dialog box again and click On to turn colorized plants back on.
Unassigning Color Symbols from Plants
To unassign a color symbol from a plant, edit the plant by either:
- Using our Plant Info and selecting the plant in your plan, or
- Selecting the plant in the Plant Manager and clickingEdit.

In the Plant Info dialog box, select the Color tab in the Symbol area. Then cick the Unassign button to the right of the symbol thumbnail.
If the plant hasn't been placed in your drawing, you'll be asked whether you're sure you wish to unassign this symbol. Click Yes to unassign the symbol.


The color symbol will be unassigned from the plant, and the symbol box will now be blank.
Including Colorized Plant Symbols in the Plant Schedule
You can include color plant symbols from either your main drawing or one of your Xrefs in your PLant Schedule. For instructions, see the Plant Schedules for a Colorized Plan section of our Plant Schedules documentation.
Customizing the Color Wheel for Planting Areas
You can now edit the color wheel assigned to planting areas within our Site Color tool, which will update the Color Books Color Render relies on.
For more information and instructions, see our documentation on Editing a color on an existing wheel, taking care to make your customizations to the Planting Areas wheel.

Plotting Your Colorized Planting Plan
Time to plot? See our Plotting Your Colorized Drawing page.
Important: Do not use the built-in AutoCAD DWG-to-PDF utility to plot a colorized plan to PDF. Instead, use one of our recommended third-party PDF printers.
Get the Latest Plant Color Symbols
Having issues with your colorized plan? You might be working with outdated color symbols. If so, follow our steps to get the latest plant color symbols.
Adding Color to Site & Hardscape Blocks
Want to colorize your site blocks as well? We've begun adding color fills to many of our default blocks in the Plan Graphics and Elevation Graphics libraries. Our Site Color tool also allows you to add your own color fills to our blocks, as well as your own. For more information, see our Colorizing Site & Hardscape Blocks documentation.
Adding Color to Reference Note (RefNote) Hatches
We've engineered Color Render to work with Reference Notes (RefNote) hatches that you've placed using our Area/Volume RefNote tool. Color Render now colorizes these areas in the same way it colorizes a groundcover or Shrub Area hatch, retaining the hatch pattern and associated data. For further information and instructions, see our Add Color to RefNote Hatches documentation.
Related Webinars
- Using Presentation Graphics: Get some "from-the-basics" looks at some of our presentation graphics tools, such as Plant Color Render, Site Color, and SketchUp Connection. Along the way, we'll also give you some more advanced tips for developing a great presentation. (58 min)
- Getting Started with Planting F/X: We'll give you a full tour of our F/X Planting ribbon, covering everything from adding, placing, and labeling plants to error checking, scheduling, and turning on our quick render tools. (1 hr)
Troubleshooting
Issue: Problems with tree transparency – can't see through or below the trees
Issue: How to turn off one color plant symbol but leave the other symbols colorized
Issue: Missing File error when using Color Render
Issue: When using Color Render, you received the message "Automation error: Problem in loading application"
Issue: Some portions of your colorized planting plan are not plotting (printing) in color
Issue: You need the latest plant color symbols
Issue: Unable to see hatches or colorized plants in a 3D model (AutoCAD or Civil 3D)
Issue: Error: Bad argument type stringp nil
Issue: You are unable to call out or edit a Reference Note (RefNote) hatch you've colorized
Issue: Colors are displaying incorrectly in Model Space
Issue: Your color Shrub Area and groundcover hatches won't turn off